Overview
This section demonstrates a typical workflow of how ServiceM8 and StockUnify work together in a real business scenario — from job creation, to stock usage, to purchasing and completion.
Follow the steps below to understand how inventory is managed throughout the lifecycle of a job.
Step 1: Create a Job in ServiceM8
A technician creates a new job in ServiceM8, including customer details and required materials.
Step 2: Sales Order is Auctomatically Created in StockUnify
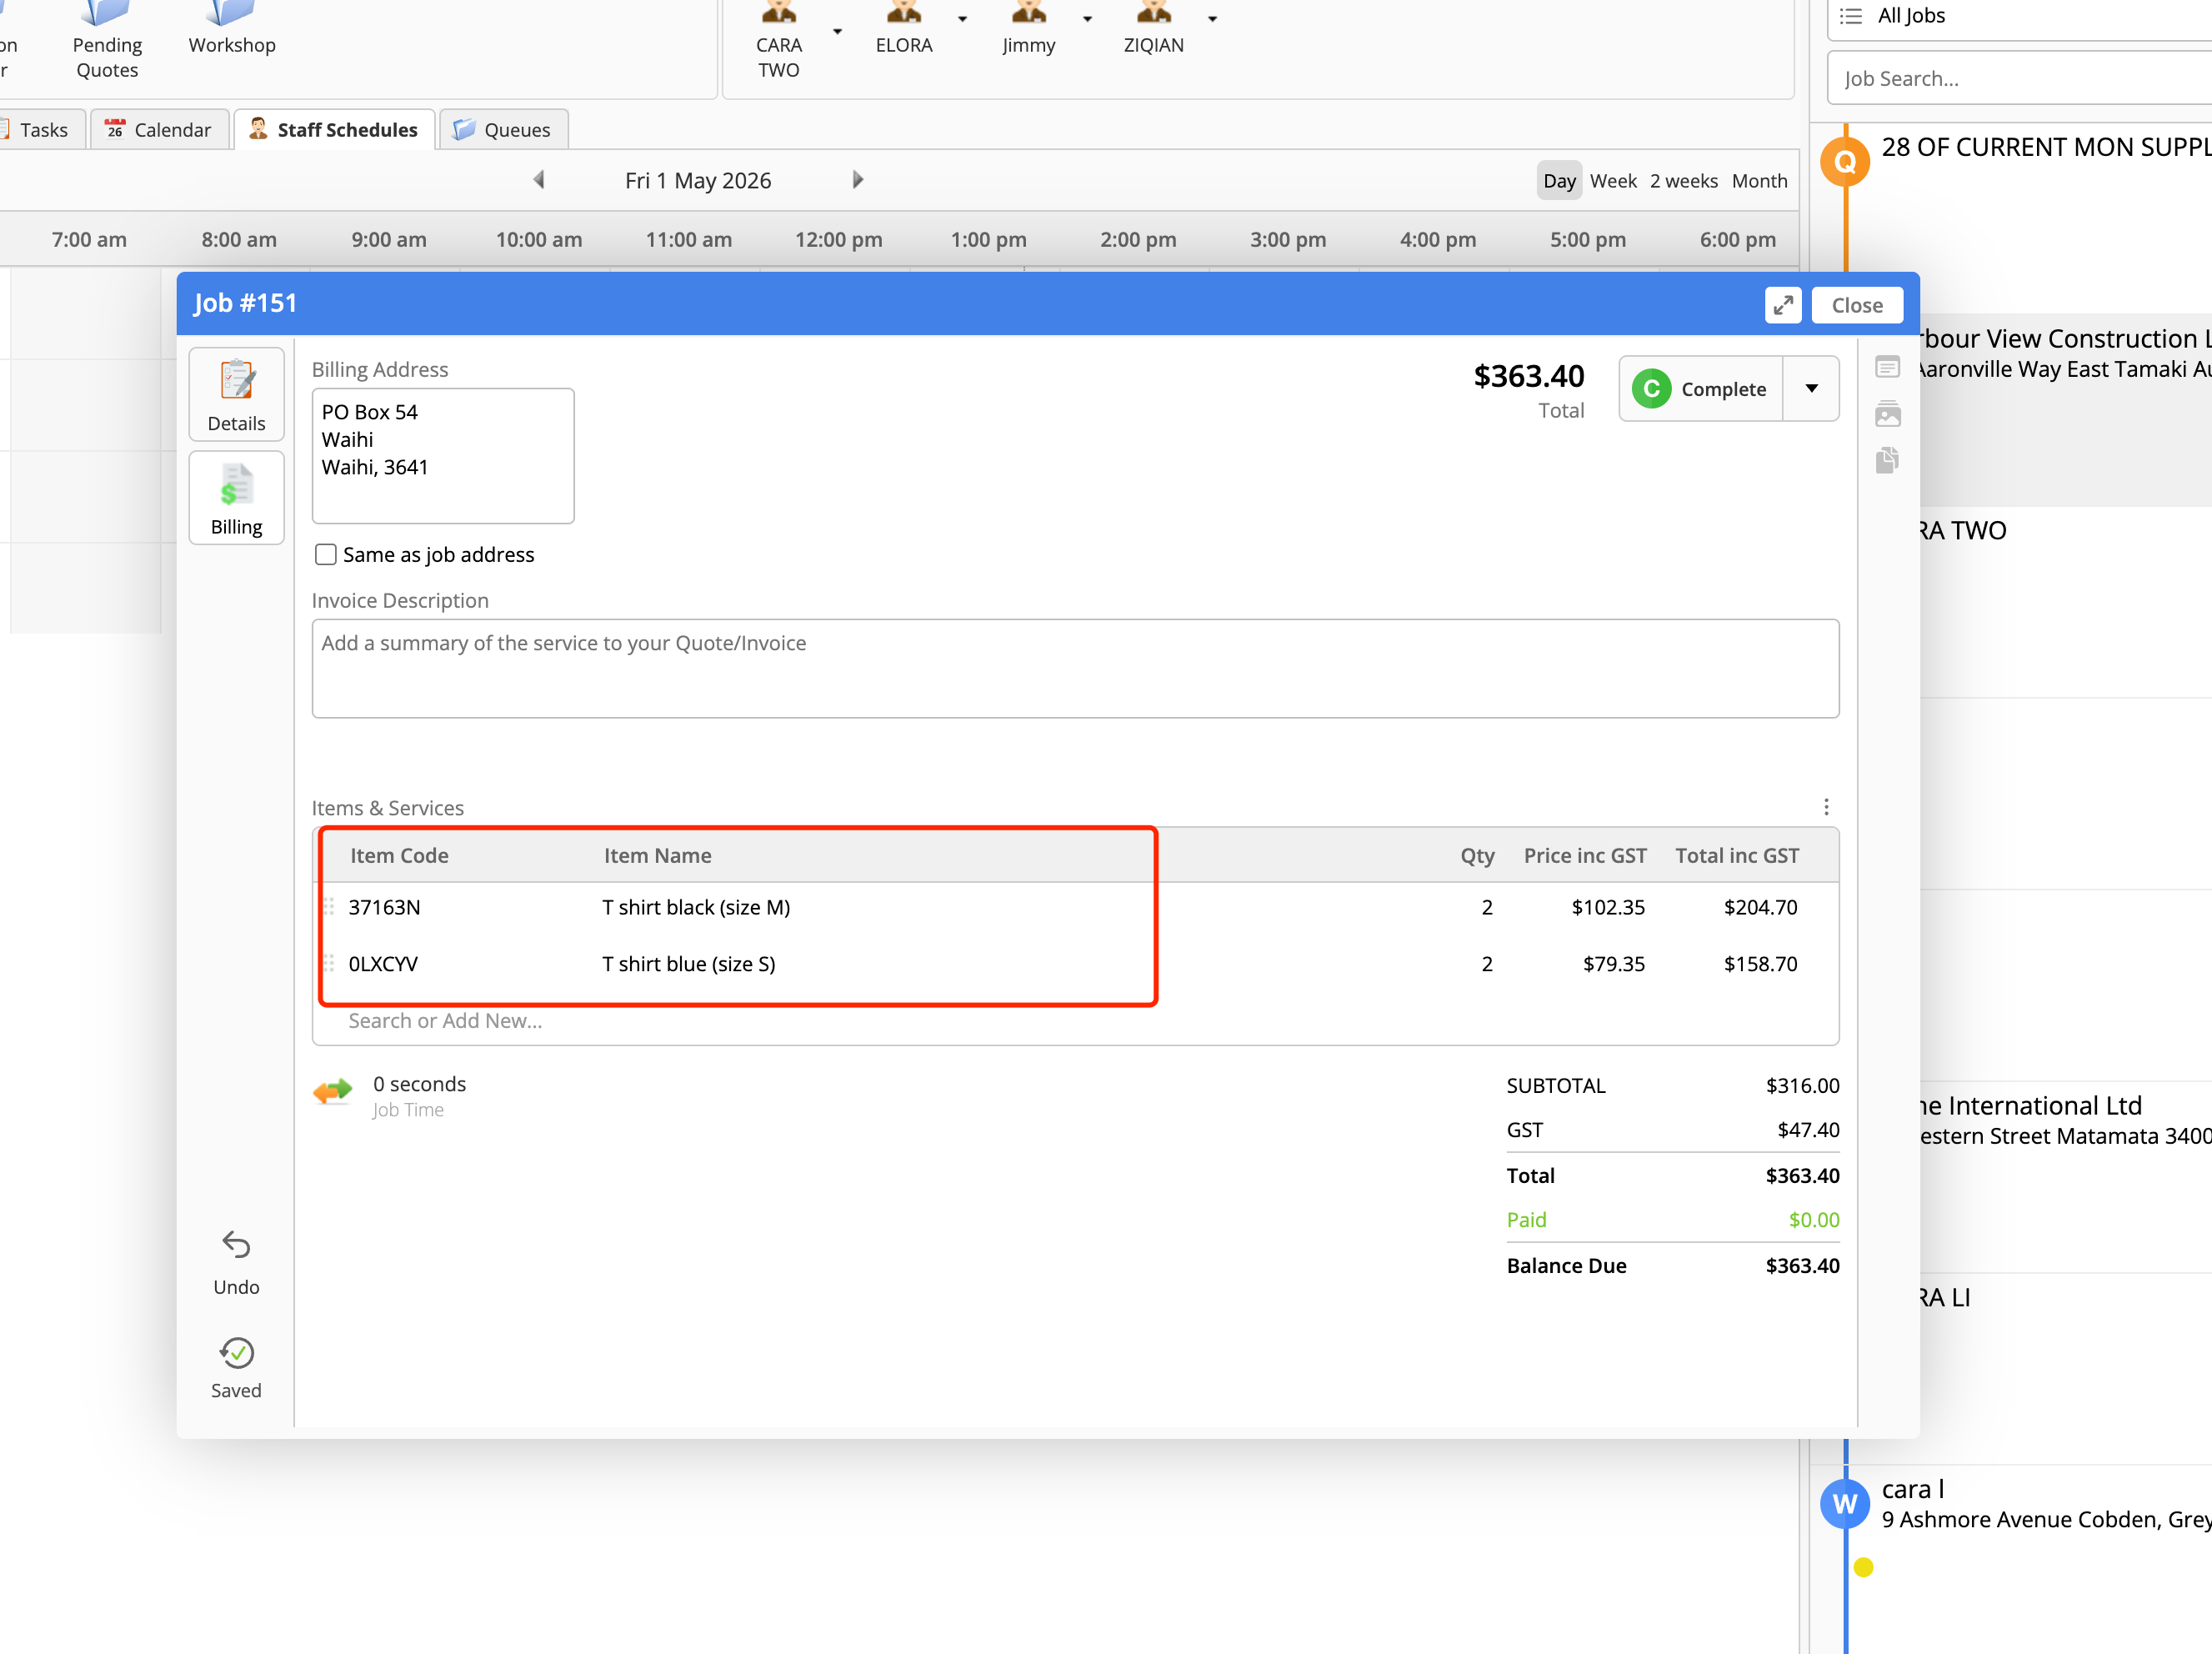
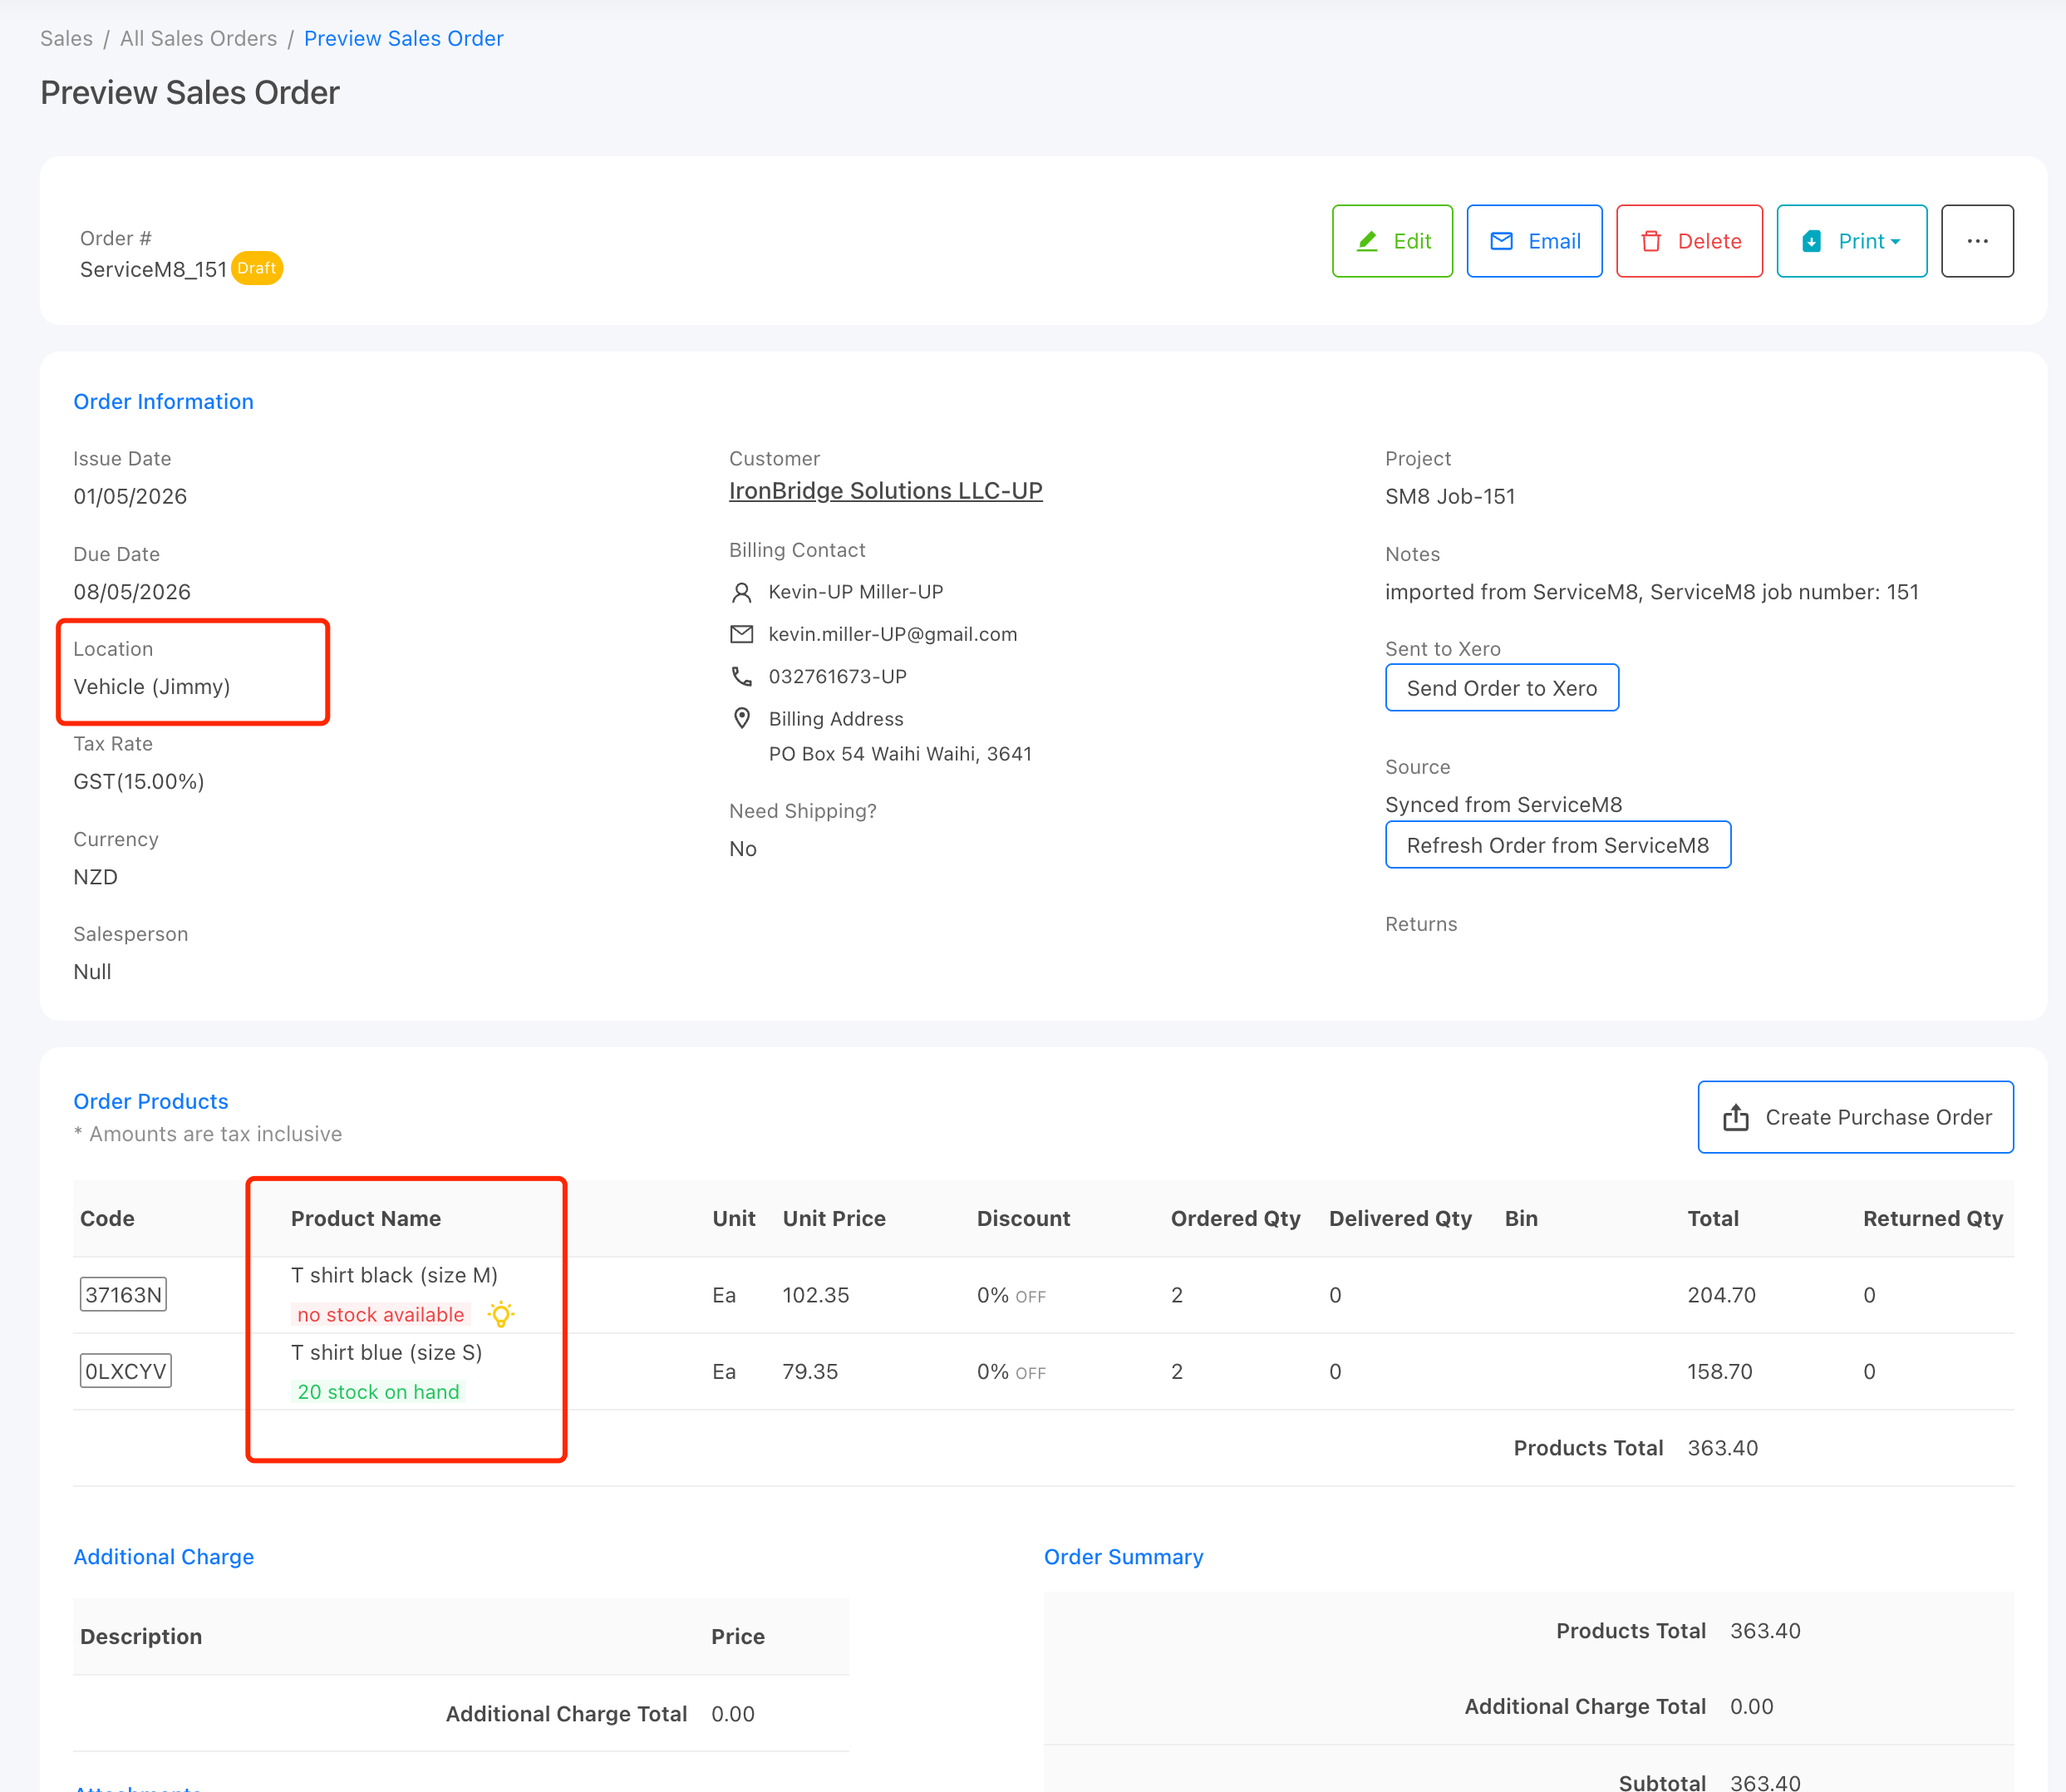
Once the job is created, a corresponding sales order is automatically generated in StockUnify. The sales order is assigned to the technician’s mapped location (e.g. vehicle or warehouse).
The sales order displays the stock availability for each item at the assigned location, allowing you to quickly identify whether the required materials are available to complete the job.
Step 3: Replenish Stock (If Required)
If some items are out of stock, you can create a purchase order directly from the sales order.
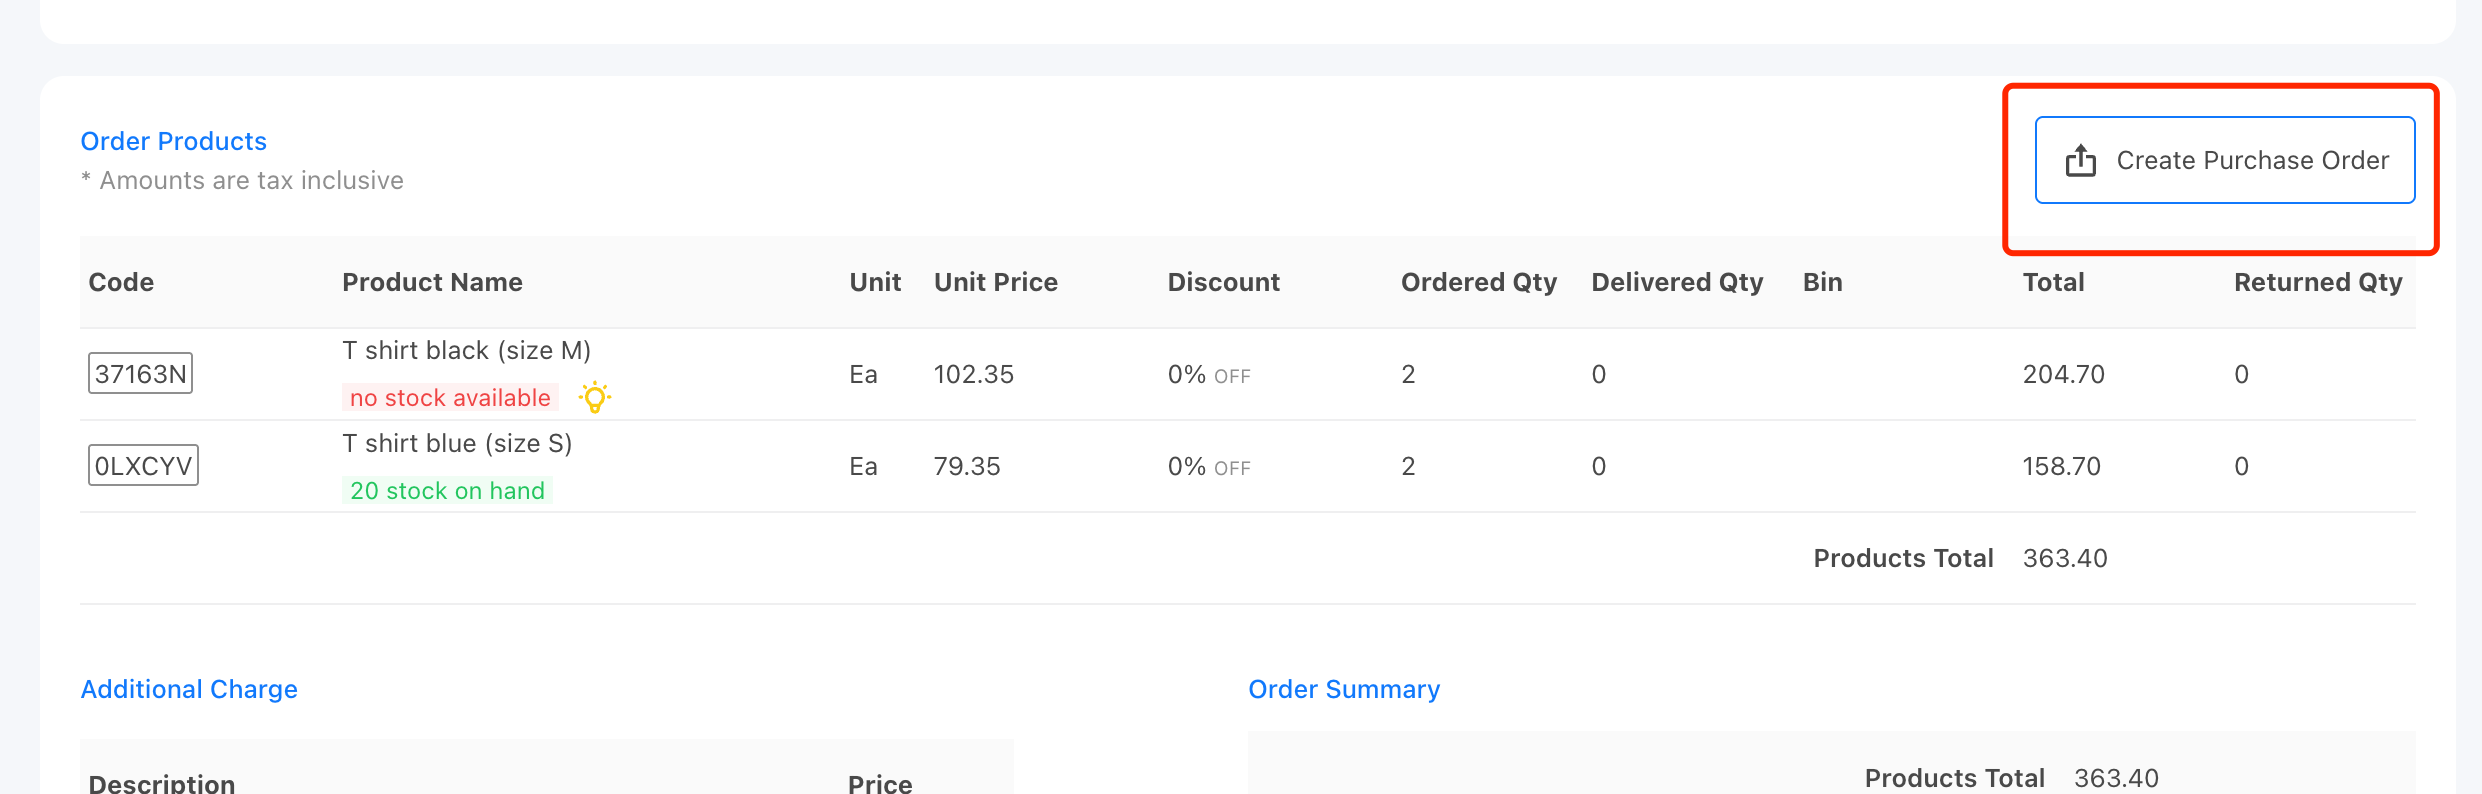
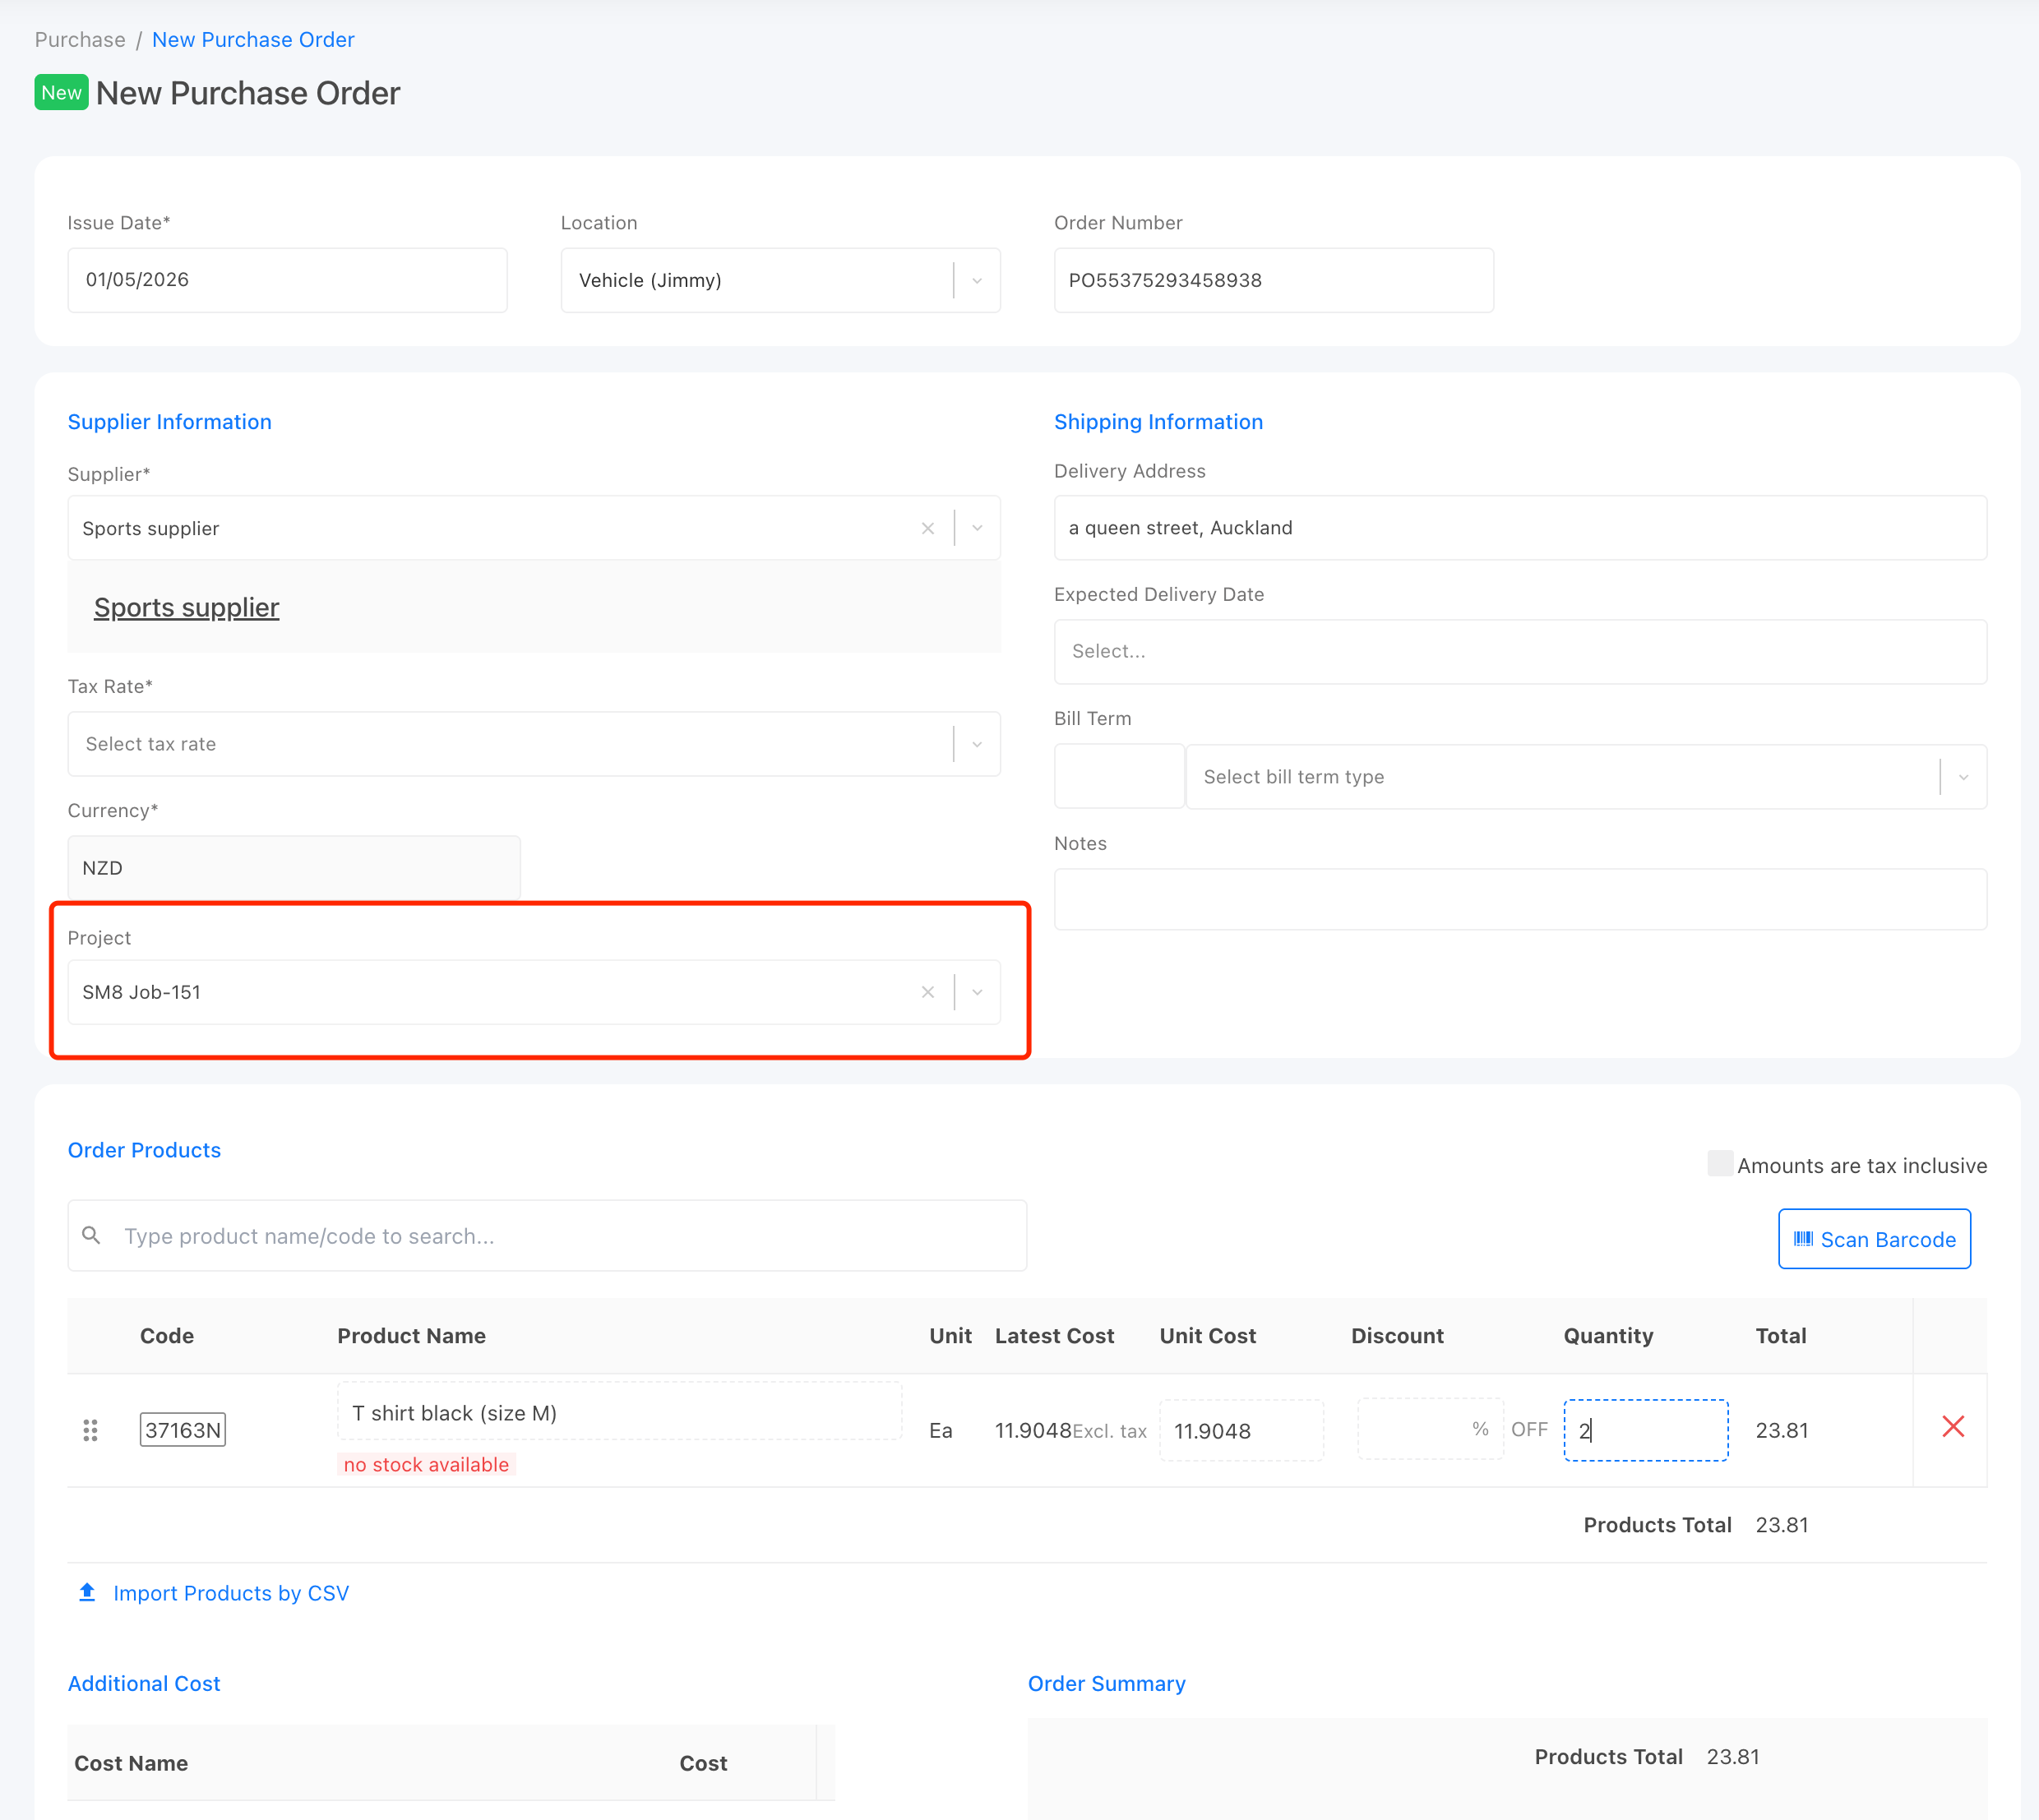
On the purchase order page, a project linked to the job number will be automatically attached. Select a supplier, review the product list, and remove any items that do not need to be ordered. Then save the purchase order.
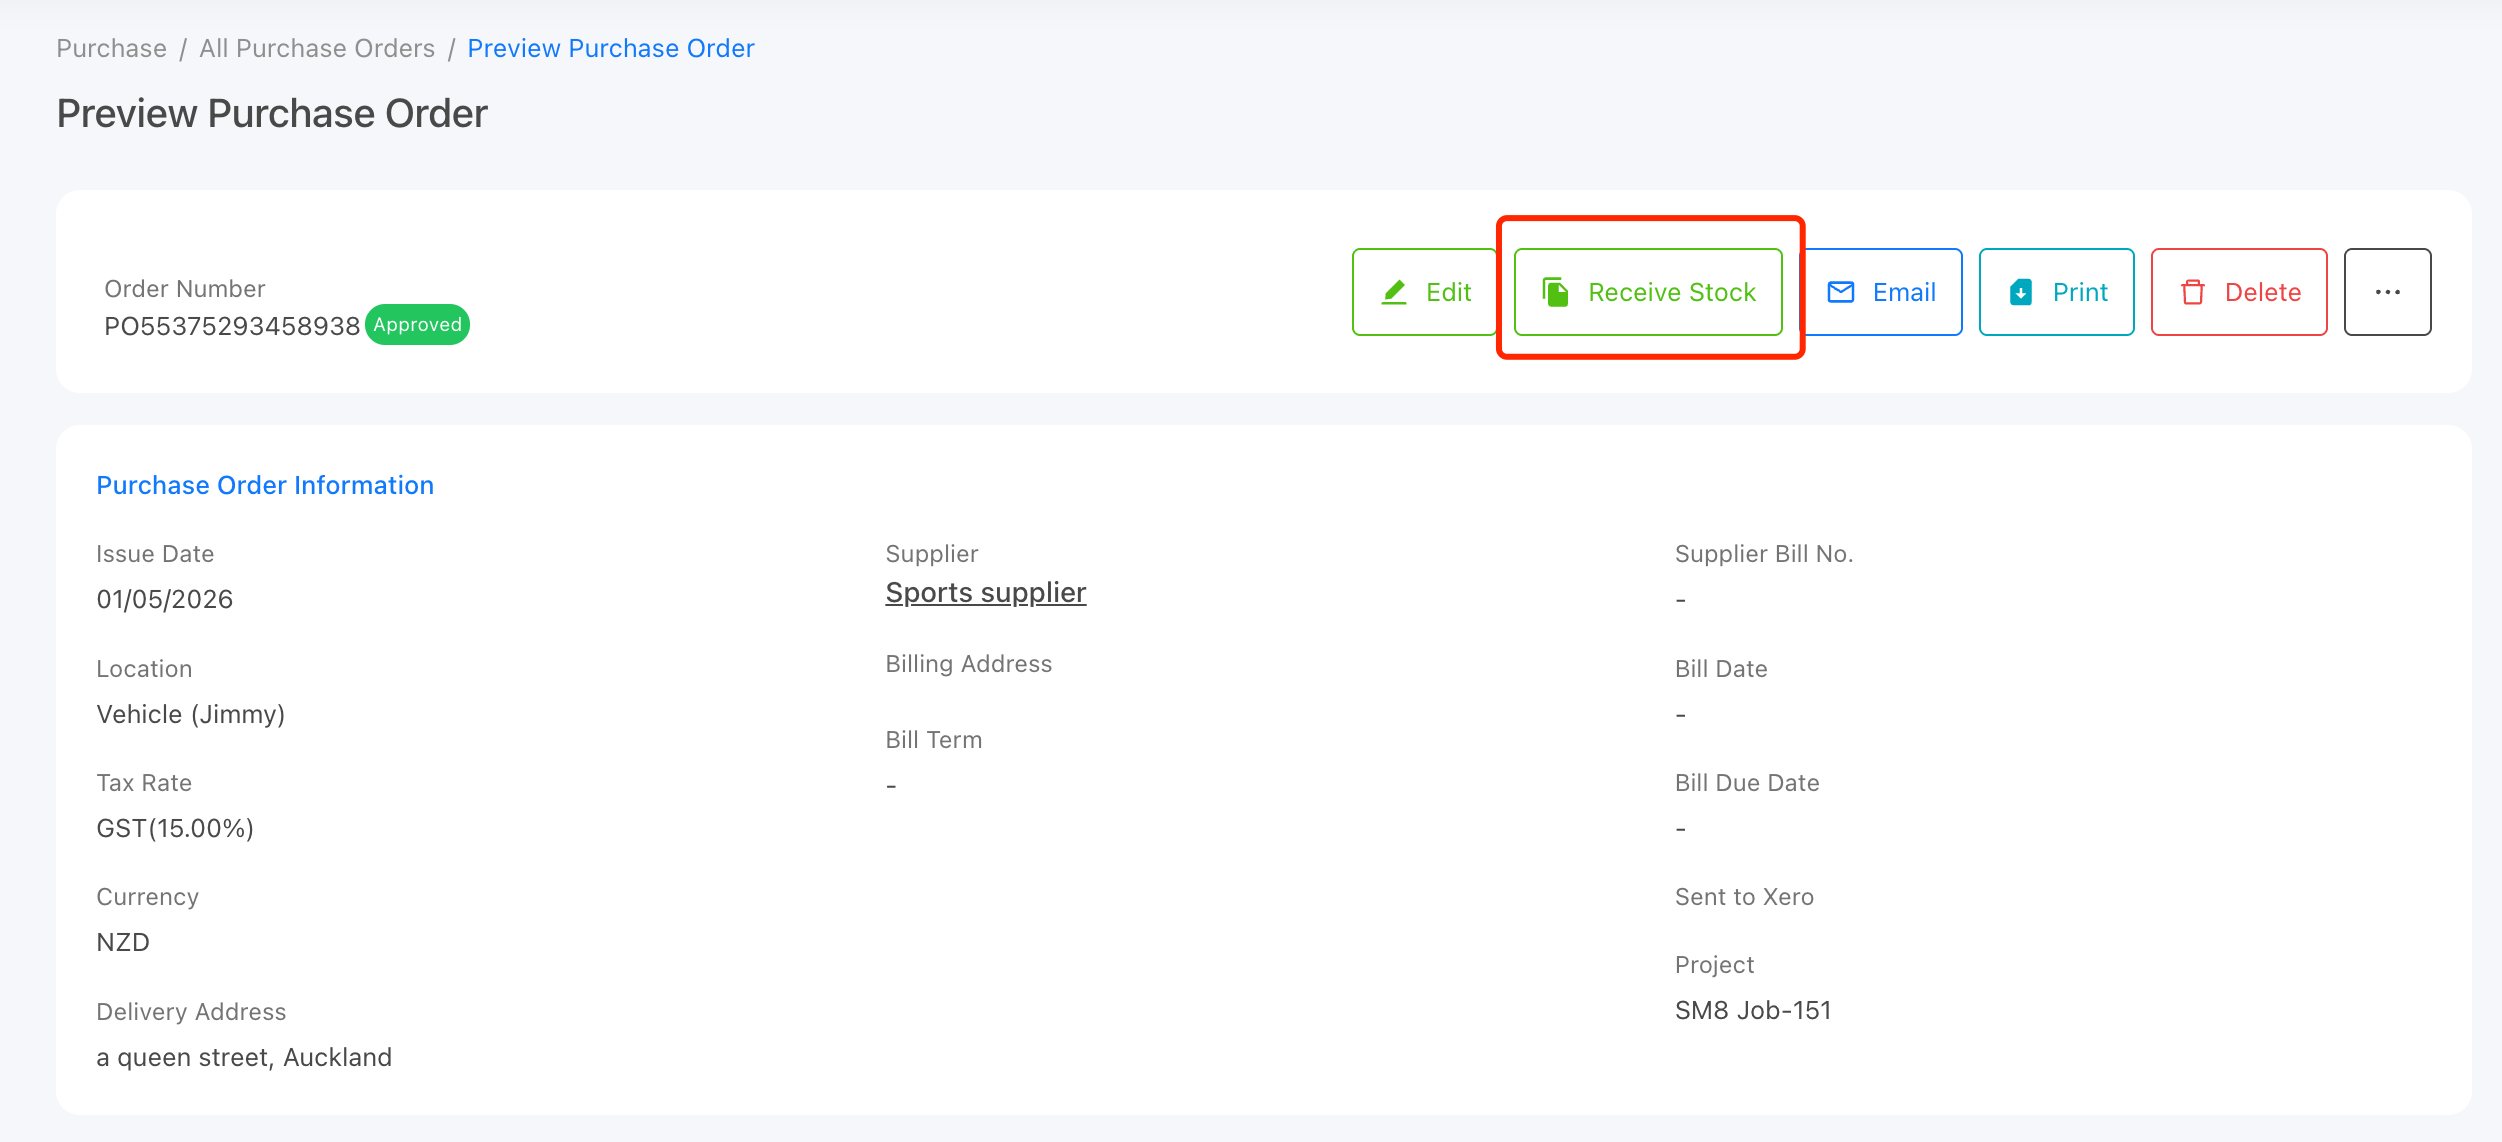
Once the stock arrives at the warehouse, click the "Receive Stock" button on the purchase order to receive the items into inventory.
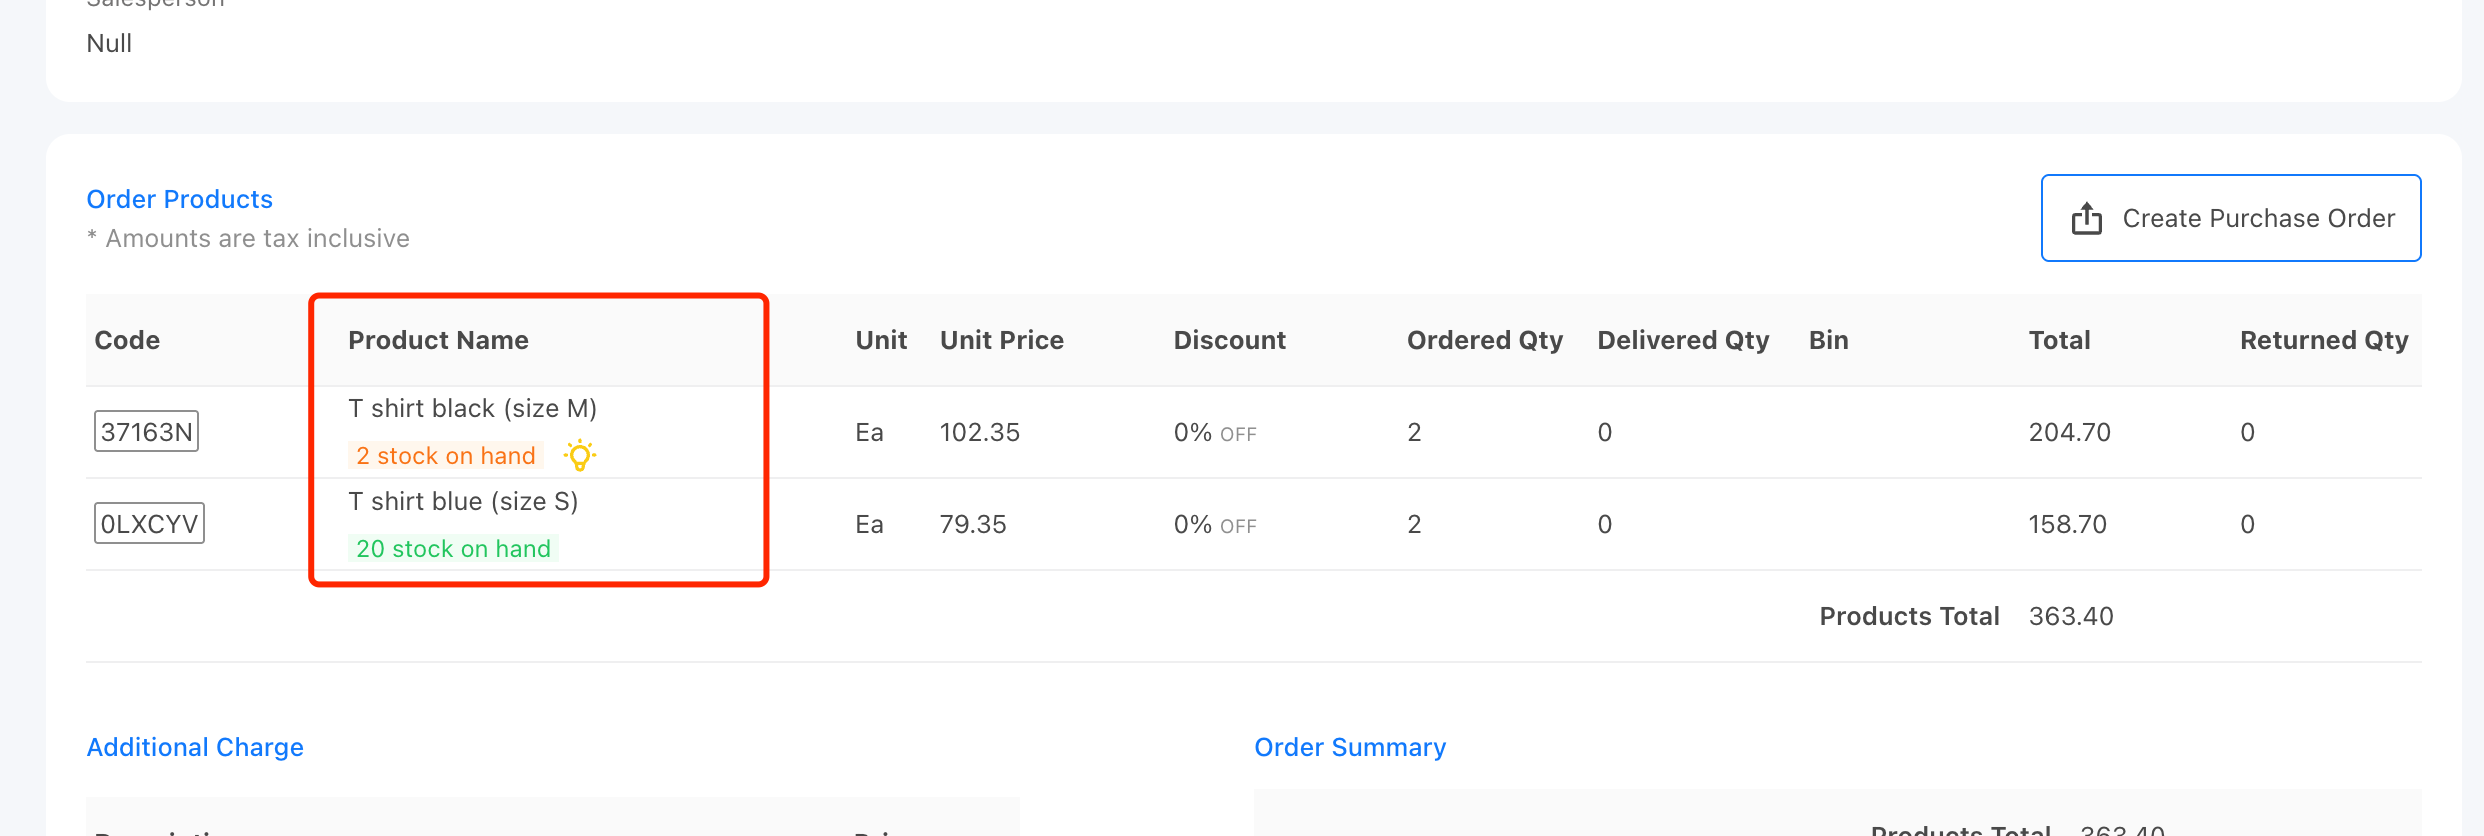
After receiving the purchase order, return to the sales order. You will see that all items now have sufficient stock available.
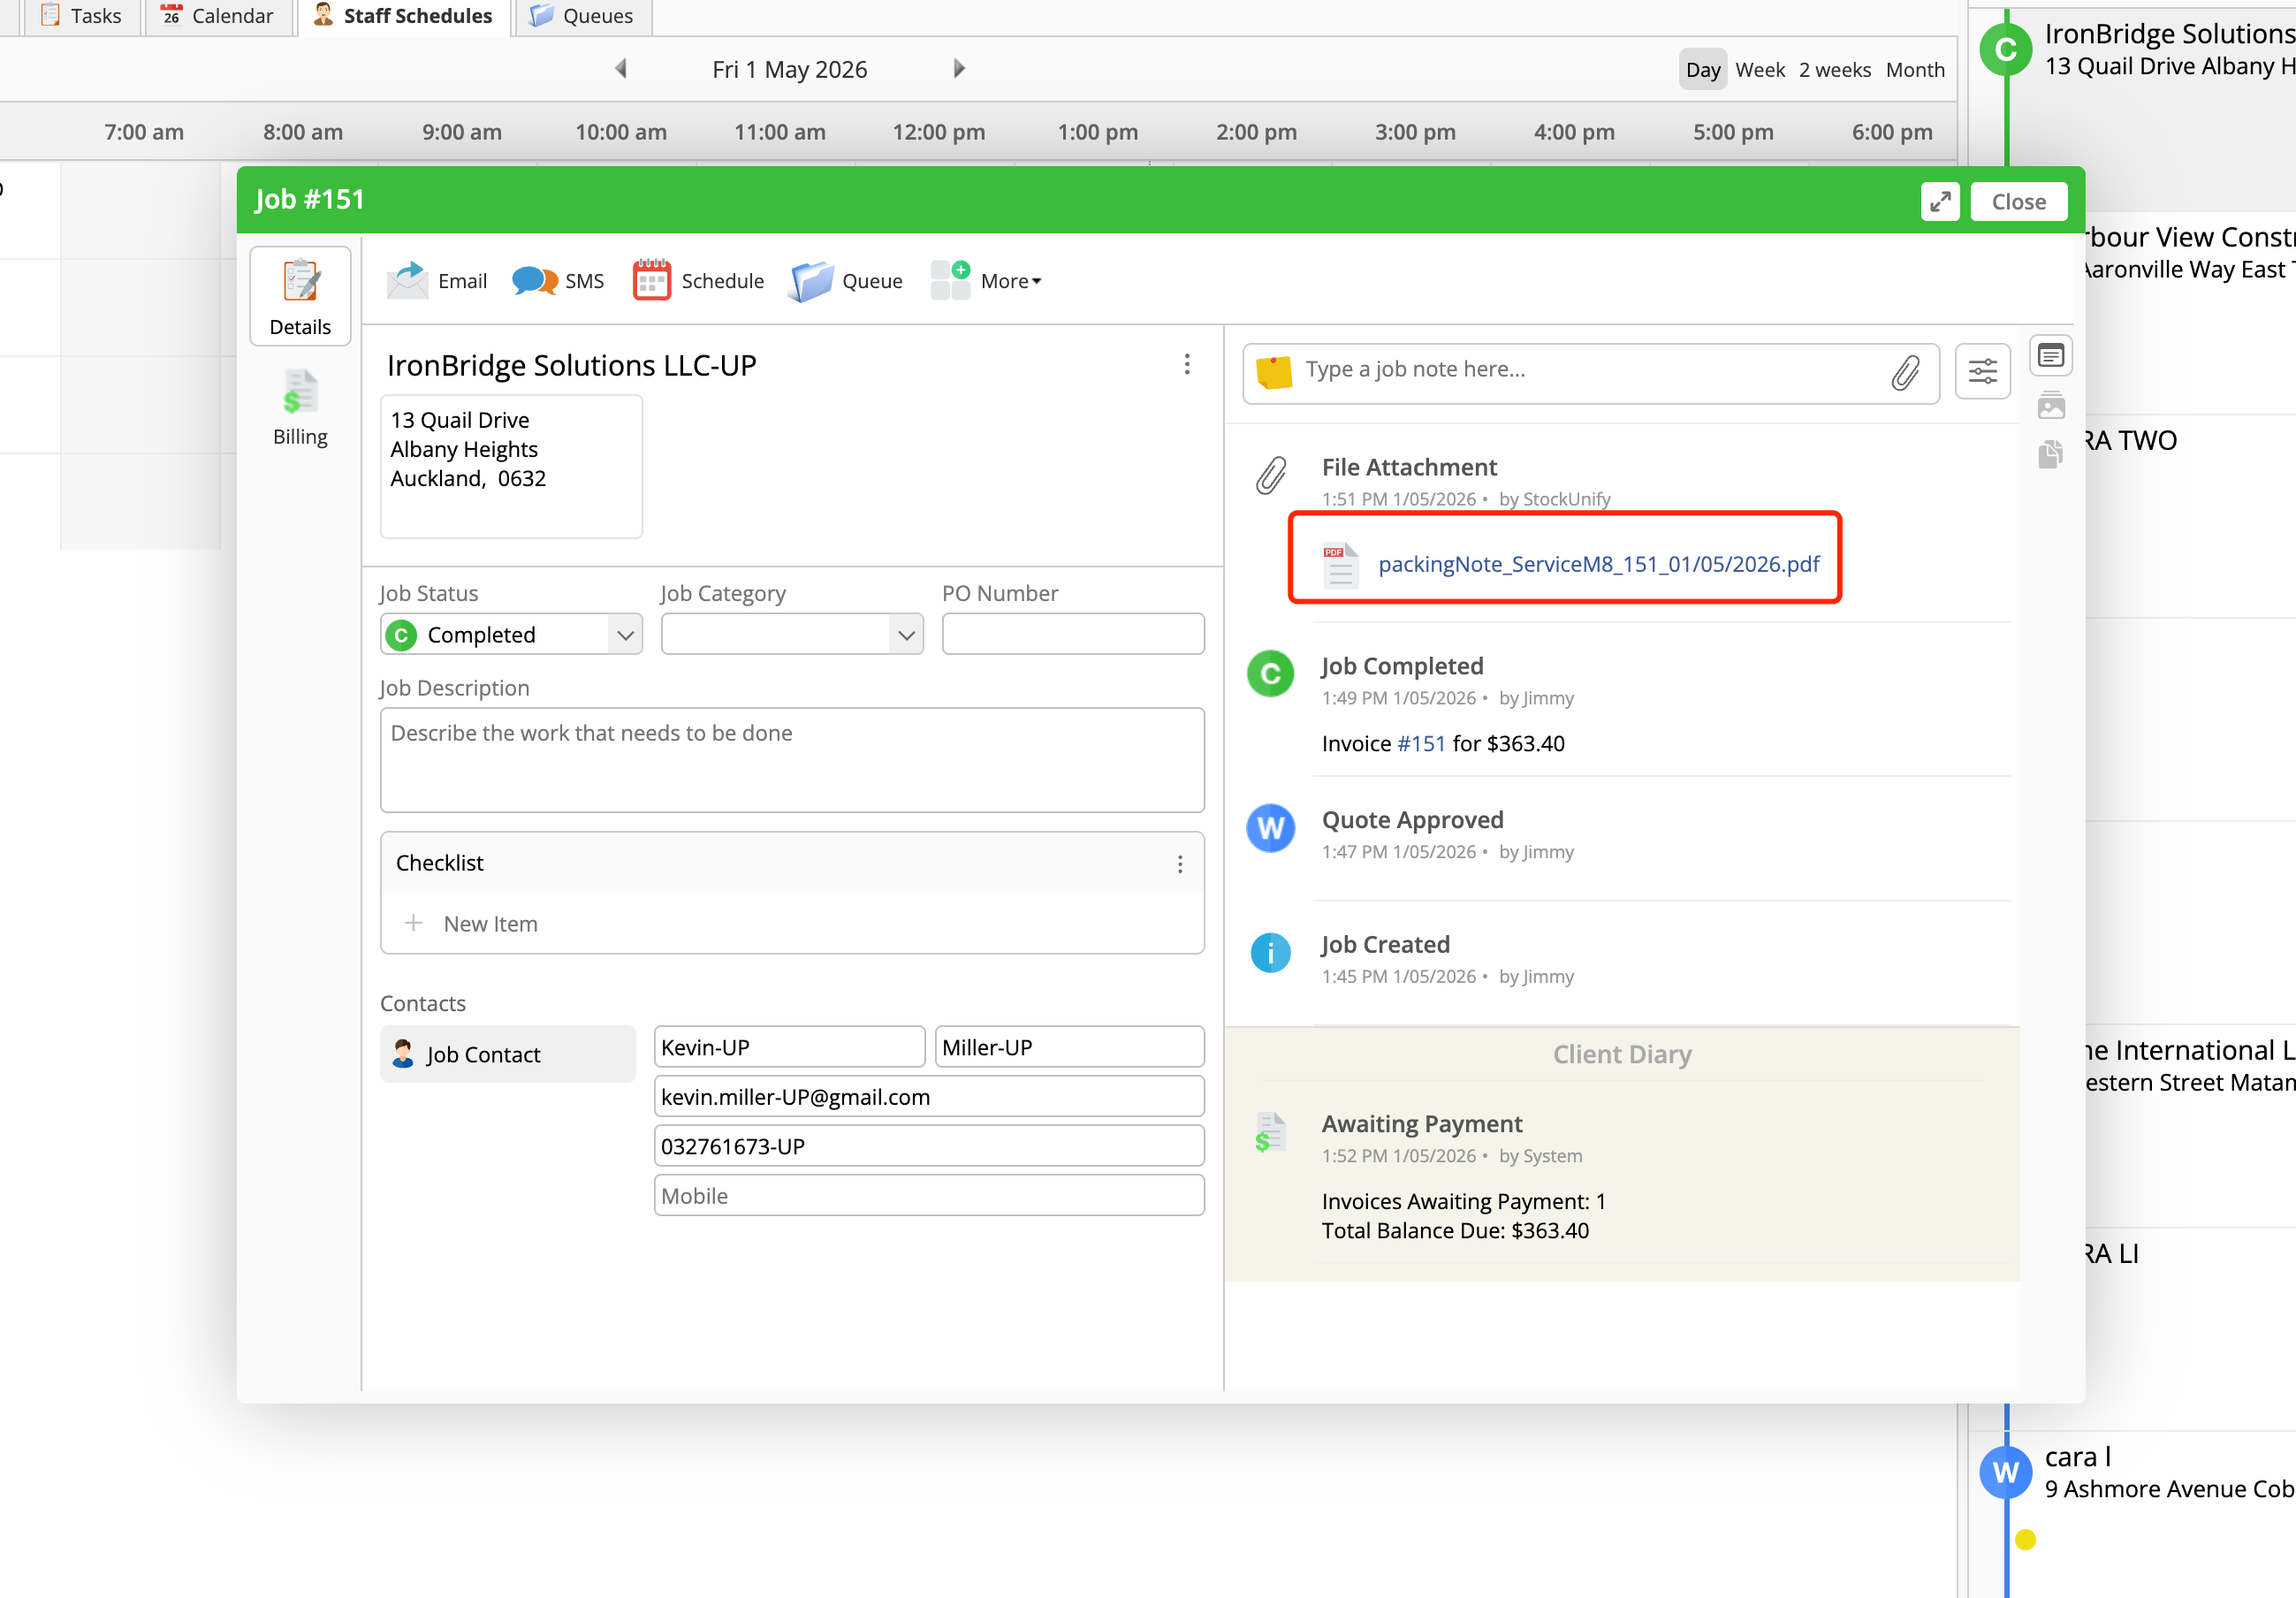
Step 4: Complete the Job in ServiceM8 & Stock is Deducted
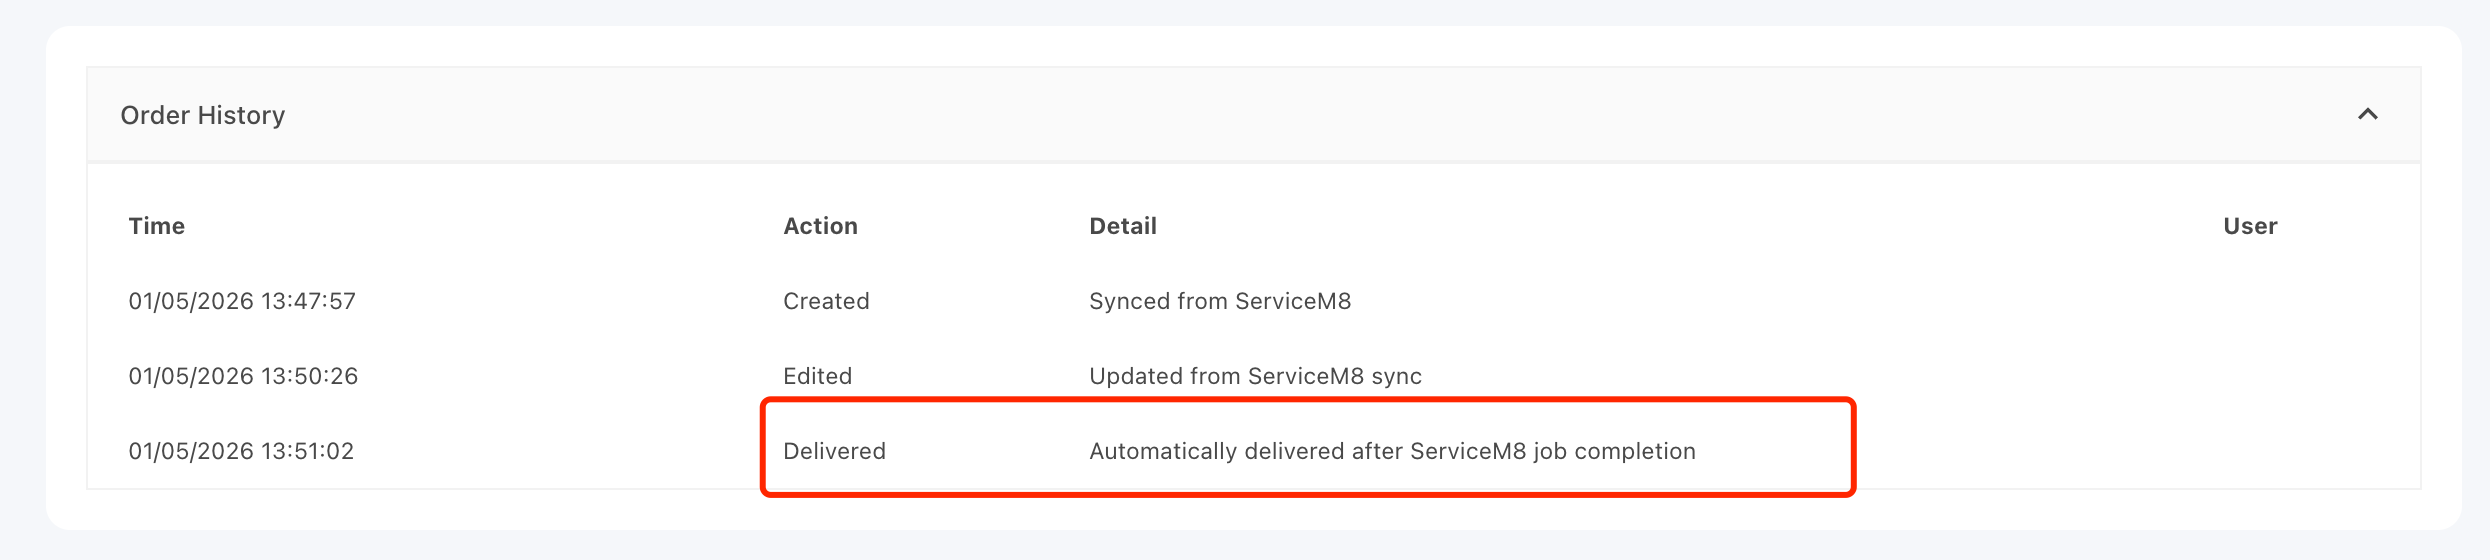
Once the work is completed, the technician marks the job as "Completed" in ServiceM8. This triggers a sync to StockUnify.
The corresponding sales order in StockUnify is automatically delivered, and stock is deducted from the technician’s assigned location.
An automatic delivery record will be created on the sales order for tracking purposes.
A packing note will also be sent back to the ServiceM8 job as an attachment.