Overview
Once a barcode is saved on a product, StockUnify can find that product when you scan it. This article shows you how to add a barcode to a product.
Add a barcode when creating a new product
- Go to [Inventory] -> [Add New Product] page.
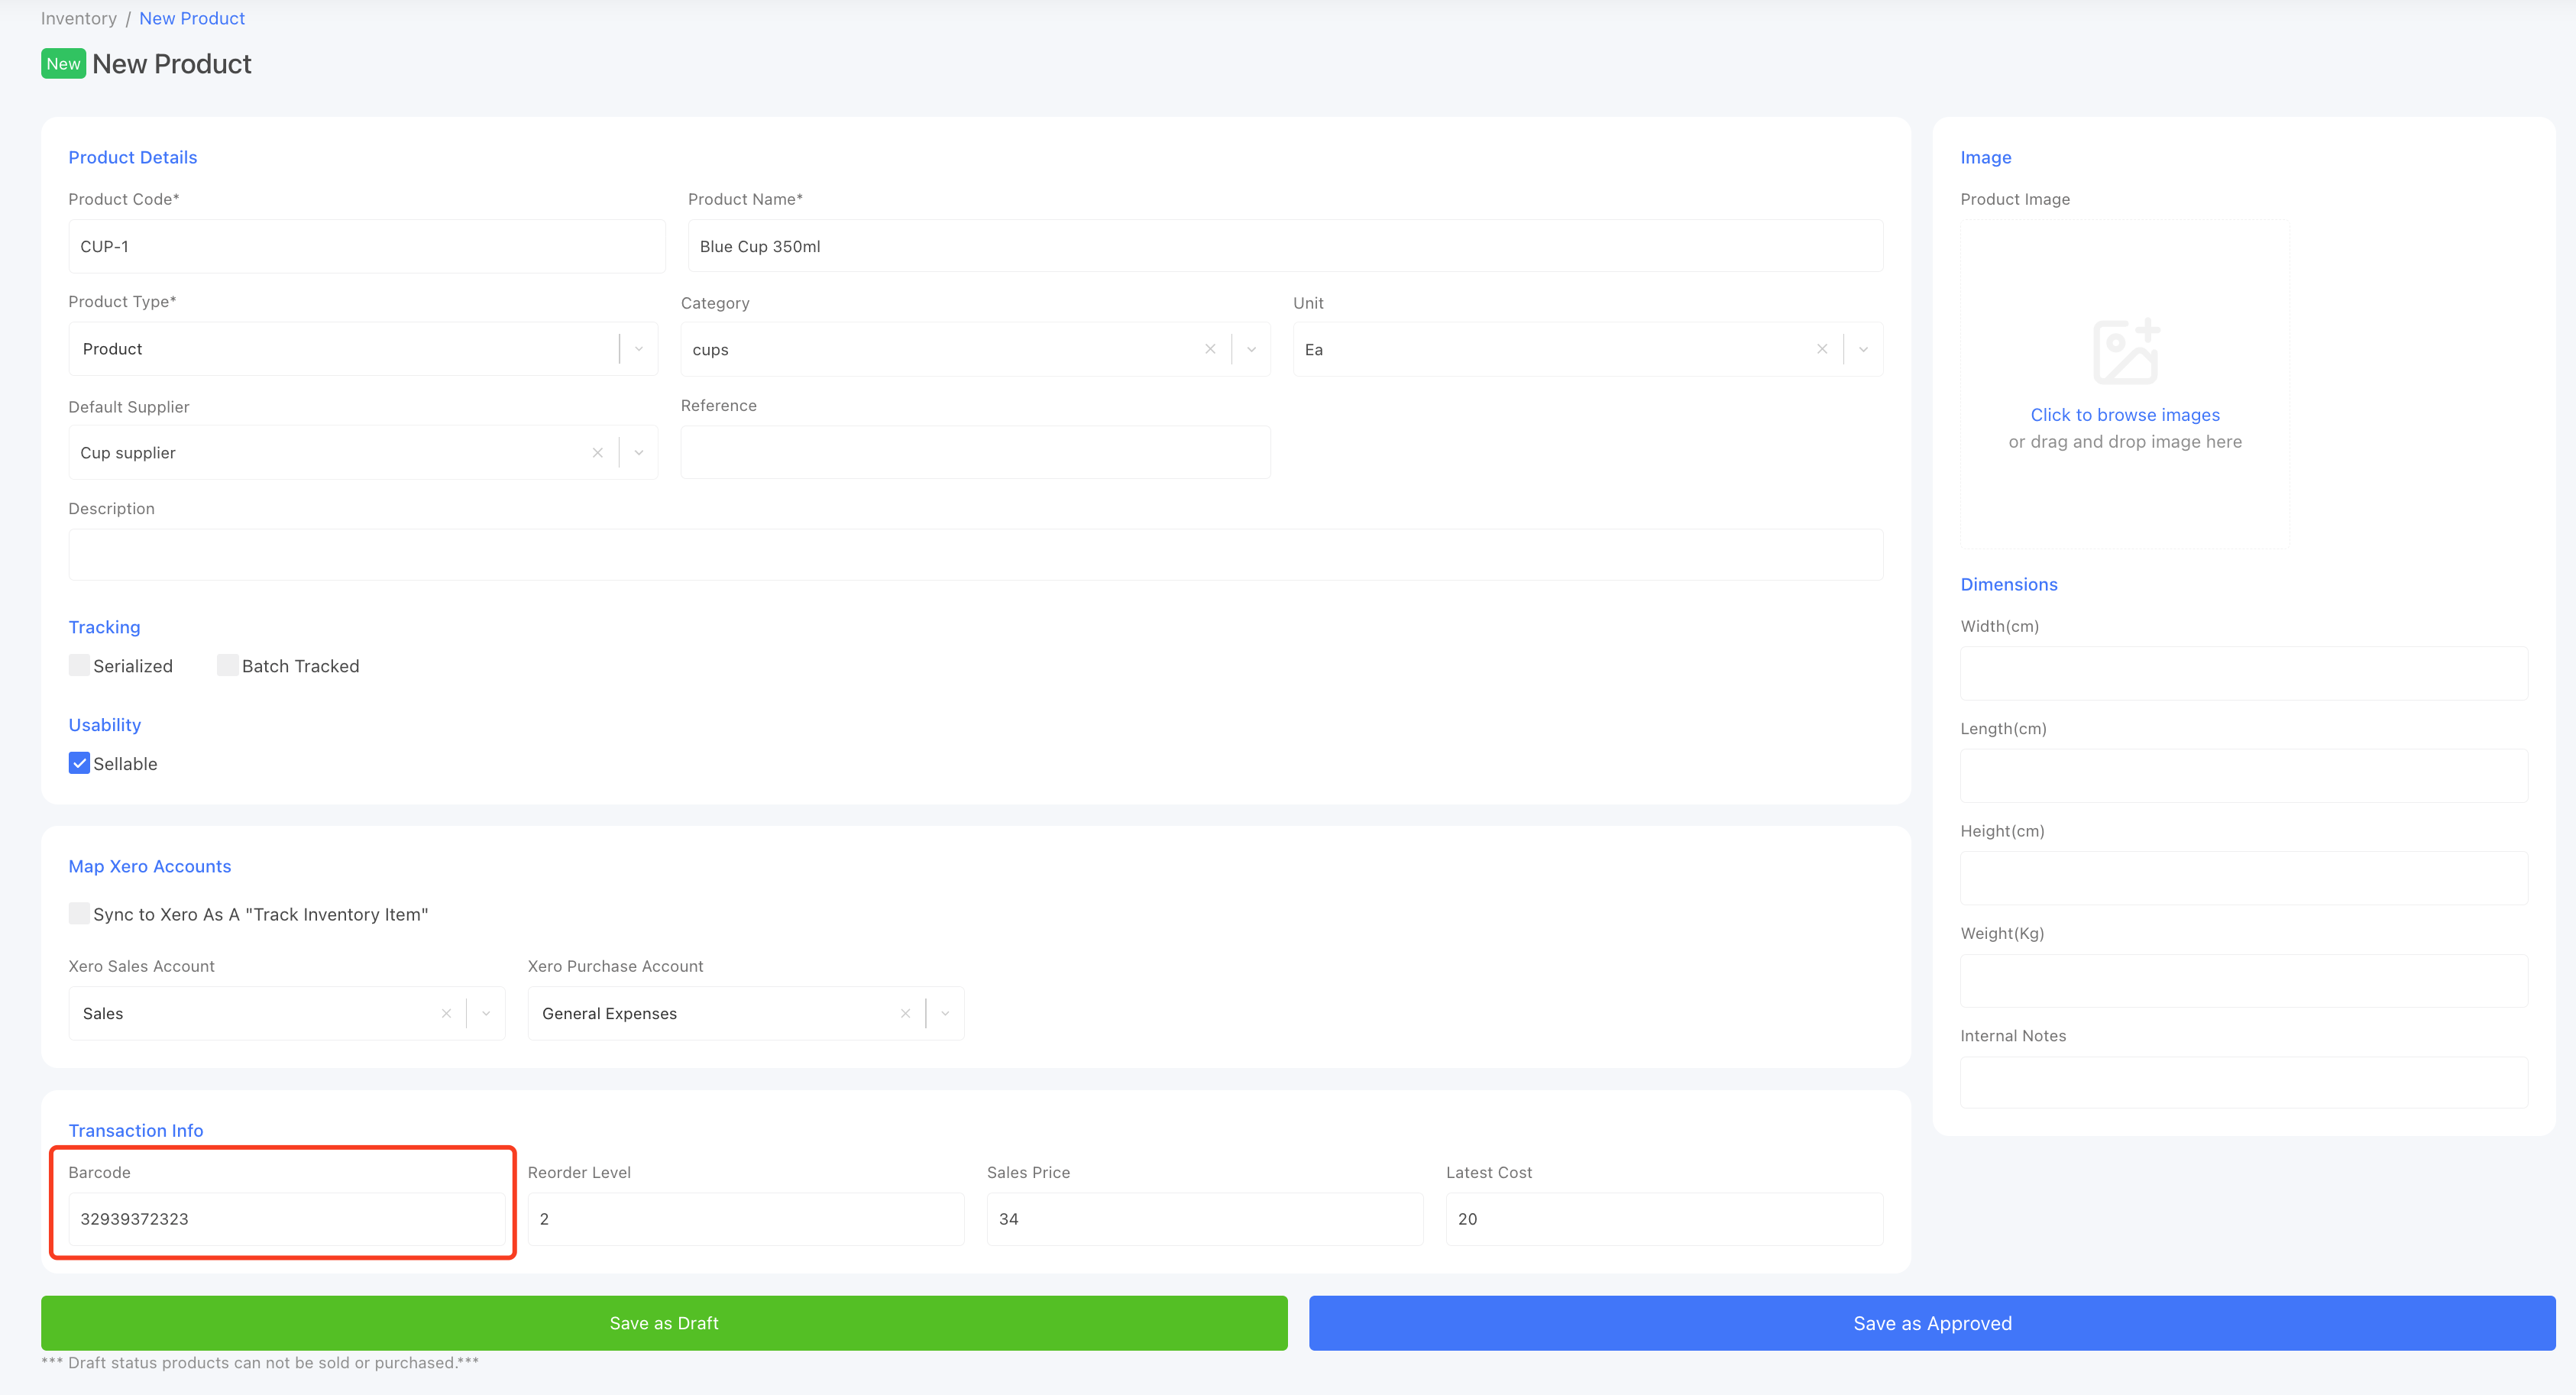
- On the product details page, fill in the product details, then find the [Barcode] field.
- Enter the barcode. You can type it in, or click into the field and scan the product with your scanner to fill it automatically.
- Click [Save as Approved] to save the product.
Add a barcode to an existing product
If a product already exists in the system:
- Go to [Inventory] -> [Manage Products] page.
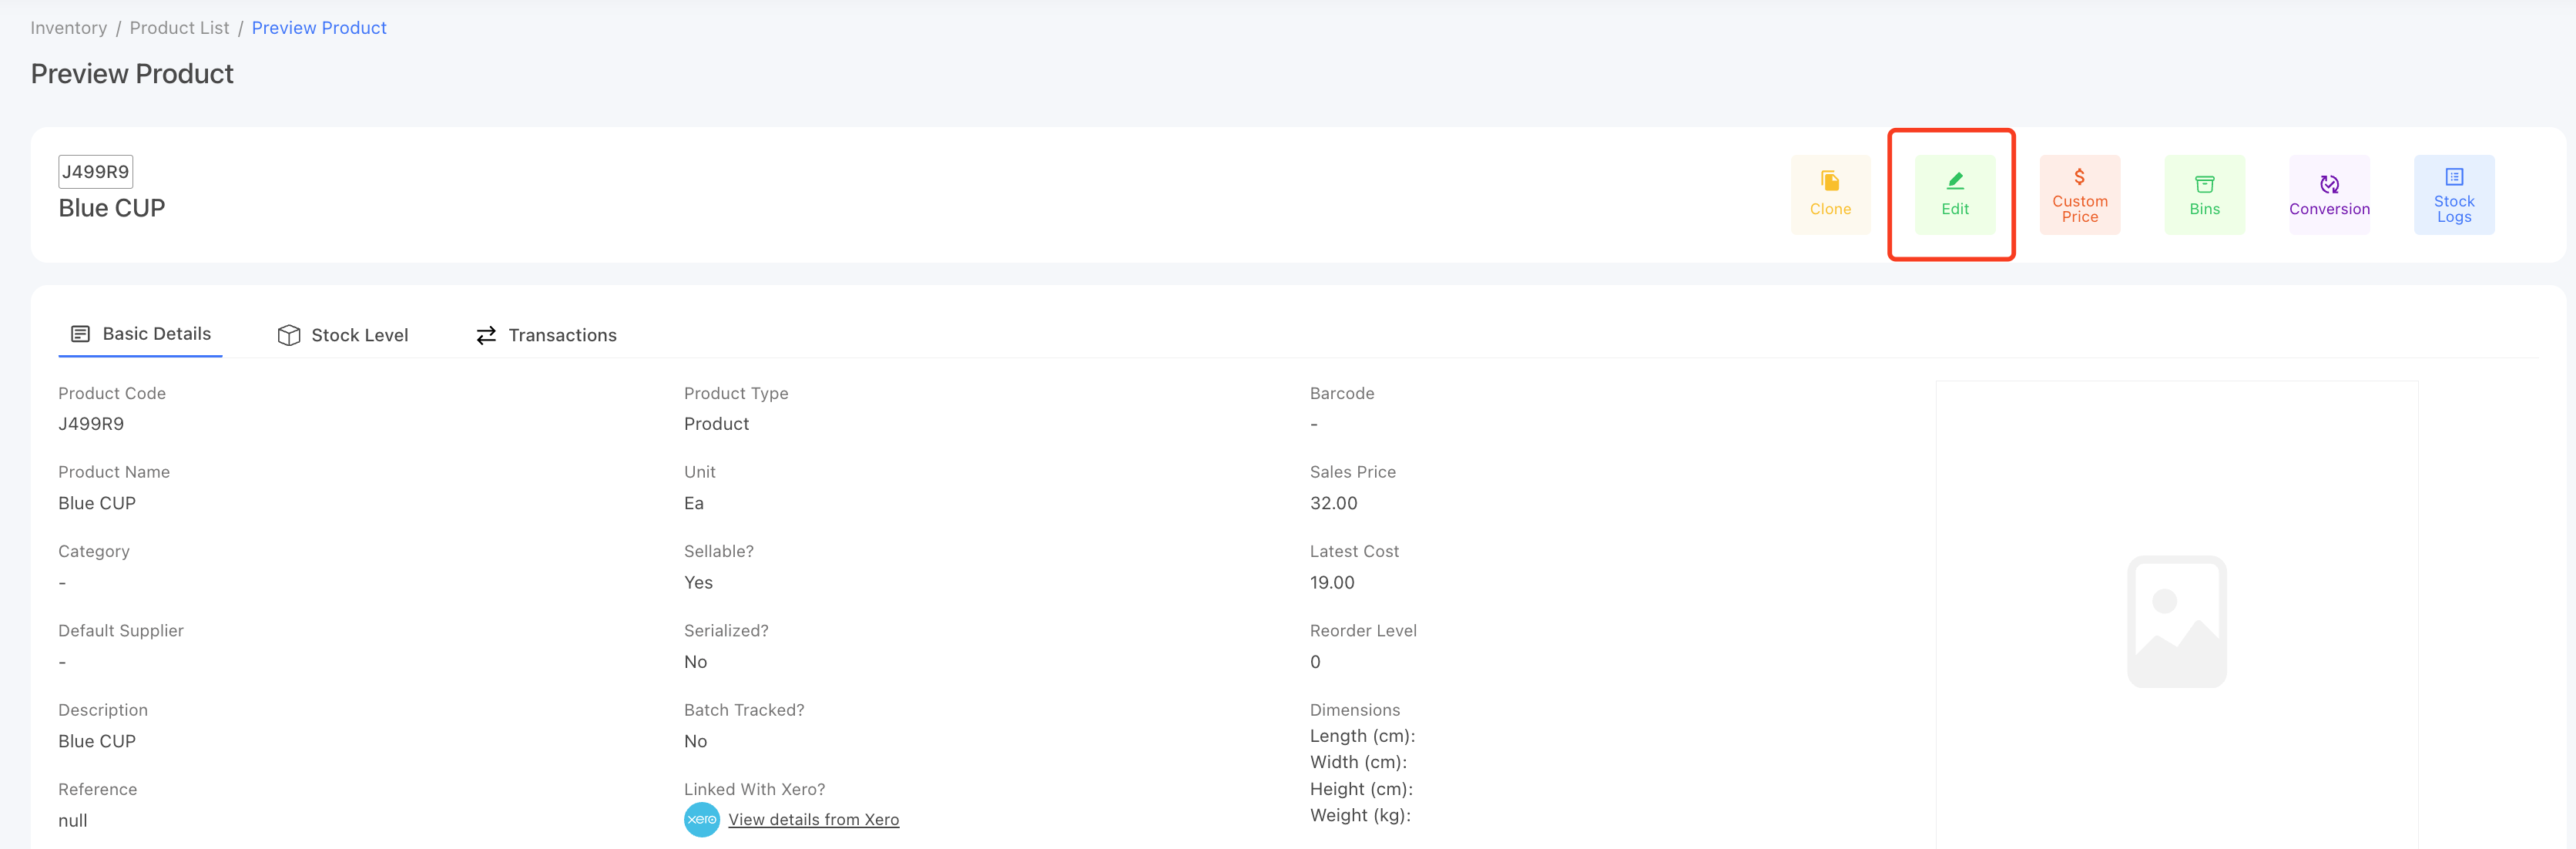
- Type the product name to search for the product, then click on the product name to open the product details page.
- Click on the Edit button.
- Find the Barcode field and enter the barcode. You can type it in, or click into the field and scan the product with your scanner to fill it automatically.
- Click [Update Product] to save it to the product.
Update barcodes with a CSV file
If you have a lot of products to update, importing is faster than editing them one by one.
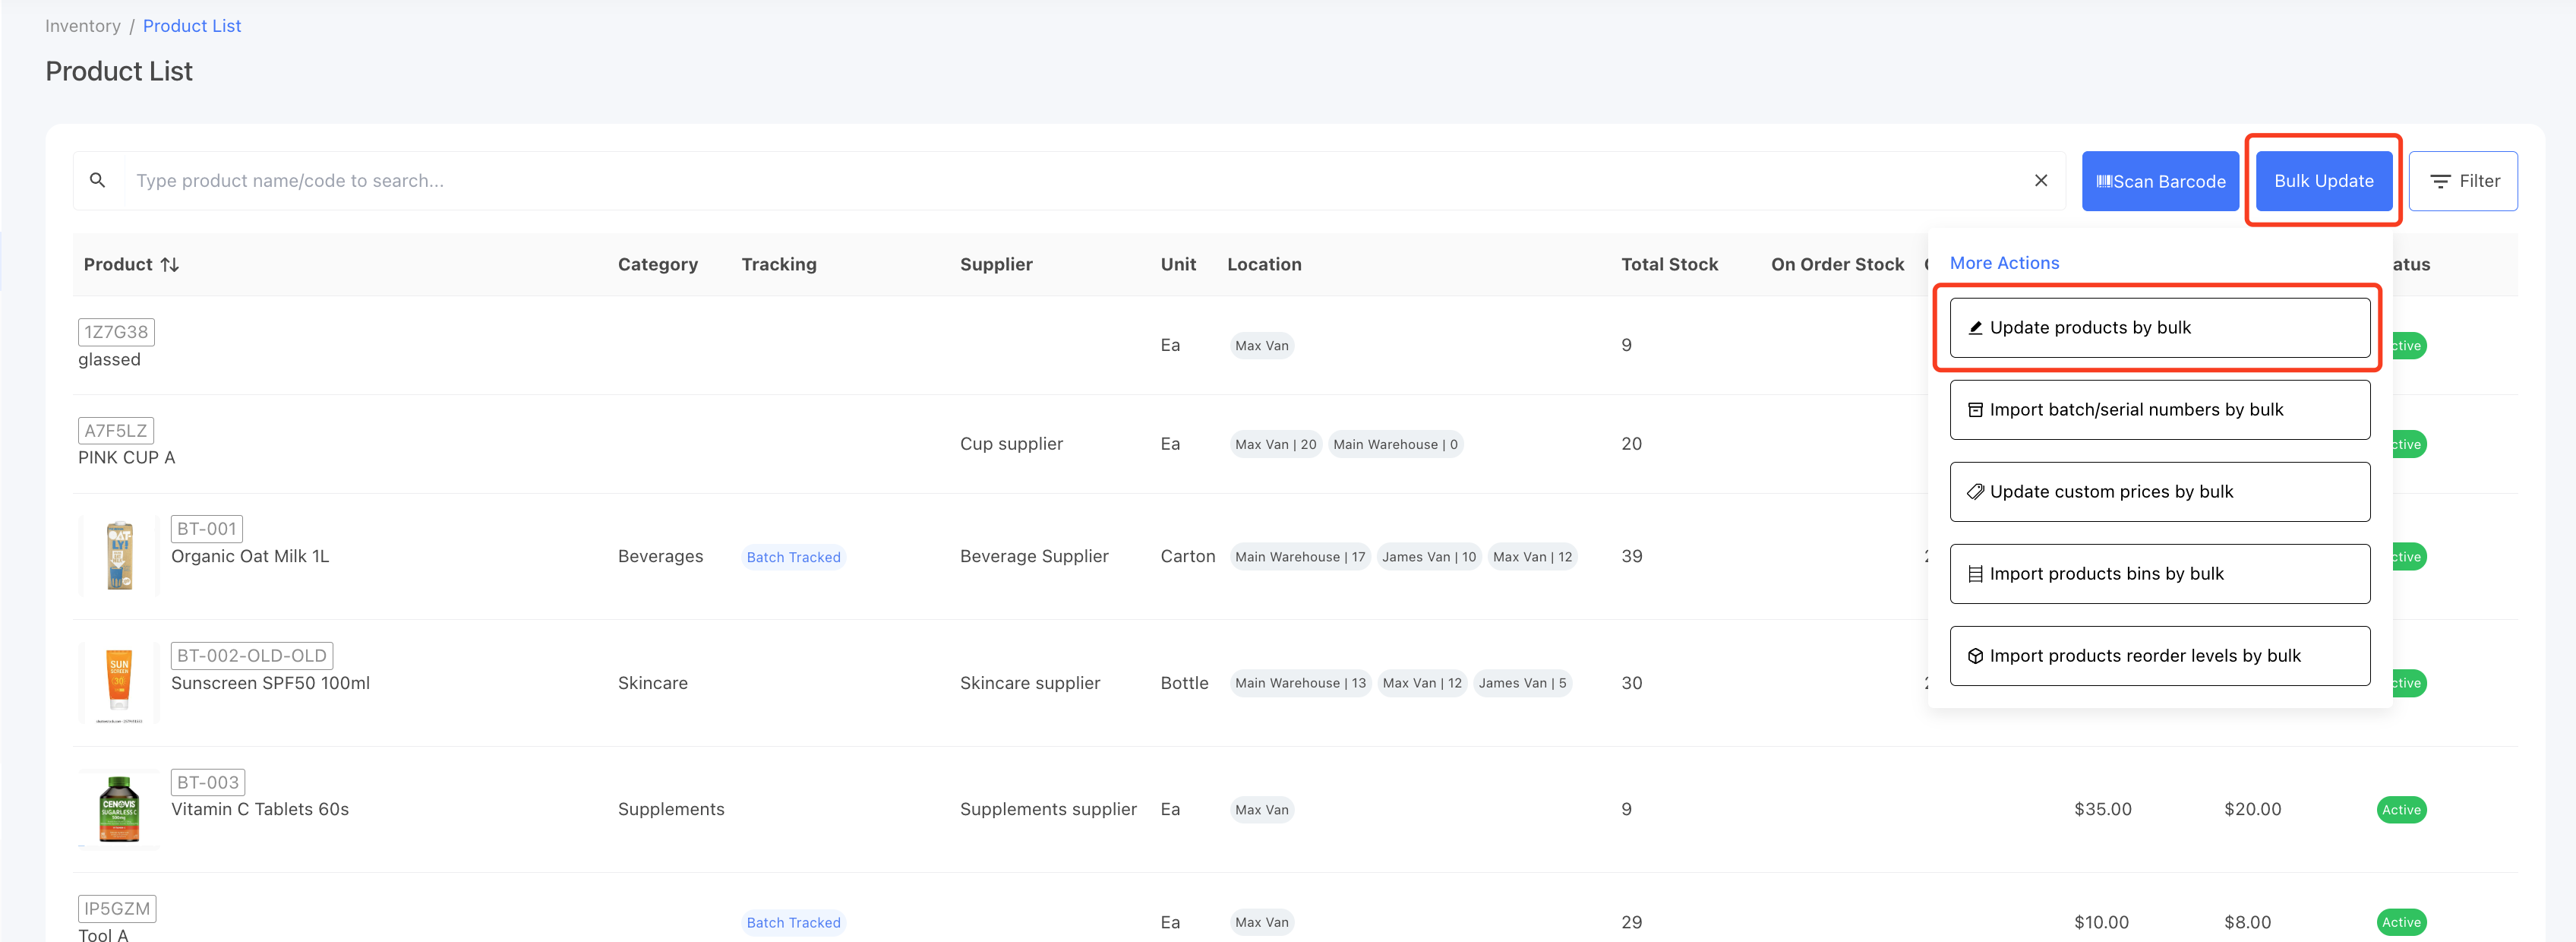
- Go to [Inventory] -> [Manage Products] page.
- Click on the [Bulk Update] button, then select [Update Products by Bulk].
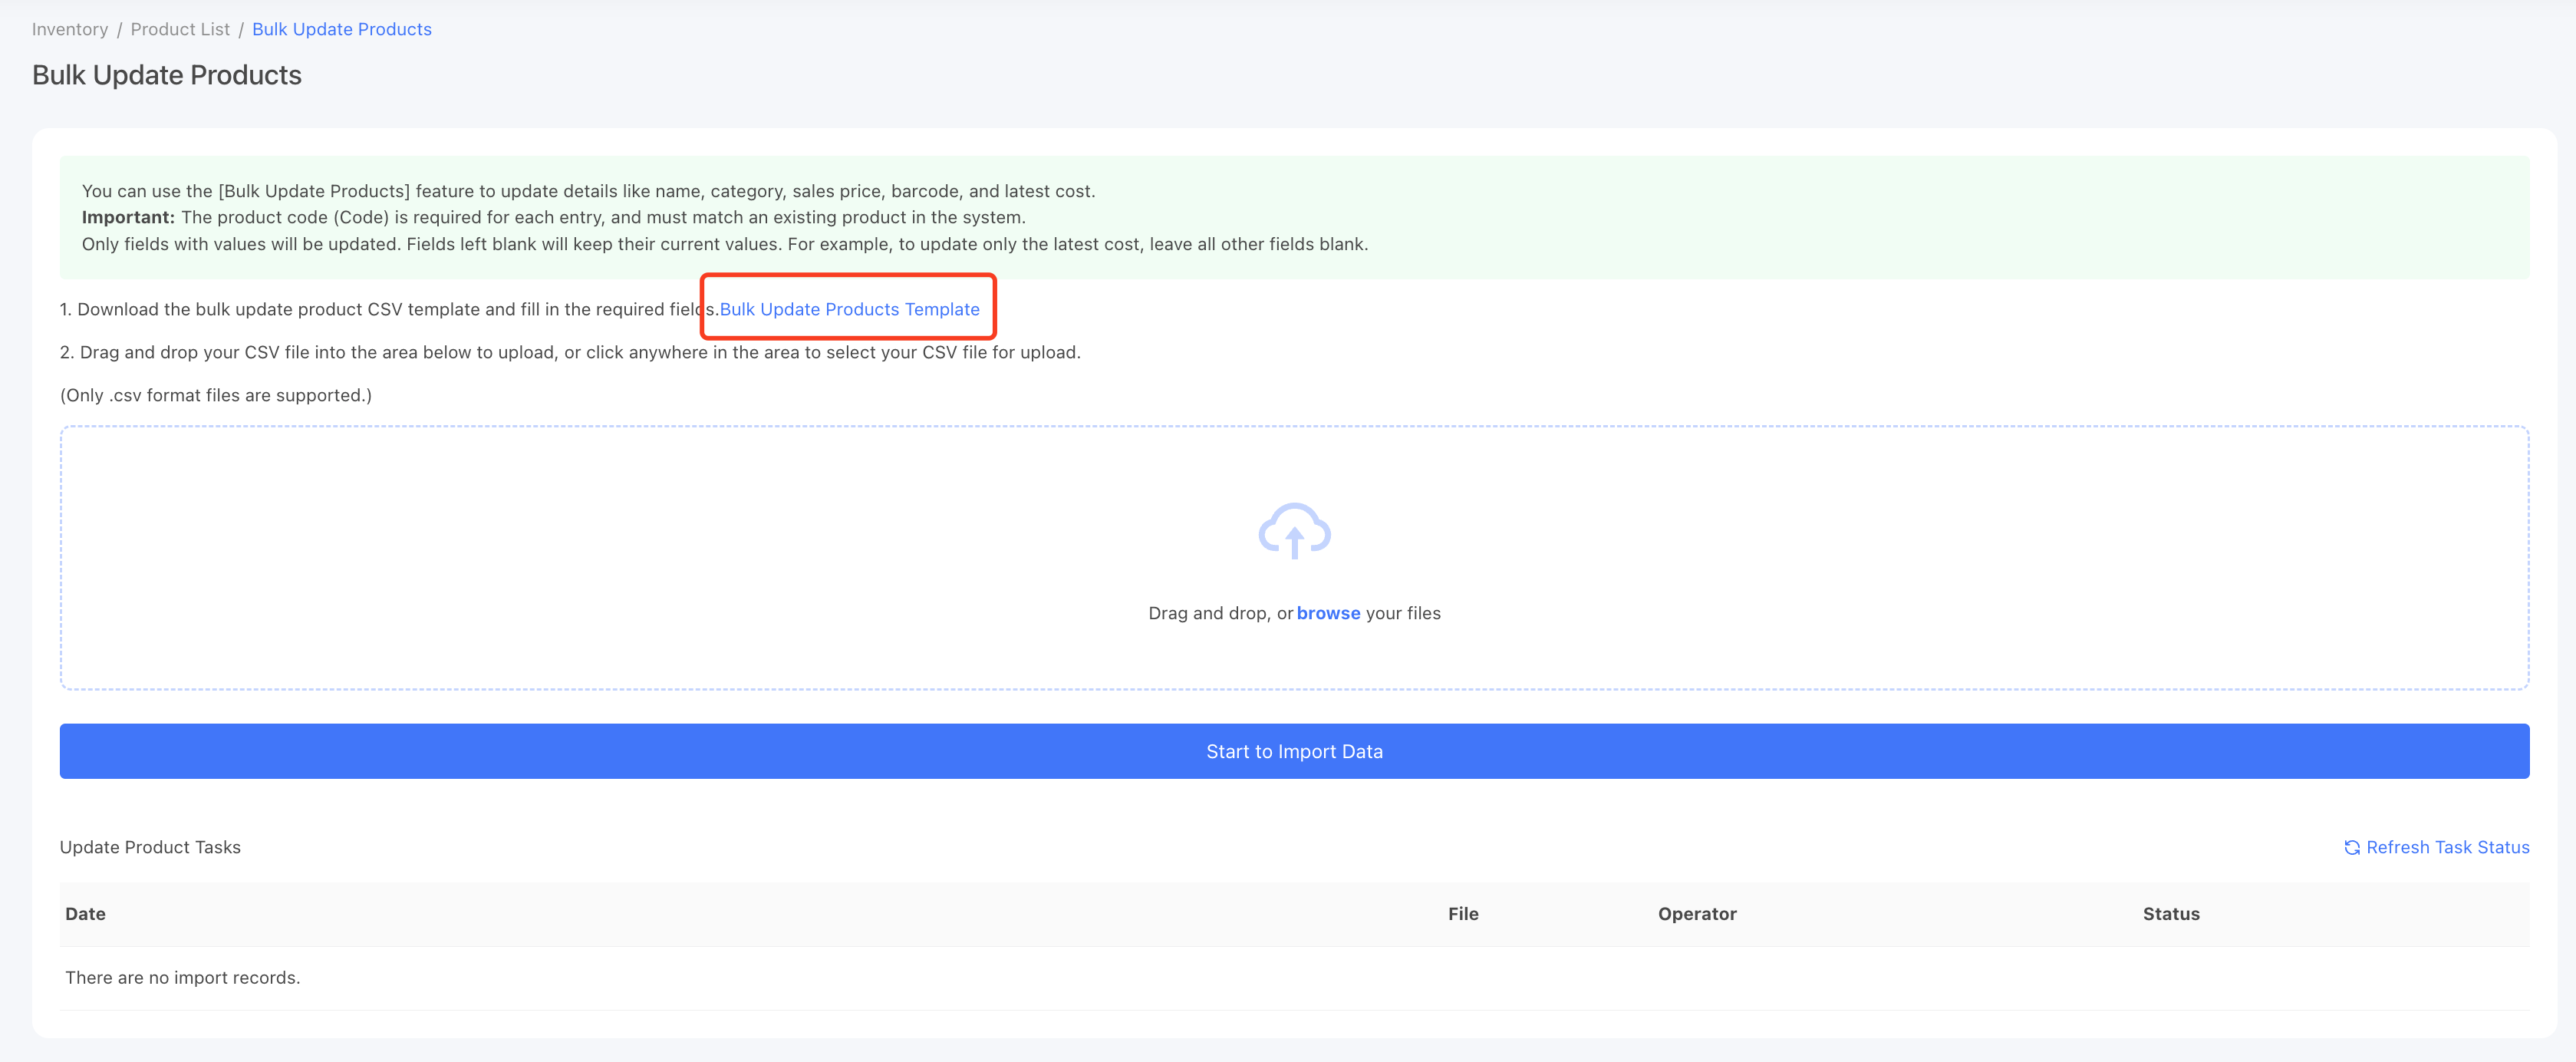
- Download the bulk update template.
- Open the template, fill in only the Code* and Barcode columns, and save the file as a CSV.
- Back on the Update Products by Bulk page, drag the CSV file to the upload field to upload it.

That's it — once a product has a barcode saved, it can be found by scanning.