Overview
Once your products have barcodes saved, you can scan them to add products to a transaction instead of searching for each one by hand. This works the same way across the transactions you use every day — purchases, sales, stock adjustments, transfers, and stock counts.
Before you start, make sure your scanner is connected and your products have barcodes saved. If a product has no barcode, scanning won't find it — you'll need to add it first.
How scanning works in a transaction
The basic action is the same everywhere in StockUnify.
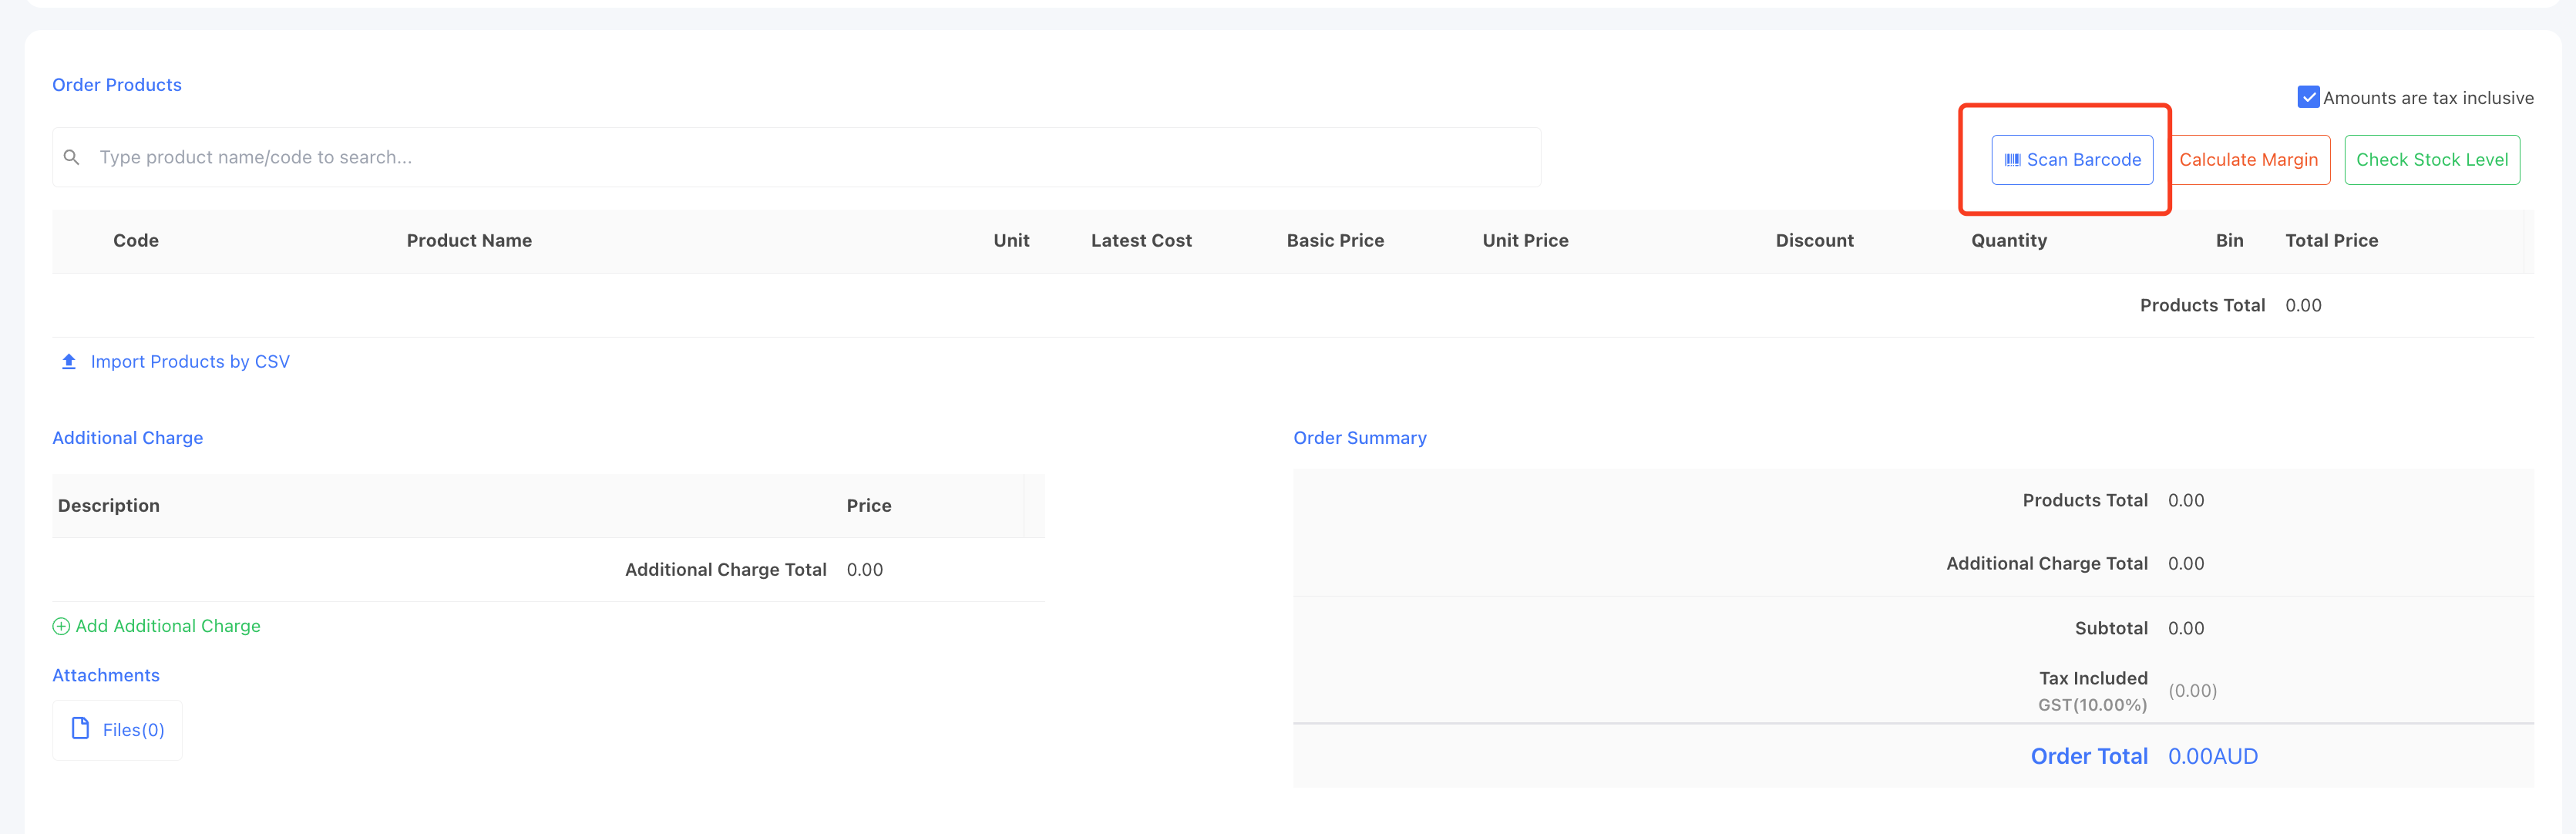
- Open or create the transaction you're working on.
- Click the [Scan Barcode] button to open the barcode scanning pop-up window.
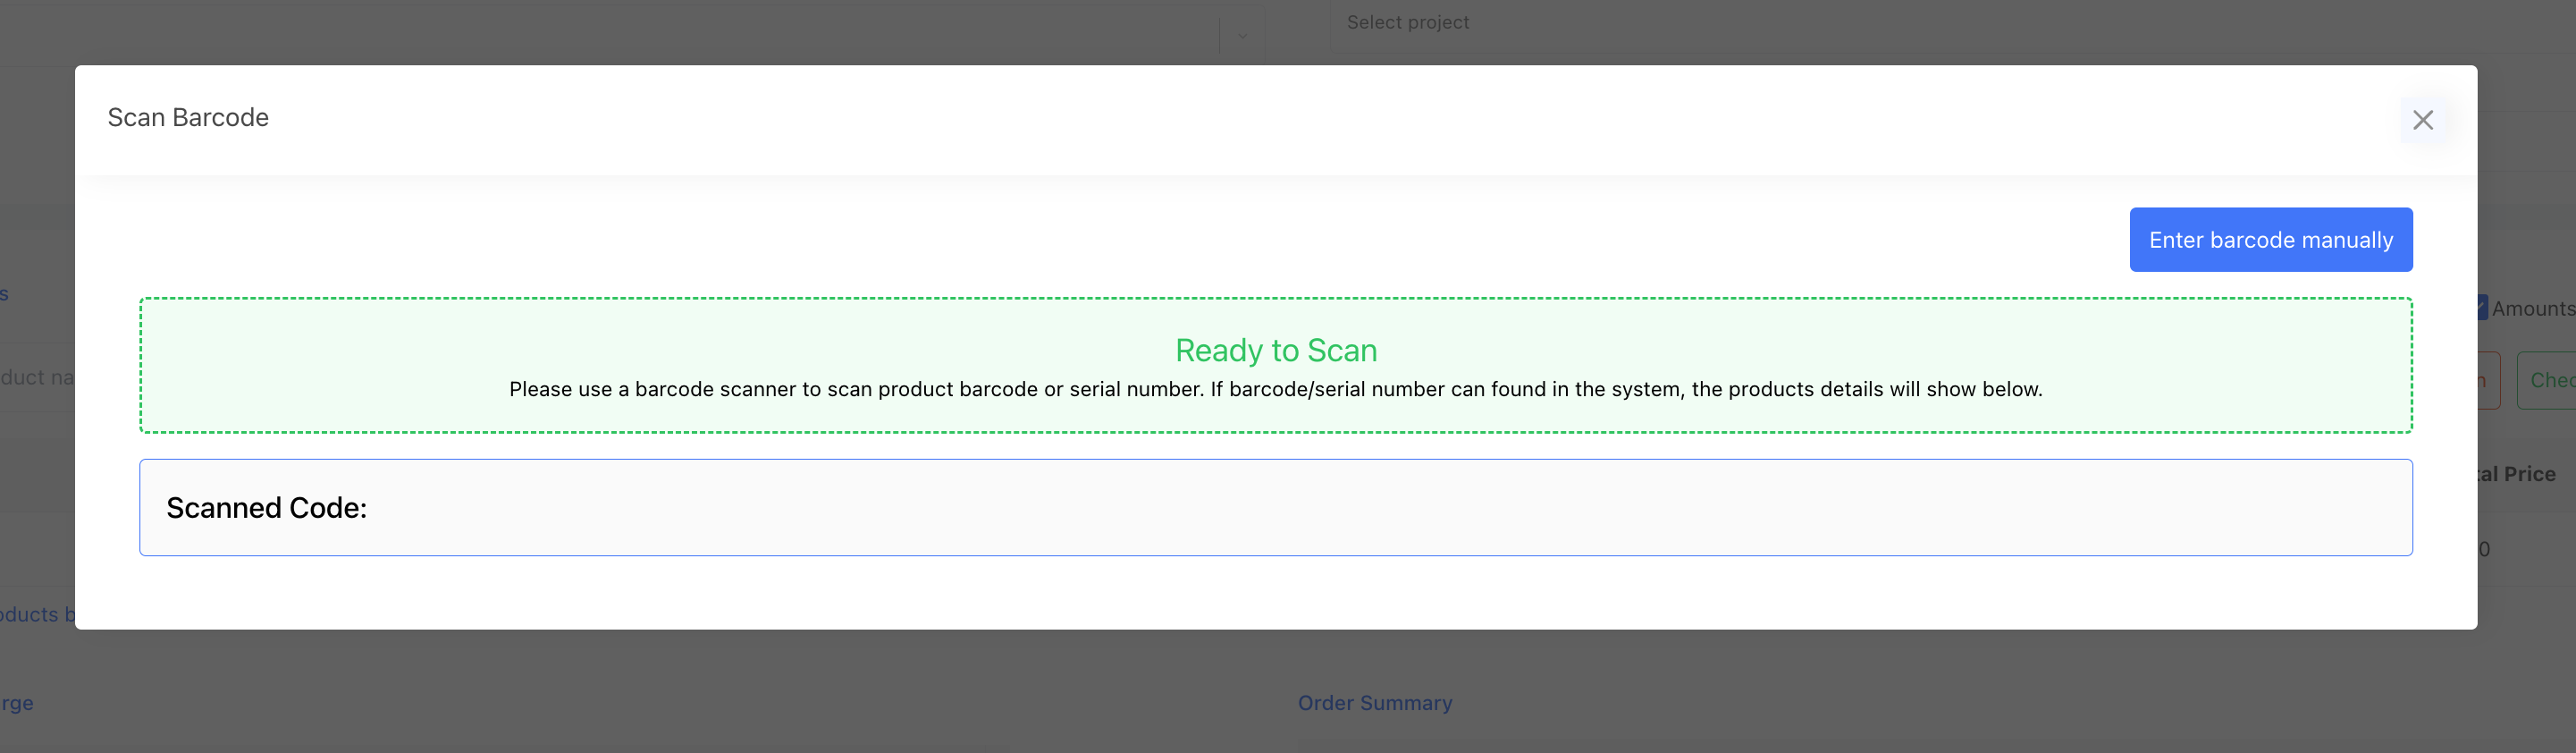
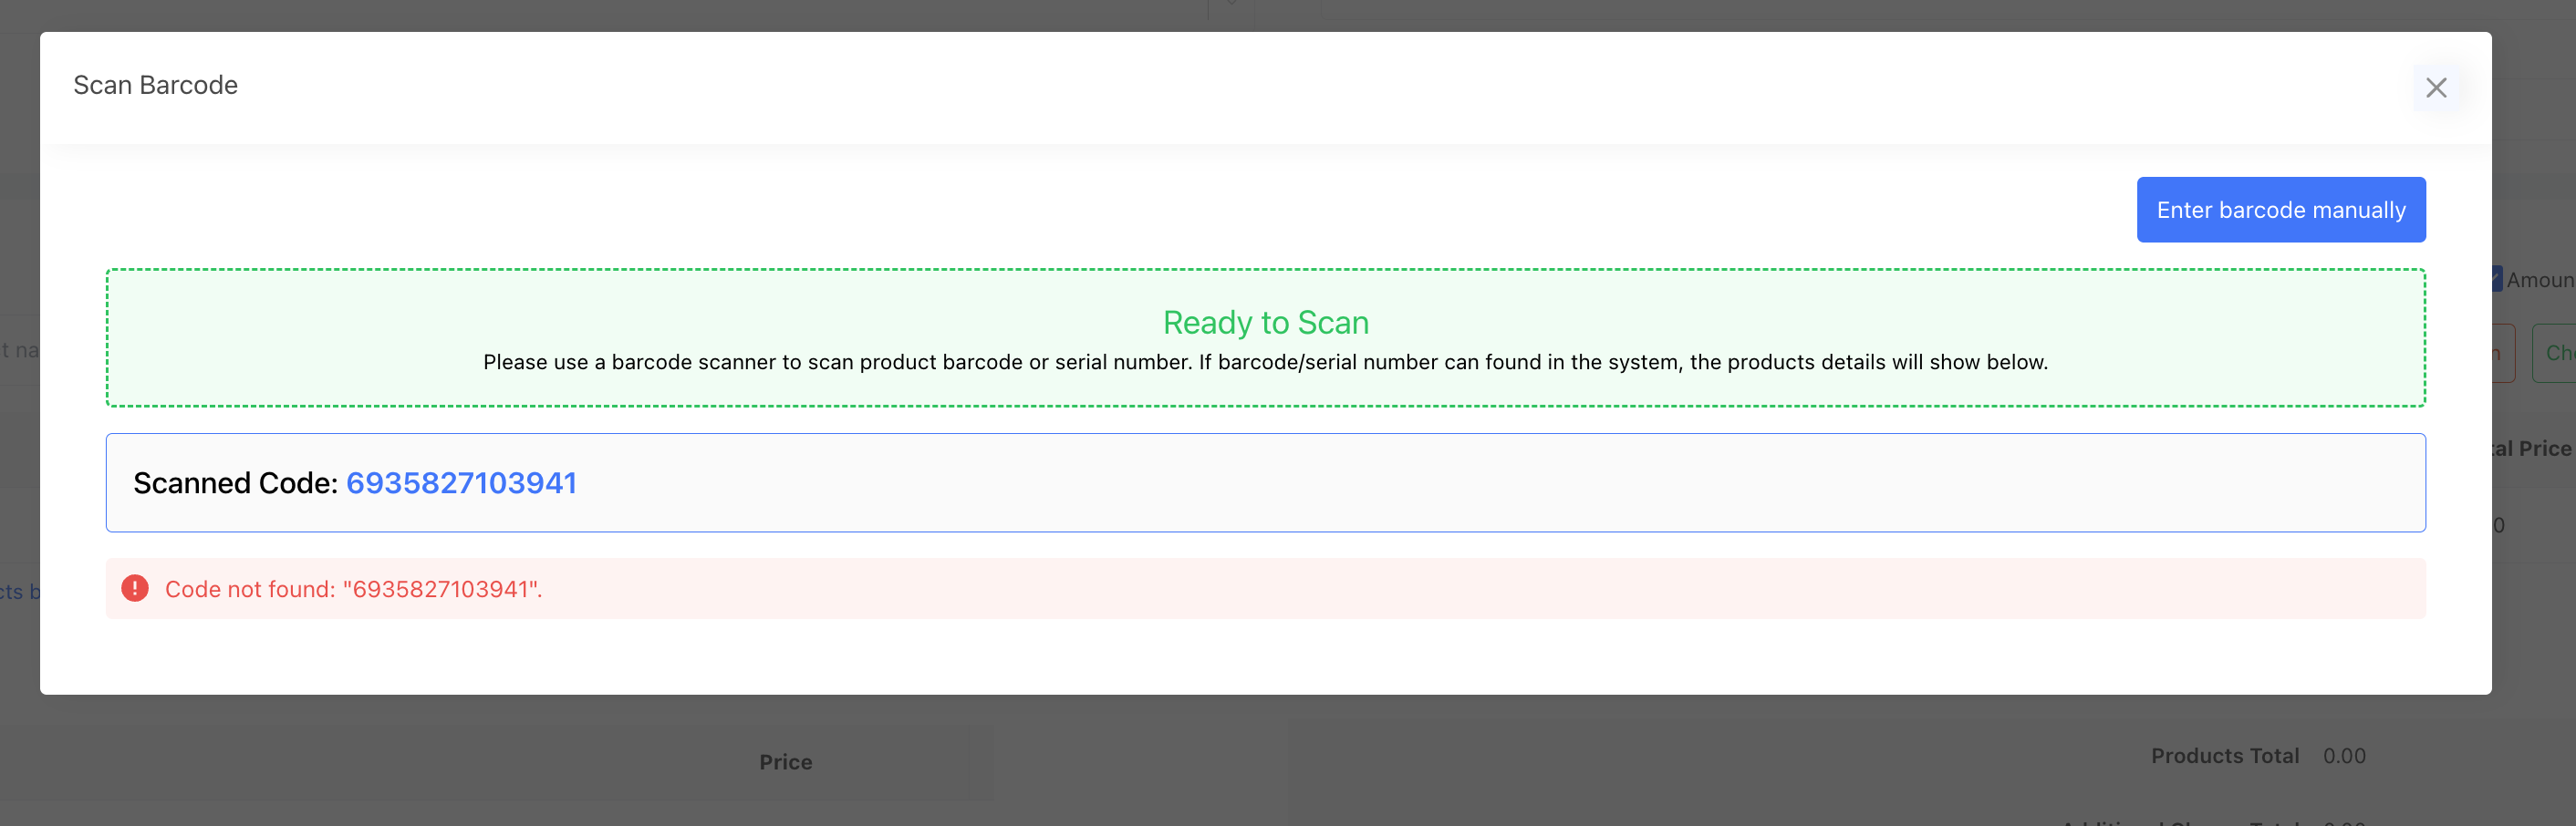
- When it shows "Ready to scan", use your barcode scanner to scan the products.
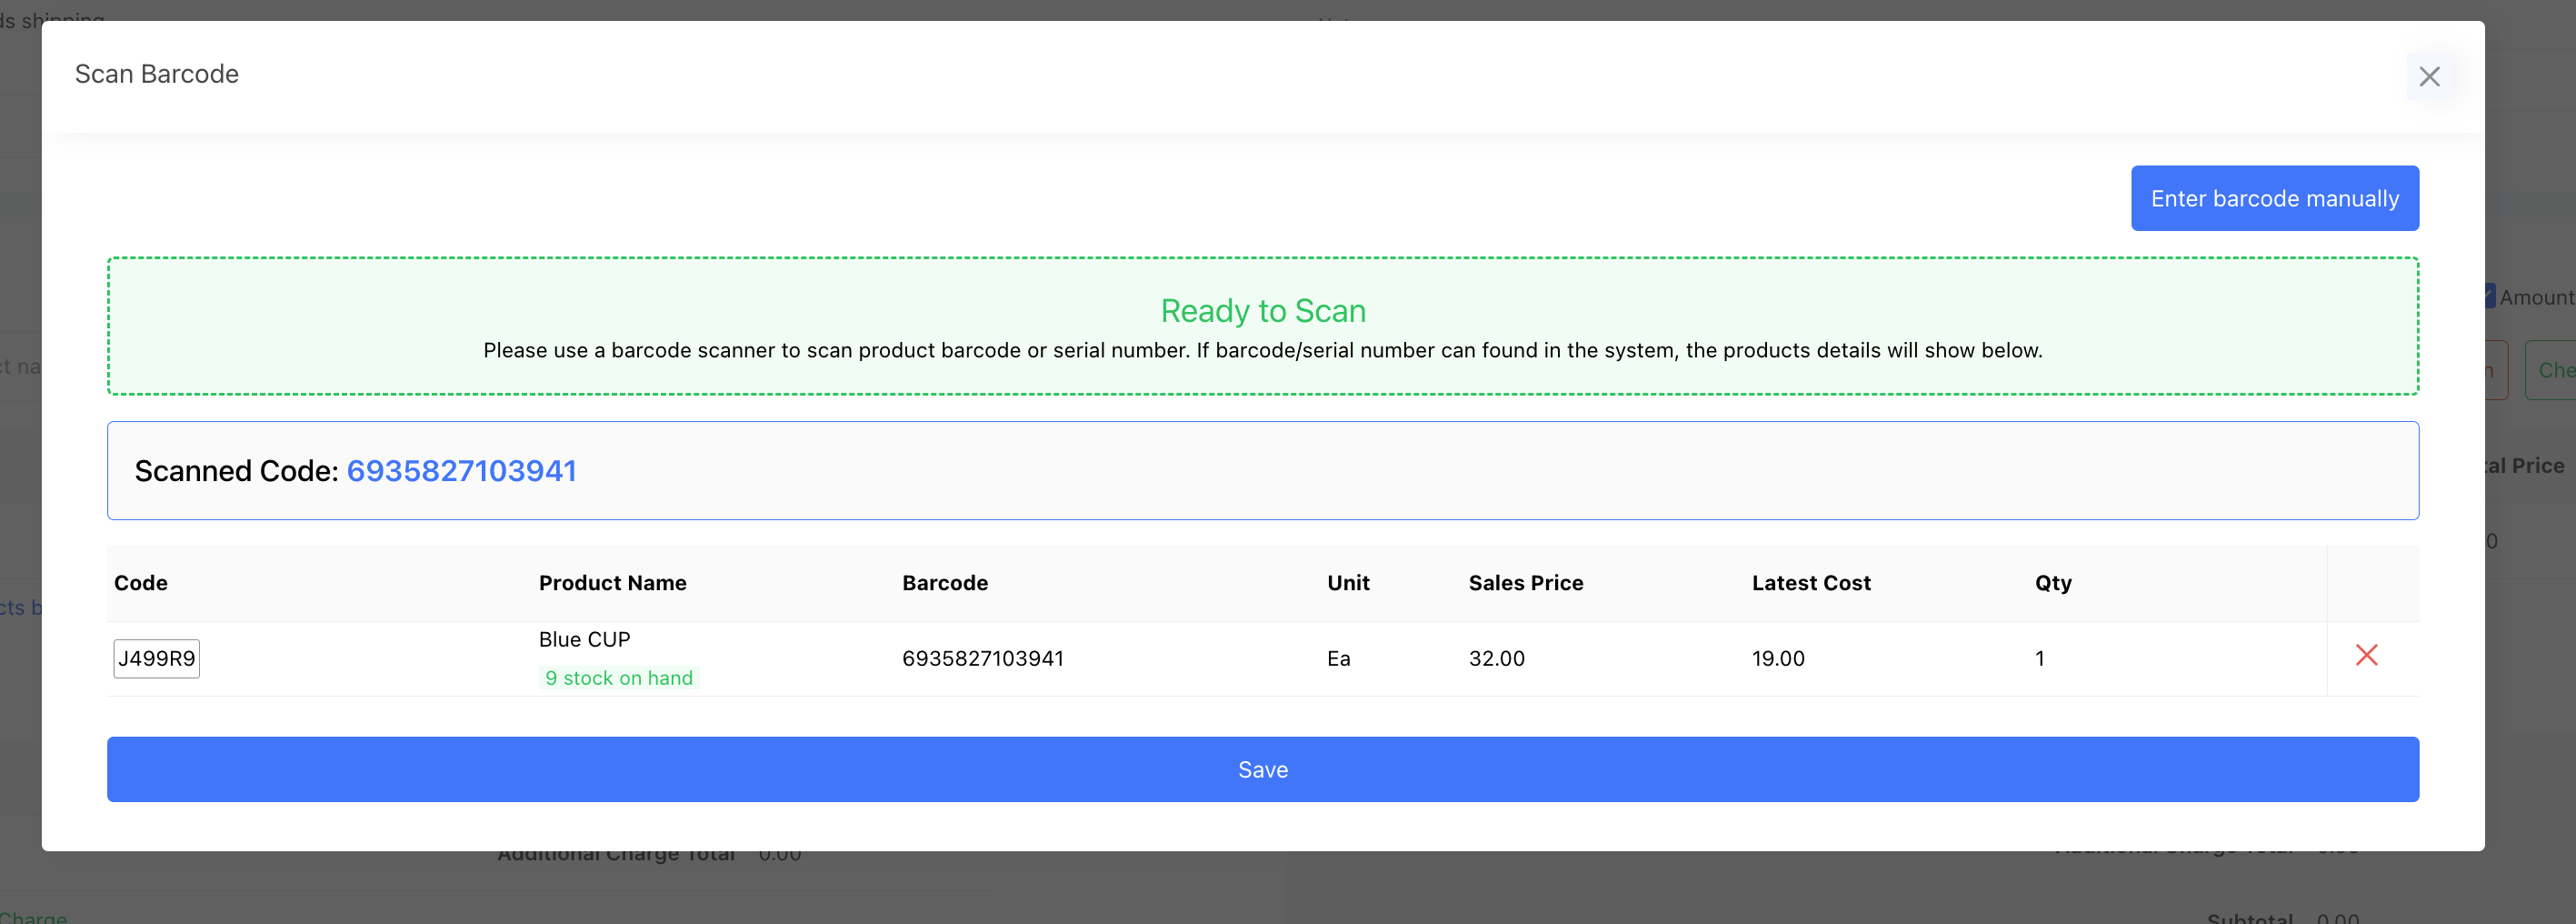
- StockUnify finds each matching product as you scan.
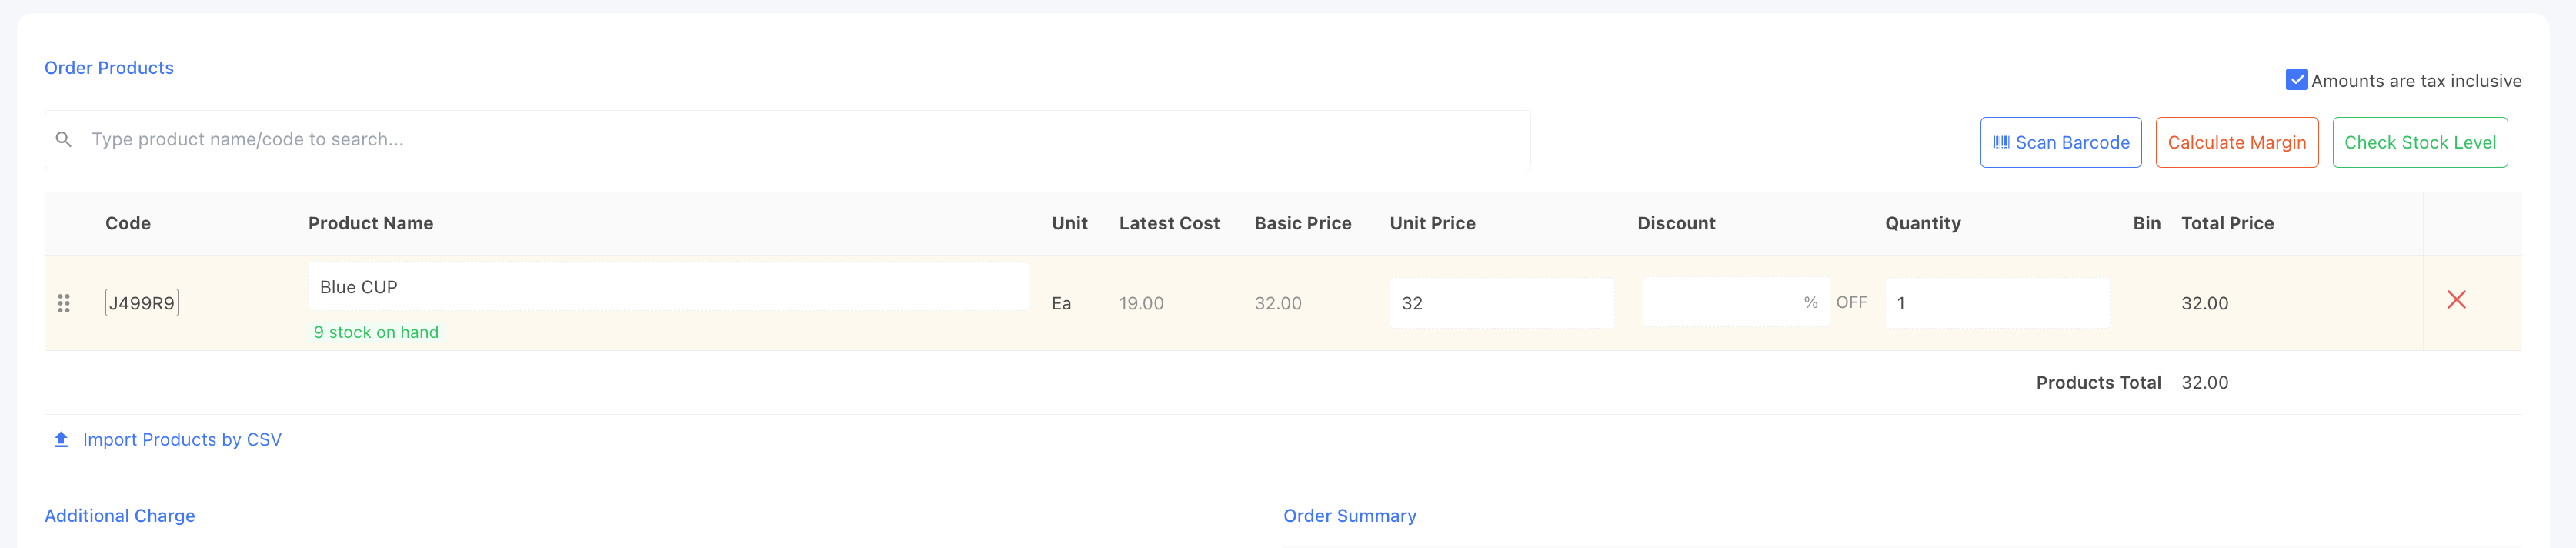
- When you've finished scanning, click [Save] in the pop-up window. The products are added to the order as line items.
Tip: Keep the scanning pop-up window open while you scan. If you close it, scanning stops.
The [Scan Barcode] button is available on quotes, sales, purchases, stock adjustments, stock transfers, and stocktakes — they all work the same way.
If a scan doesn't find a product
If a product can't be found, an error appears in the scanning window. Check these first:
- The scanning pop-up window is open and showing "Ready to scan" before you scan.
- The product has a barcode saved, and it matches the code on the label.
- The scanner is connected — test it by scanning into any text field to see if the number appears.