Overview
This guide explains how to add attachments, such as PDFs and images to a purchase order at StockUnify, making it easier to keep relevant documents accessible within your order records.
Adding Attachments to a Purchase Order
When creating a new purchase order or editing an existing one, follow these steps to add attachments:
- Step 1: On the purchase order creation or editing screen, locate the file button. By default, this button will display "0 files" if no attachments have been added.
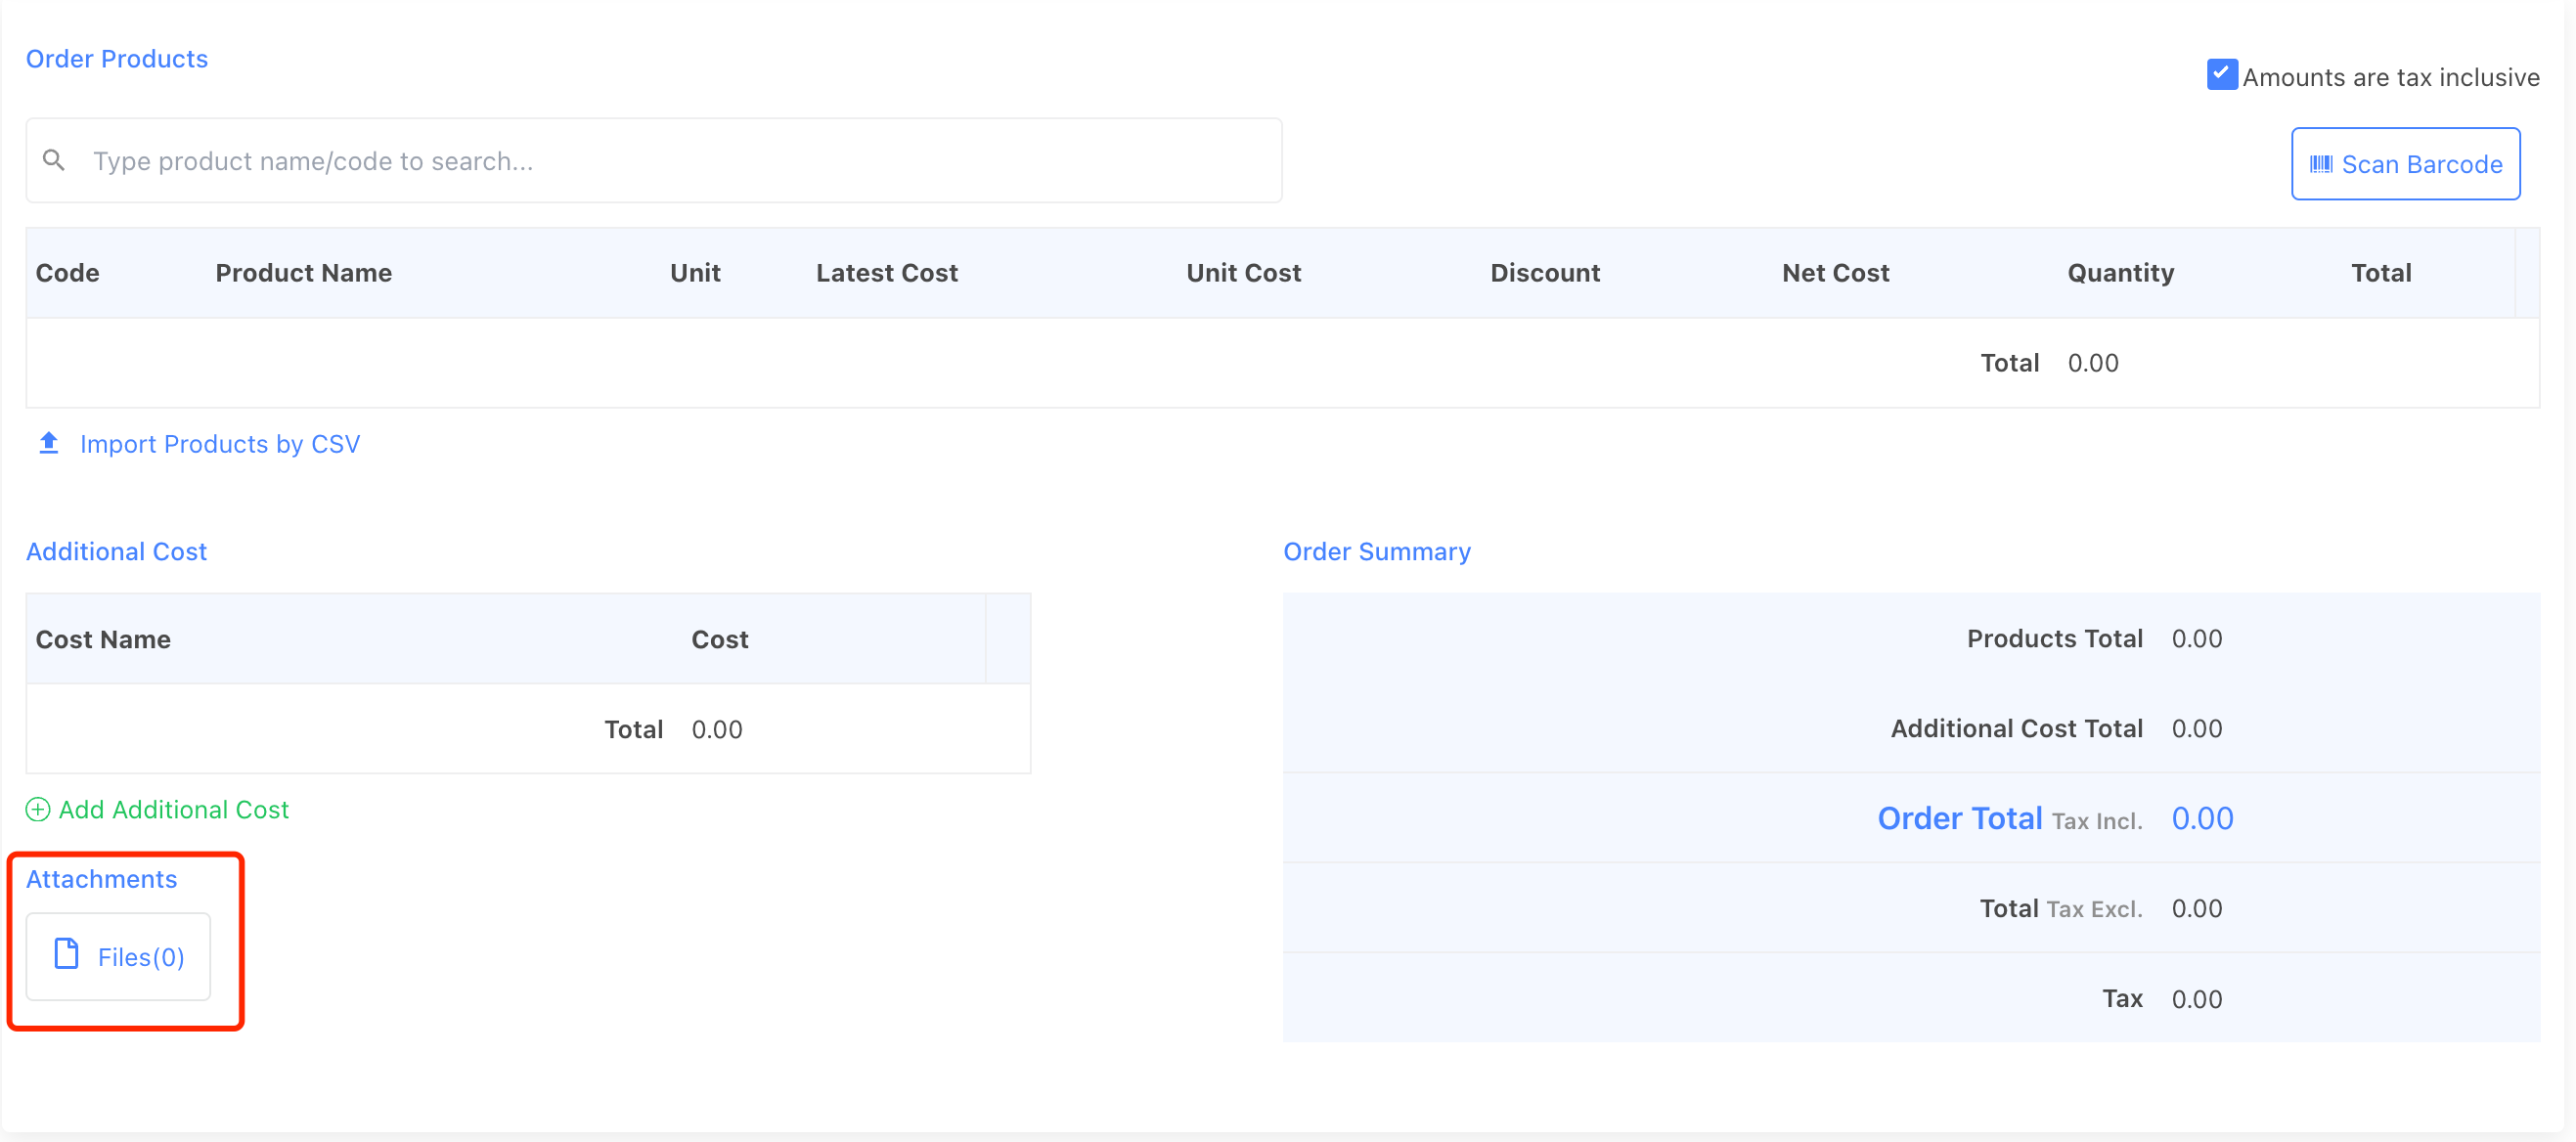
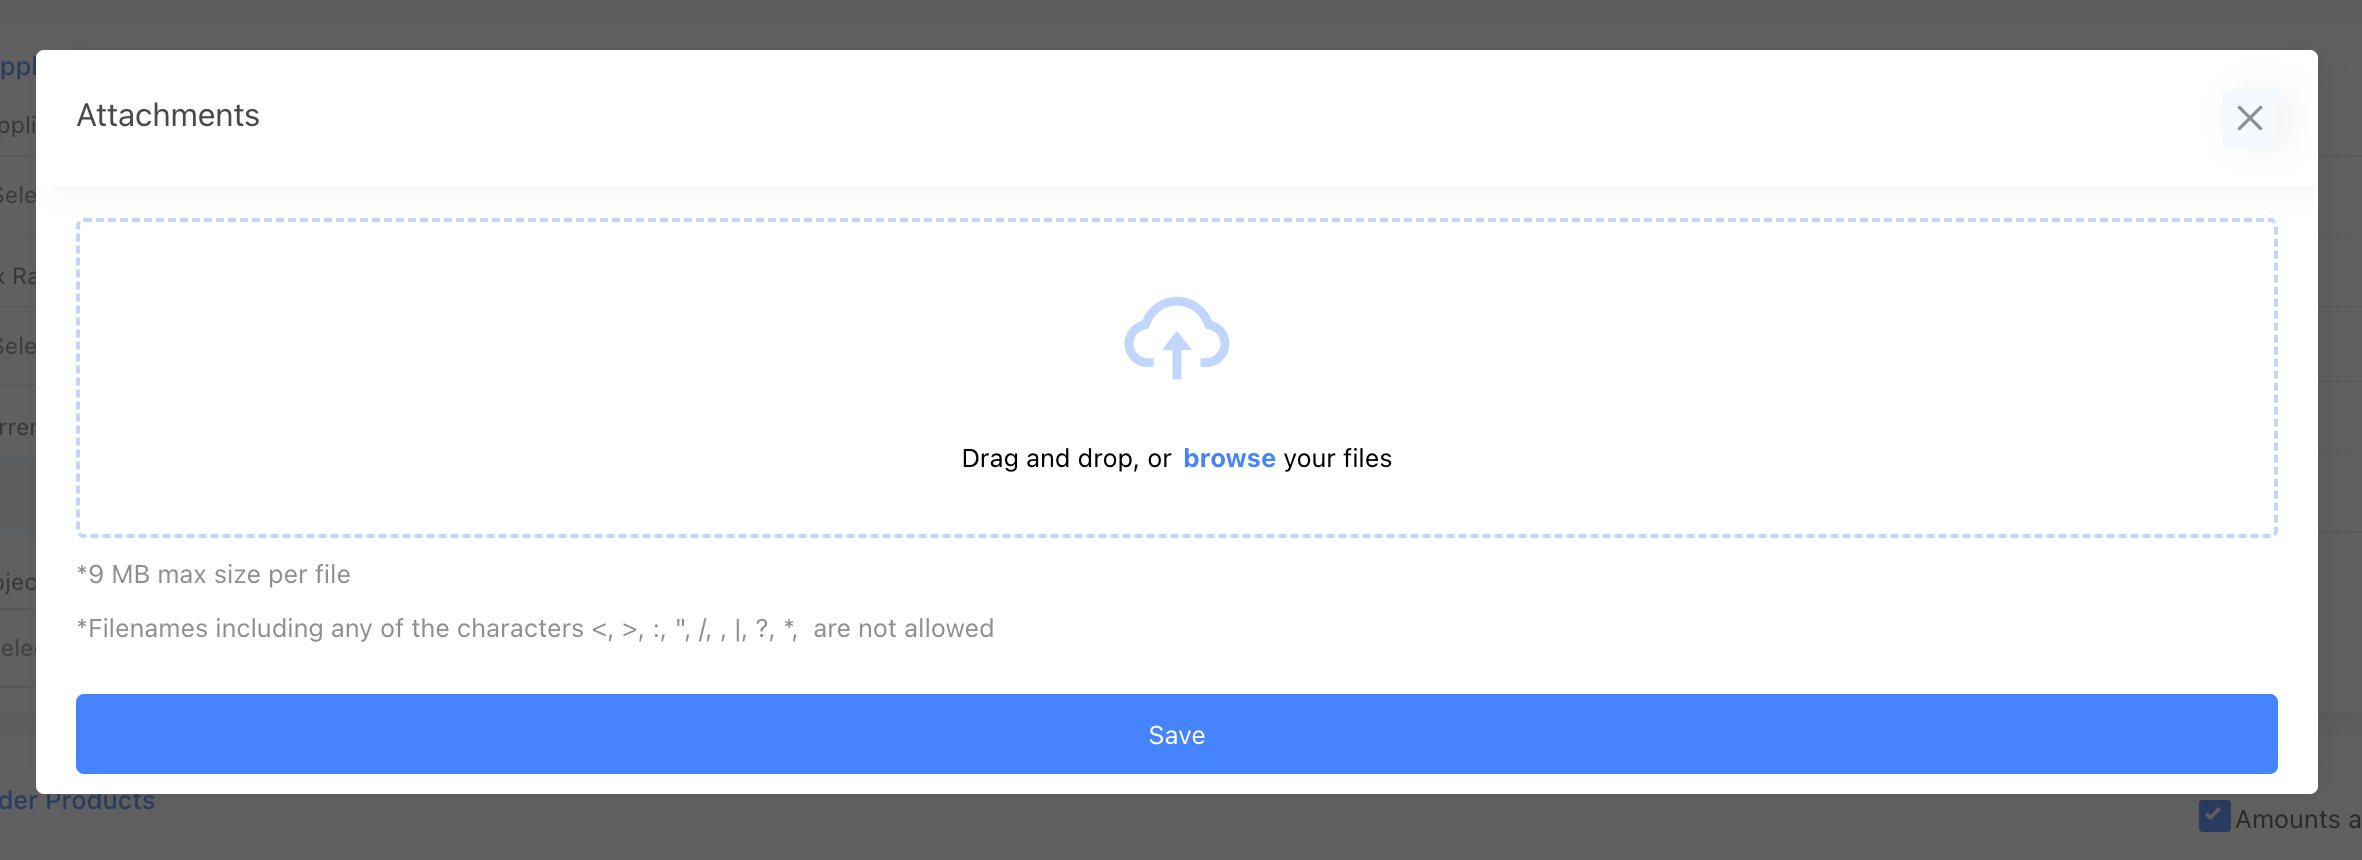
- Step 2: Click the file button to open a popup window where you can select files from your computer. Once selected, the files will be listed in the attachment section.
Notes:
- File Size Limit: Each file must be 9 MB or smaller.
- Allowed Characters in Filenames: Filenames cannot contain the following characters:
<,>,:,",/,\,|,?,*. Please rename files if necessary before uploading.
Viewing Attachments
Once attachments have been added to an order, you can view them from both the order details page and the order list page.
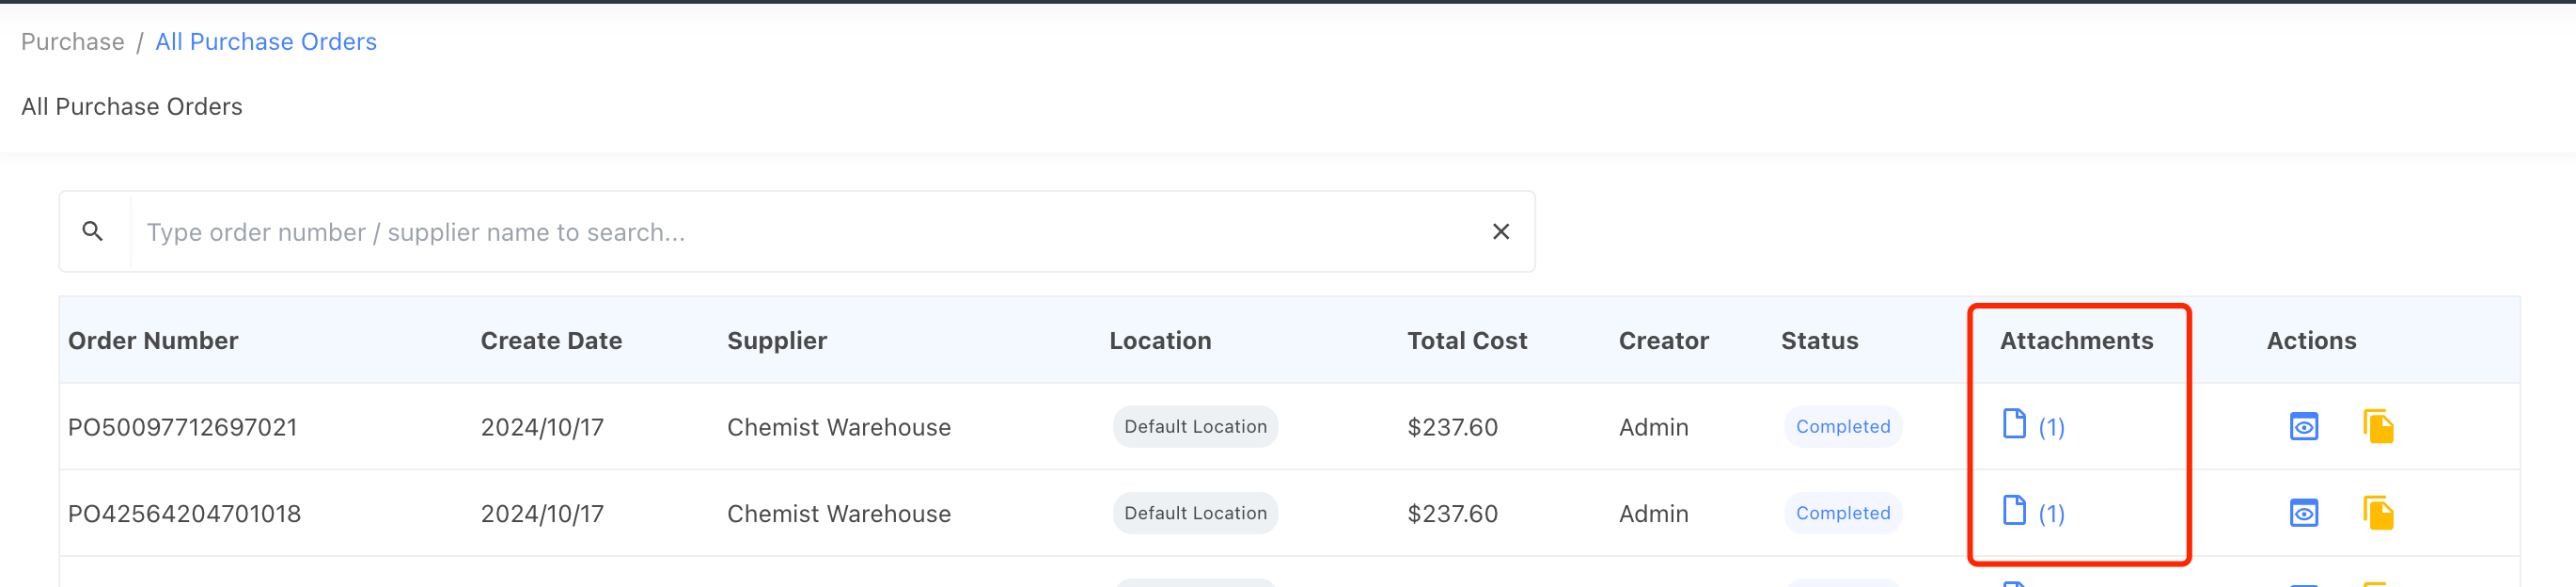
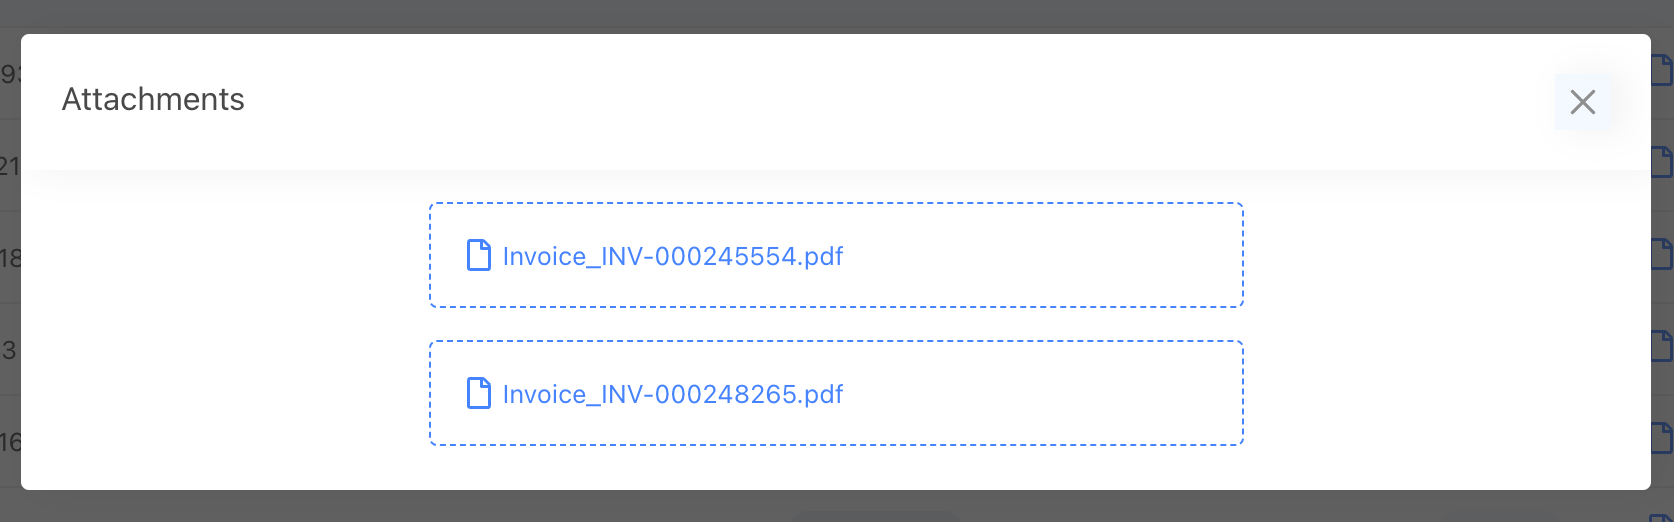
To view attachments, click the file icon on the order. This will open a popup window displaying all files attached to that order. In the popup window, hover over a file name to download it to your device.
Syncing Attachments with Xero
If your StockUnify account is connected to Xero, any attachments added to a purchase order will automatically sync to Xero.