Overview
This guide explains how to create and manage quotes in StockUnify, helping you provide customers with accurate price estimates before finalizing a sale.
Add a New Quote
From the side menu, navigate to [Sale] -> [New Quote], then you will see the New Quote screen.

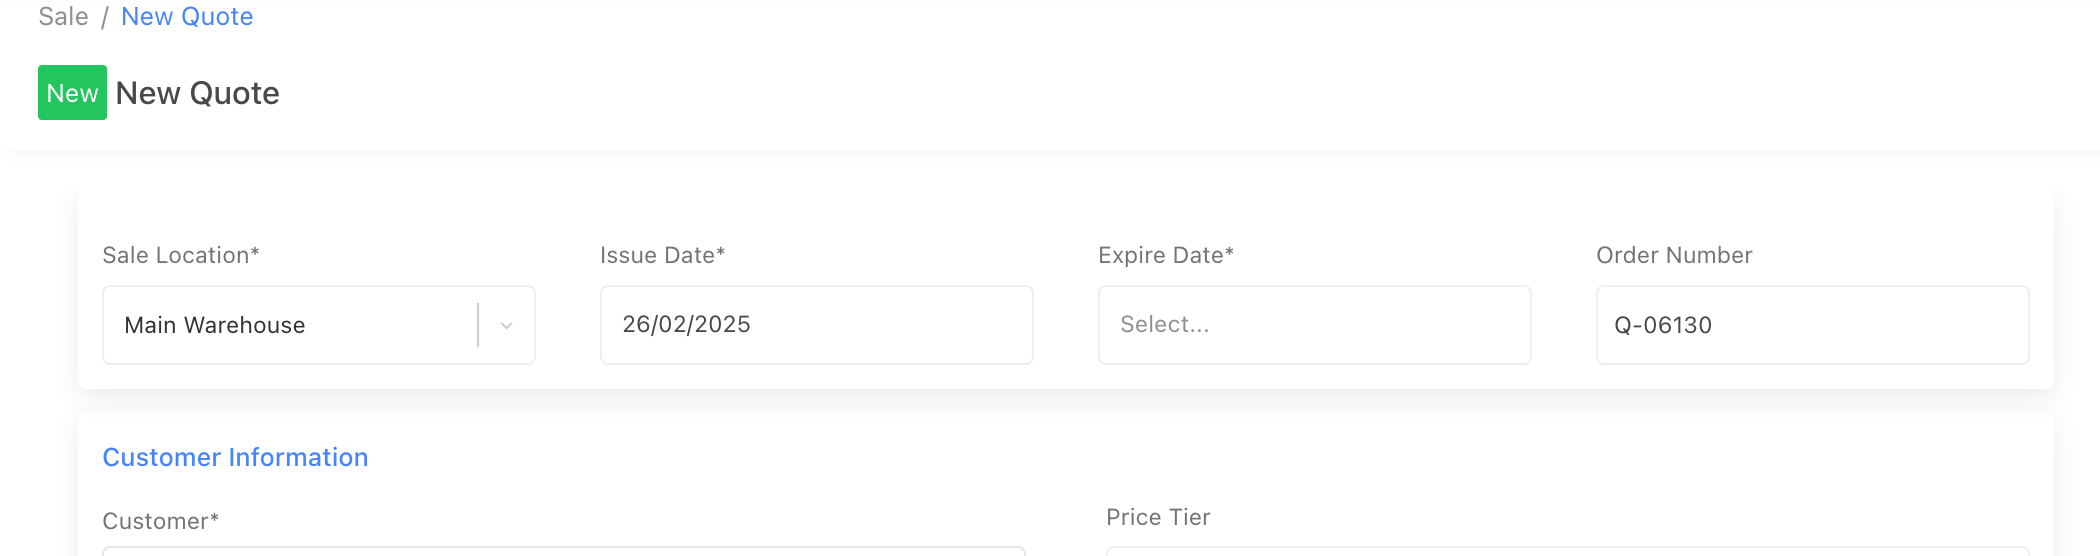
Step 1. Location, Quote Number and Date
- Location: The location field will be auto-filled with the user's default location. You can change it if needed.
- Issue Date: The current date will be auto-filled, but you can change it to another date as needed.
- Expire Date: Select an expiration date for this quote.
- Order Number: Auto-filled based on system settings. You can customize the order number pattern from [System Settings] → [Sale] tab, where you can also allow/disallow duplicate quote order numbers.
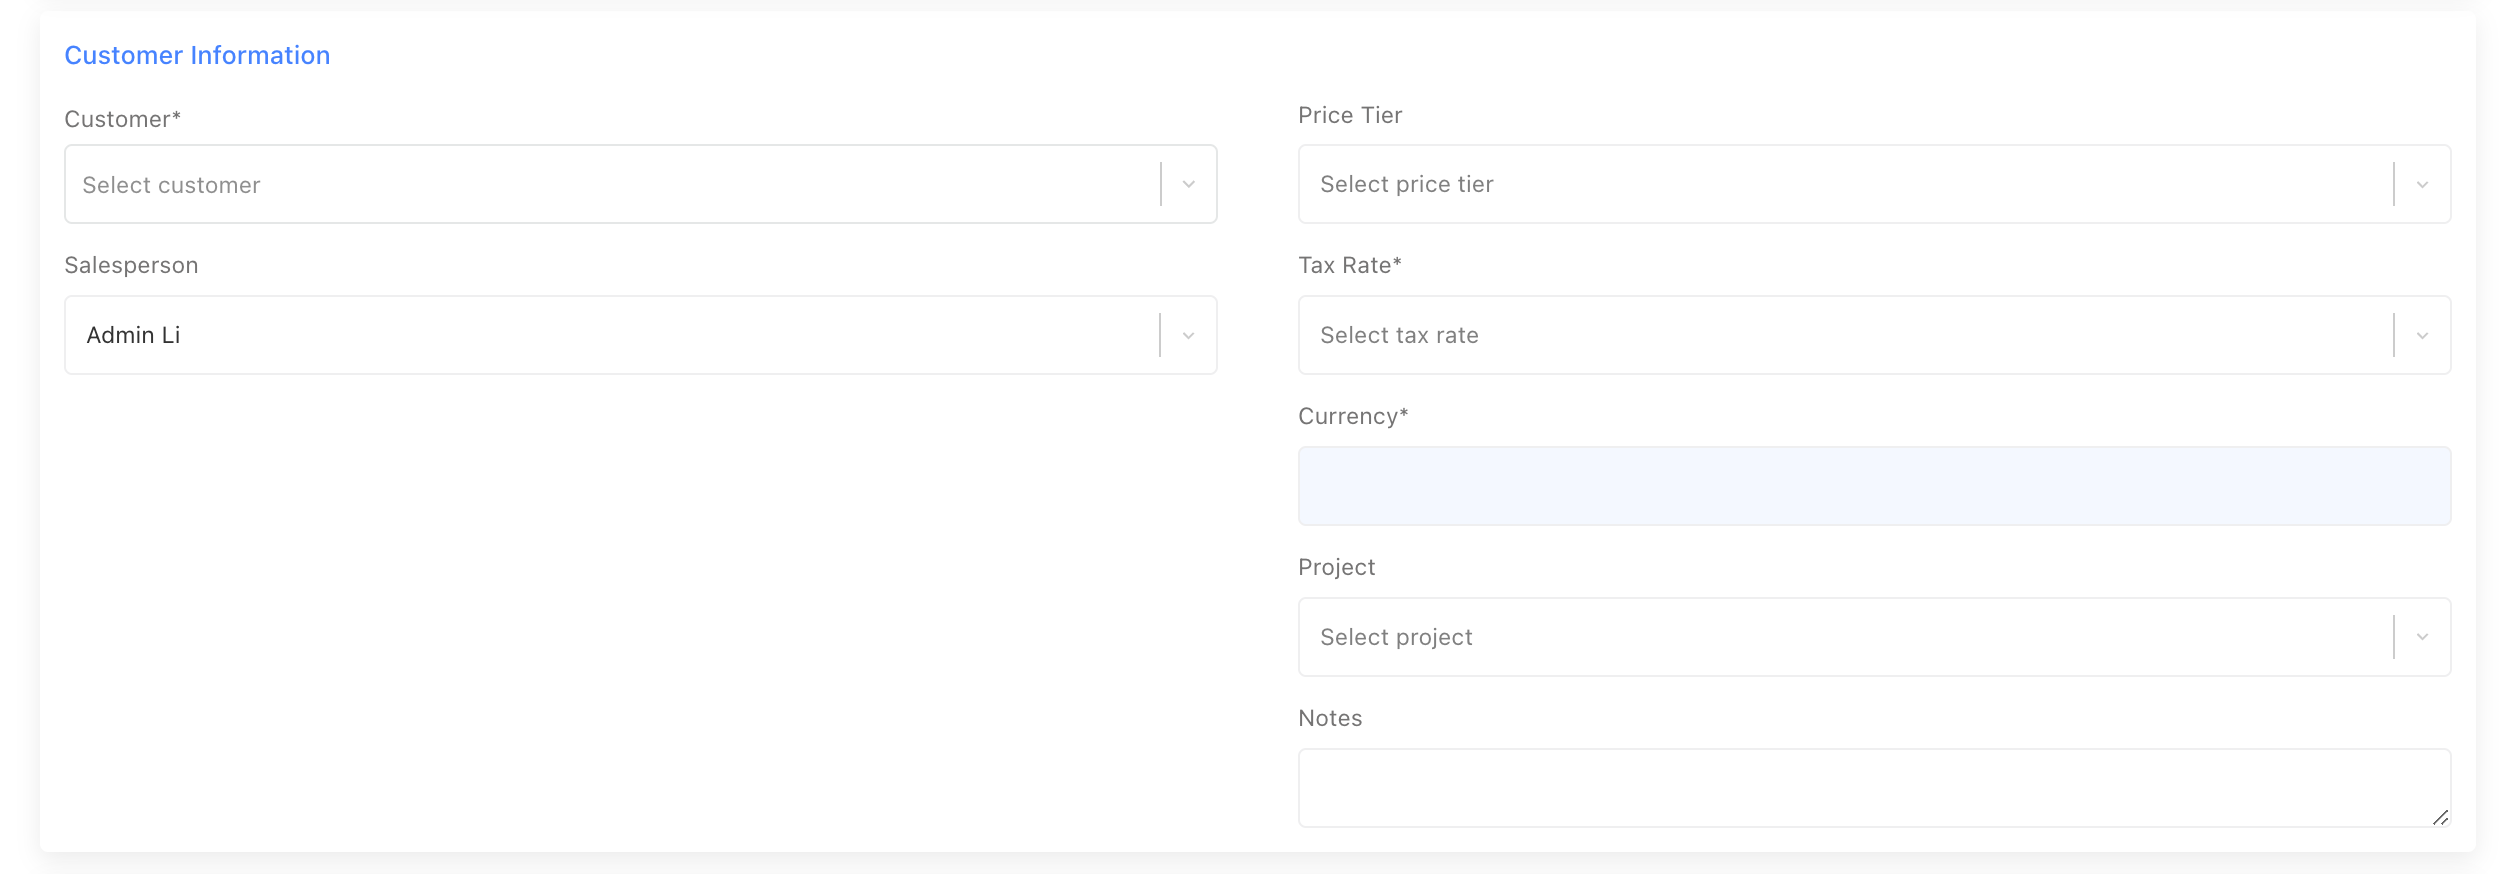
Step 2. Select a Customer
Select a customer from the dropdown menu, or type a few characters to search for the customer. If you would like to add a new customer, click the [ Add a new customer] button on the dropdown list, it will bring a pop-up window to allow you to add a new customer directly. Once selected, the tax rate, currency, and price tier fields will be auto-filled based on the customer’s preset values.
Step 3. Add Products to the sale order
Use the search field to add products to a quote. Type a few characters of the product name/code to search for products.
After you select a product, fill in the unit price, discount, and quantity fields of each row.
- The unit price is the sale price of the product. But if there is a custom price set for the product and a price tier is applied to this quote, the unit price will be applied to the tier price.
- The discount is optional.
- The quantity field supports only numbers and up to two decimals.
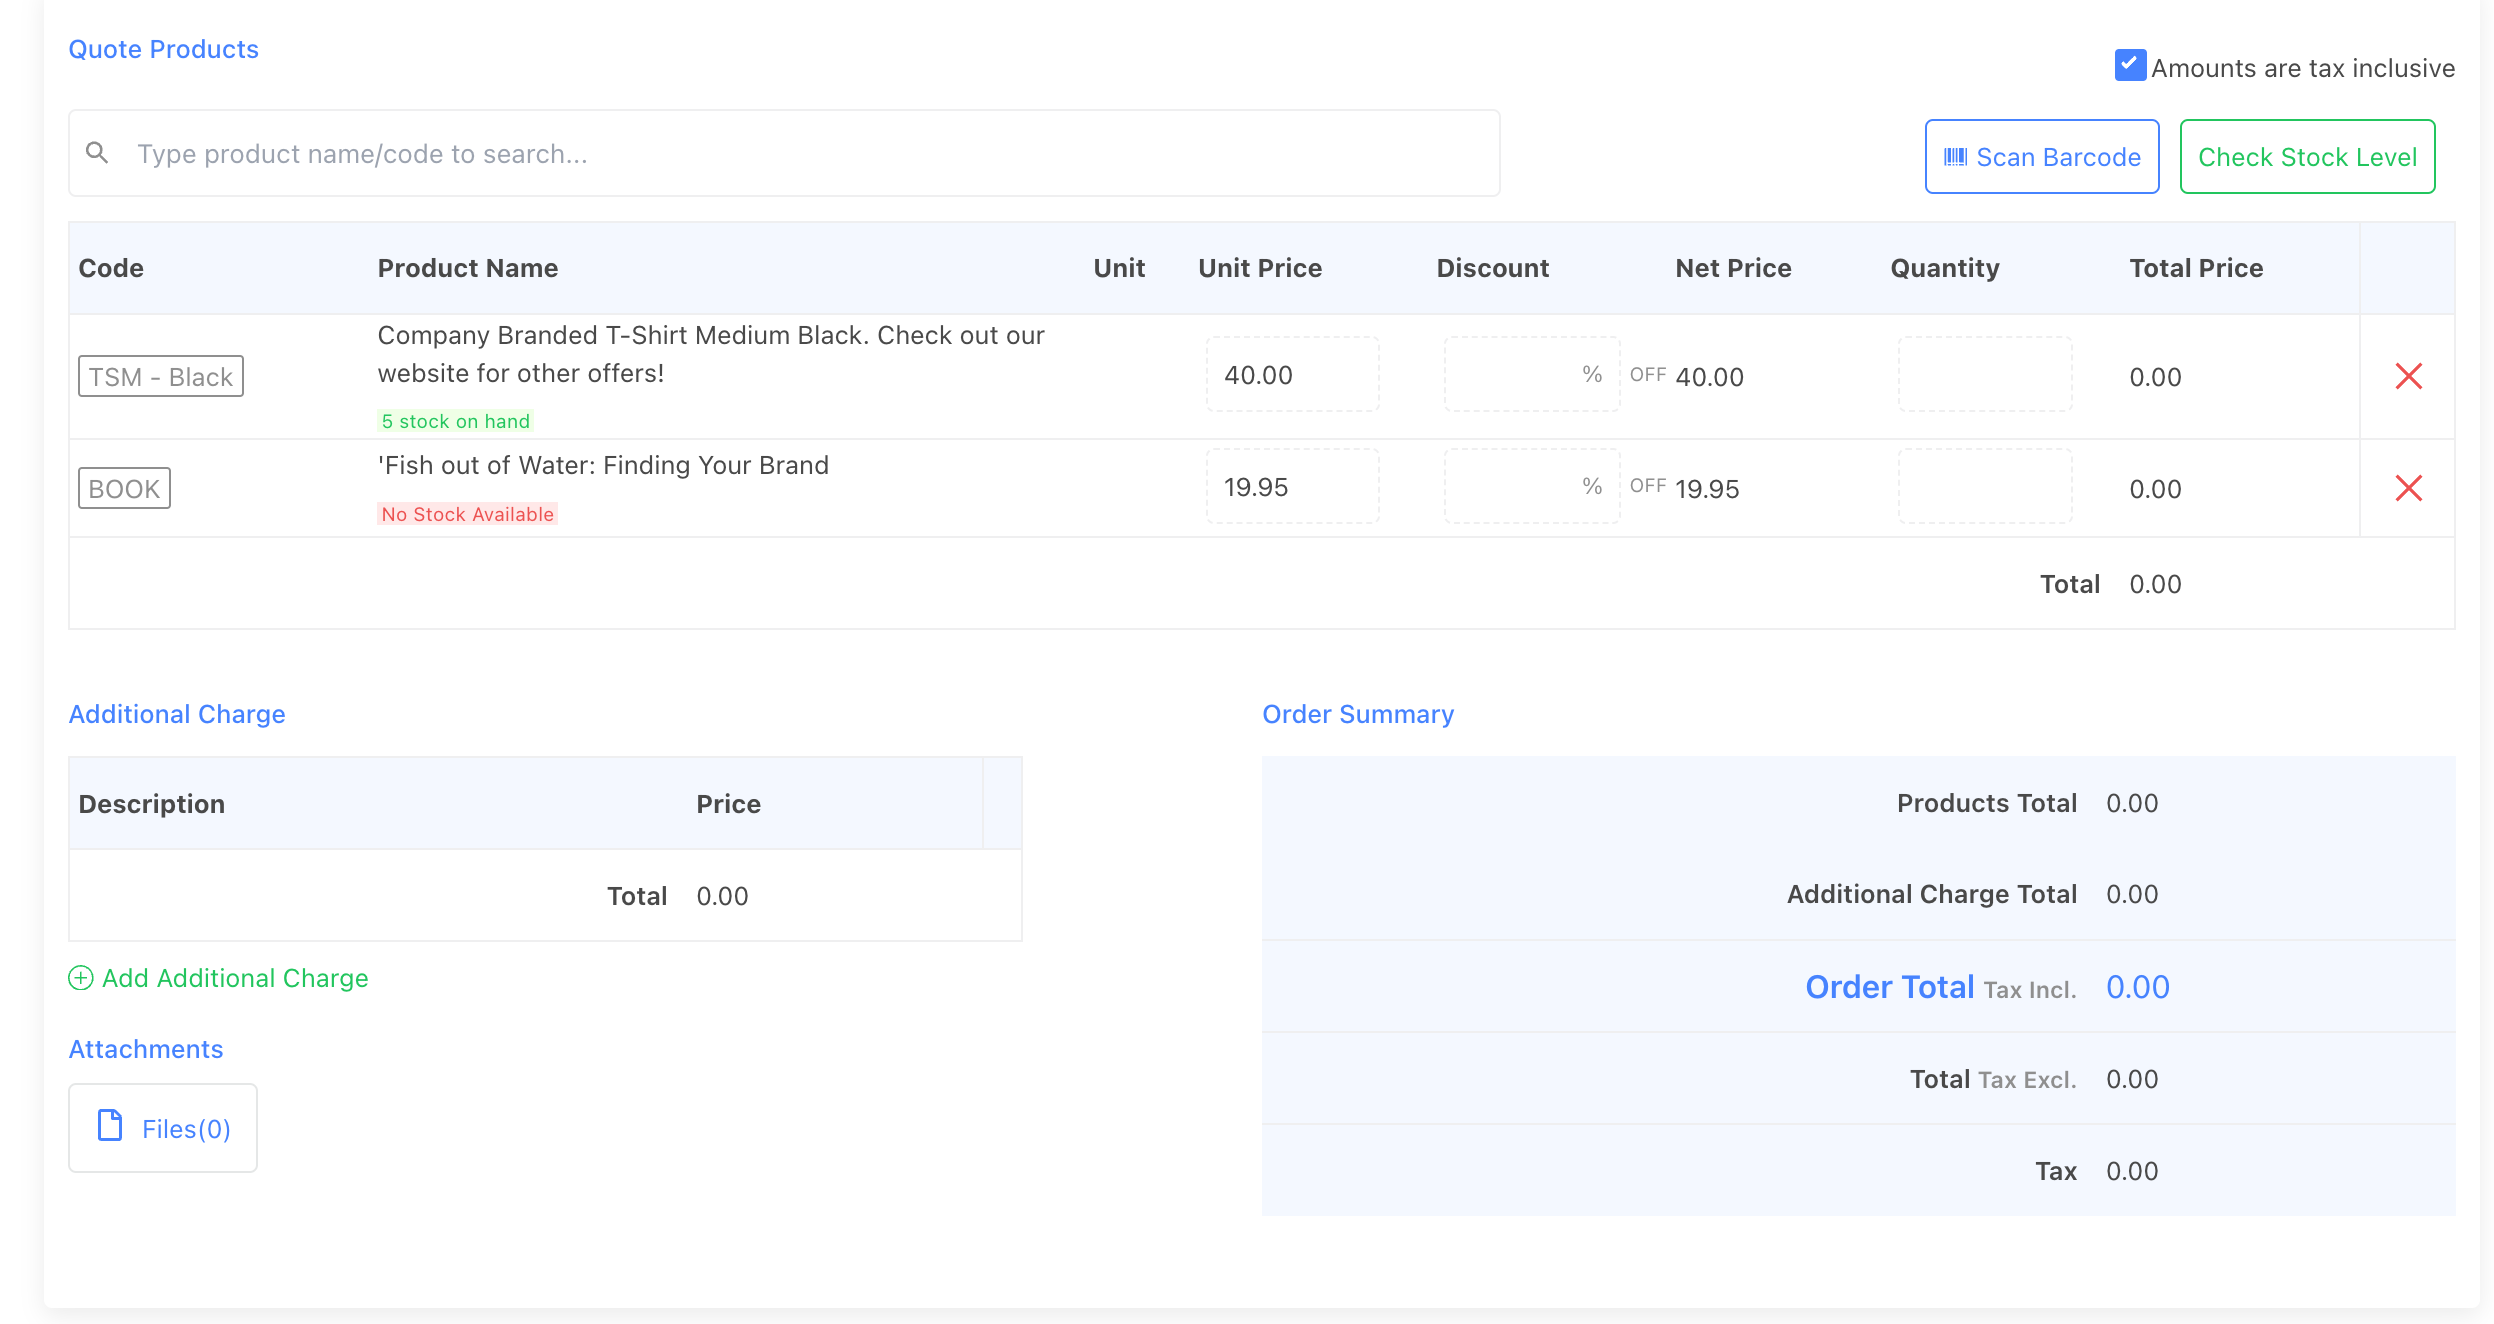
Step 4. Add additional Charges(Optional)
Click [Add Additional Charge] to include shipping, handling, or extra charges.
Step 5. Attach files (Optional)
Attach relevant documents to the quote, just like in a sales order. Attach files to sale order guide.
Step 6. Save Quote
Click [Save] – the quote will be stored in Draft status.
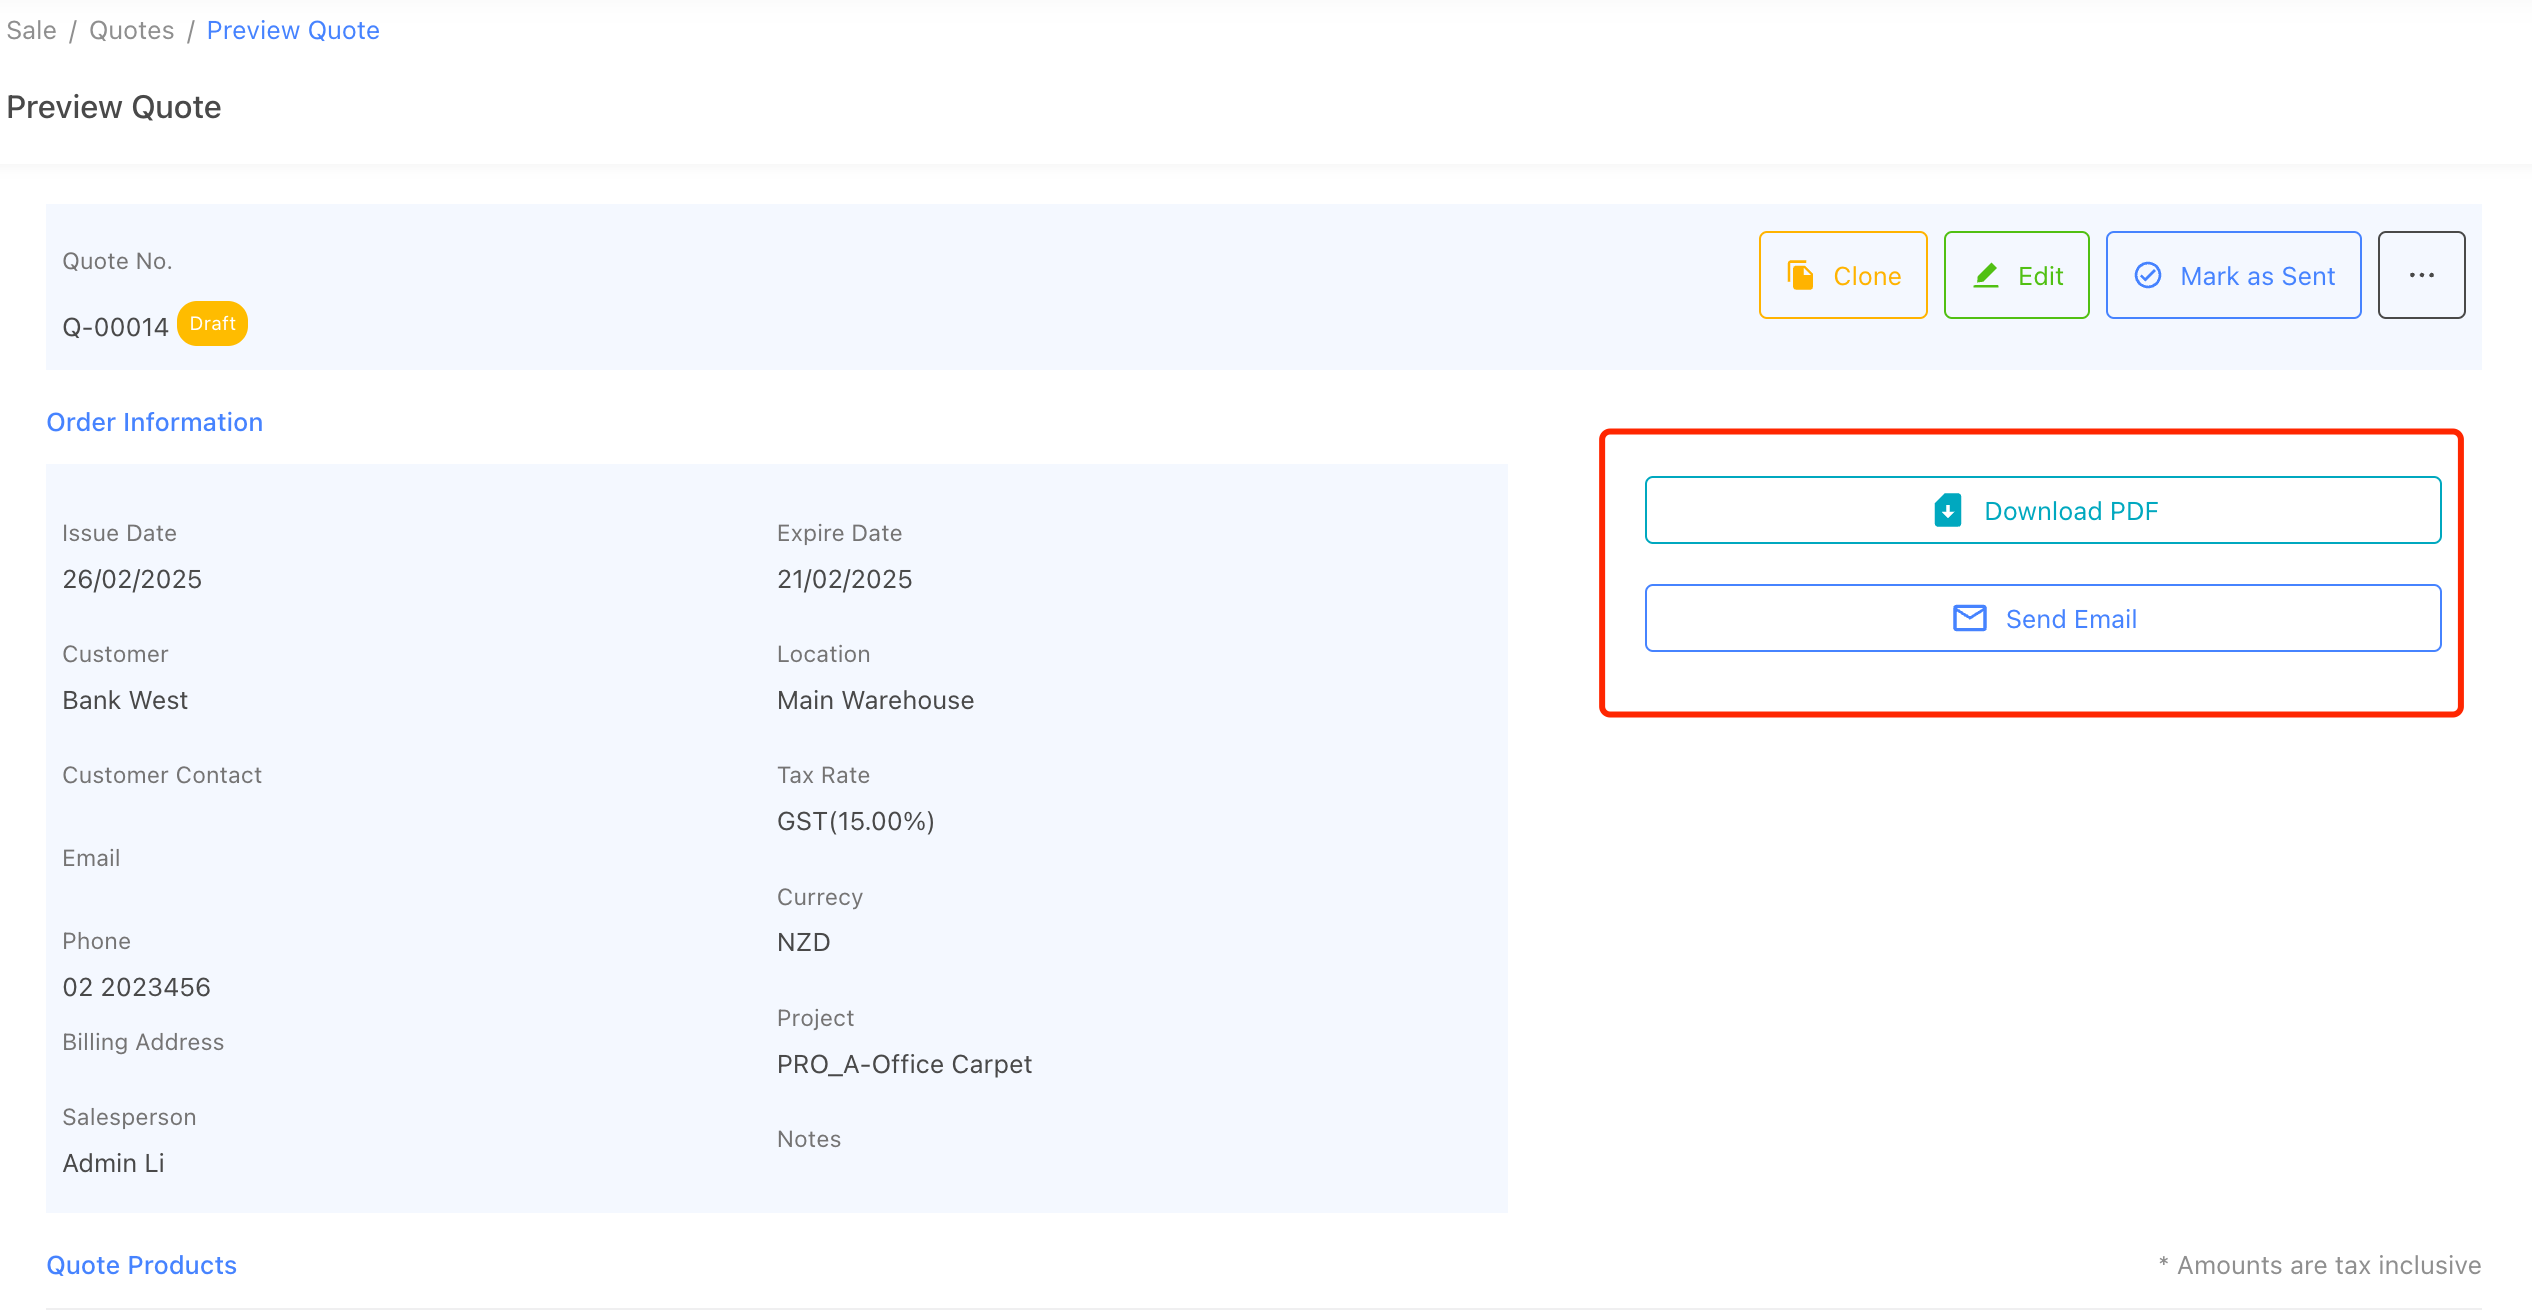
Send/Download Quote
Once the quote is created, you can send it to your customer.
- Send via email – Click [Send Email] to email the quote to the customer; You can define the email content template from the [Email Templates] settings.
- Download as PDF – Click [Download PDF] to generate a branded PDF document. You can define the PDF design under [Settings] → [Export PDF Templates].
Manage Quote
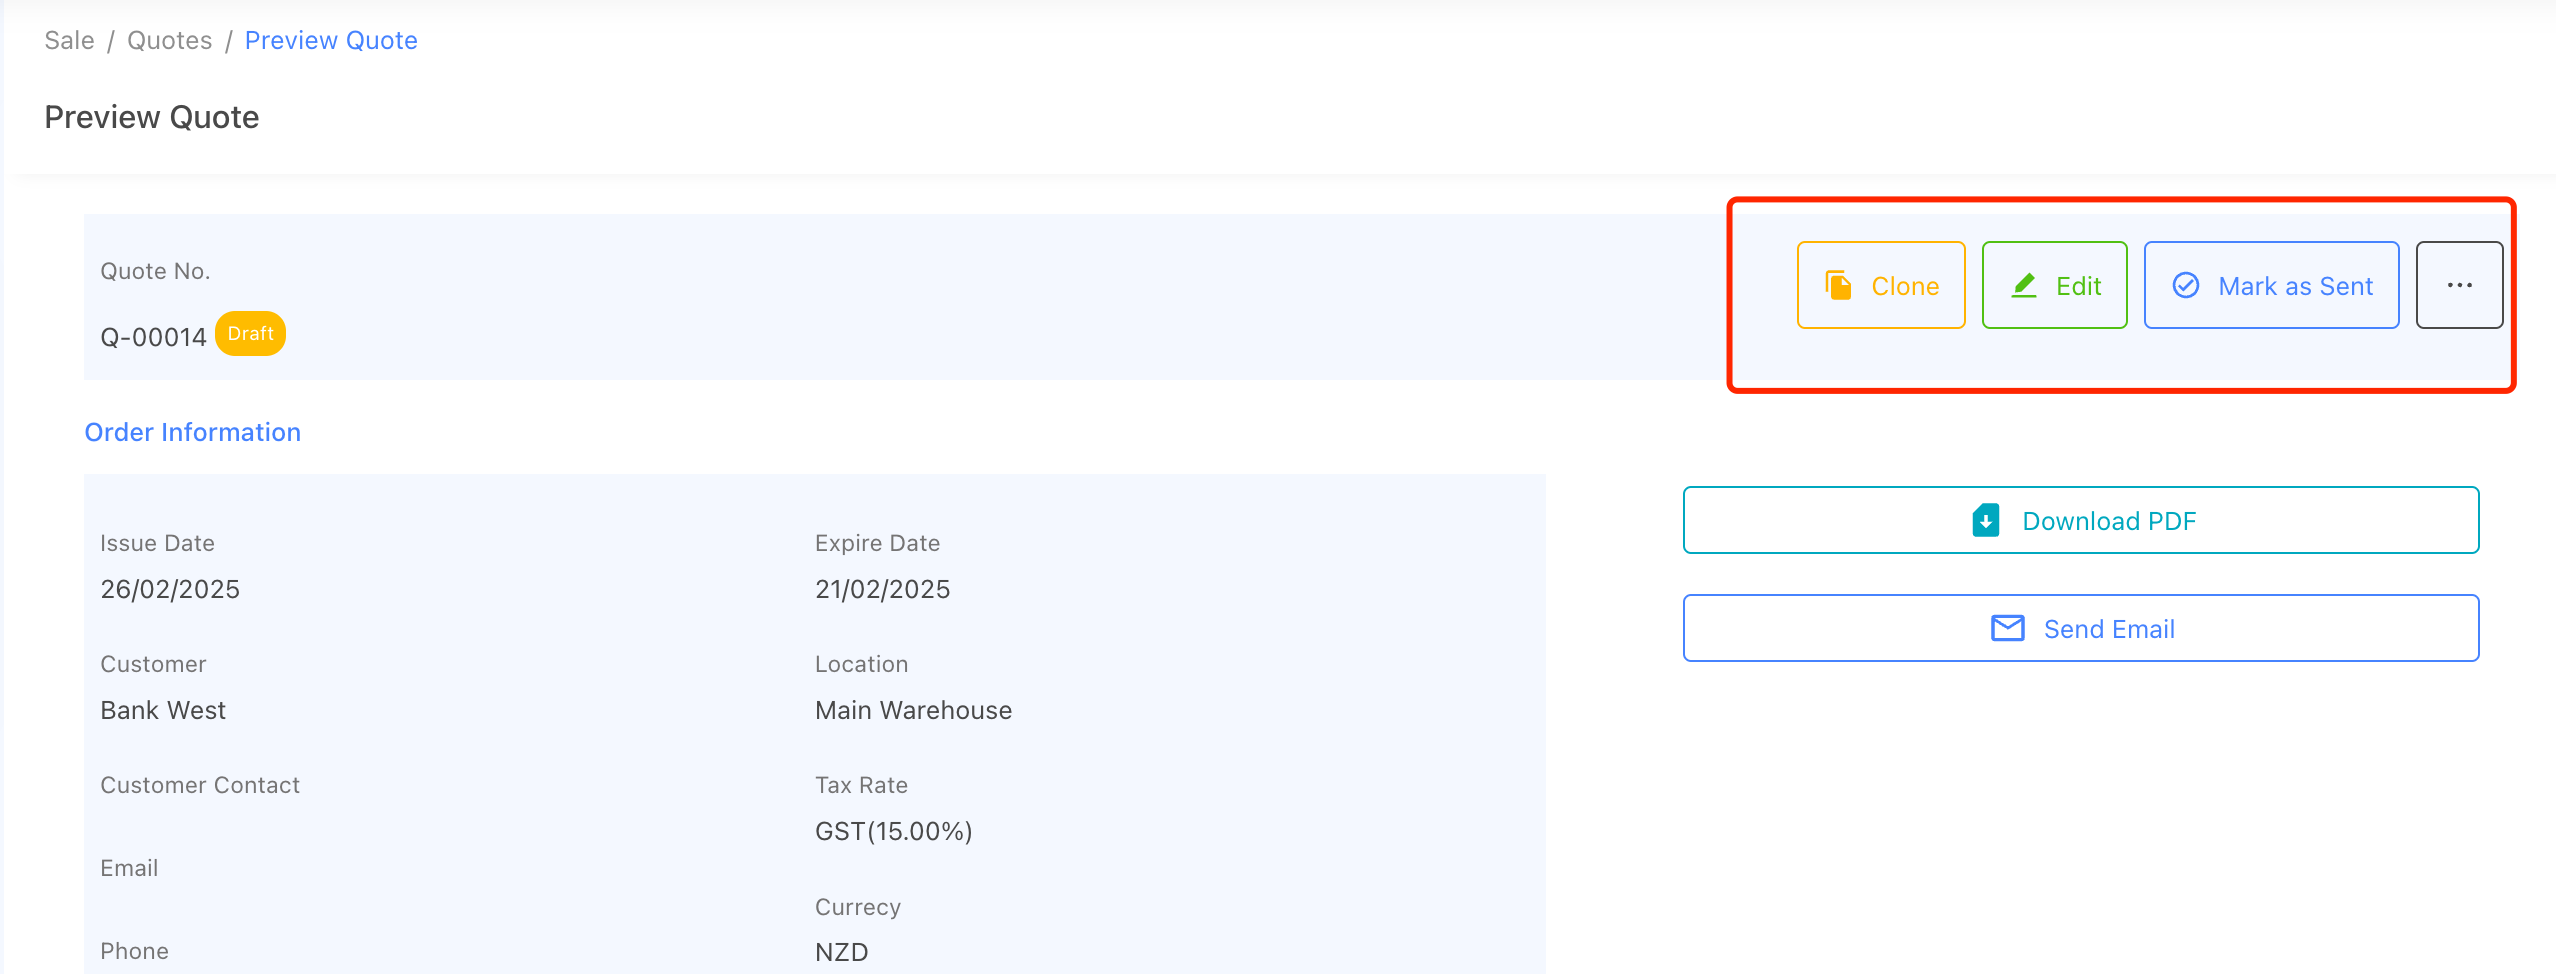
Quotes can be marked as:
- Sent – The quote has been shared with the customer.
- Accepted – The customer agrees to the quote.
- Declined – The customer rejects the quote.
Notes: You can also edit the quote in any status.
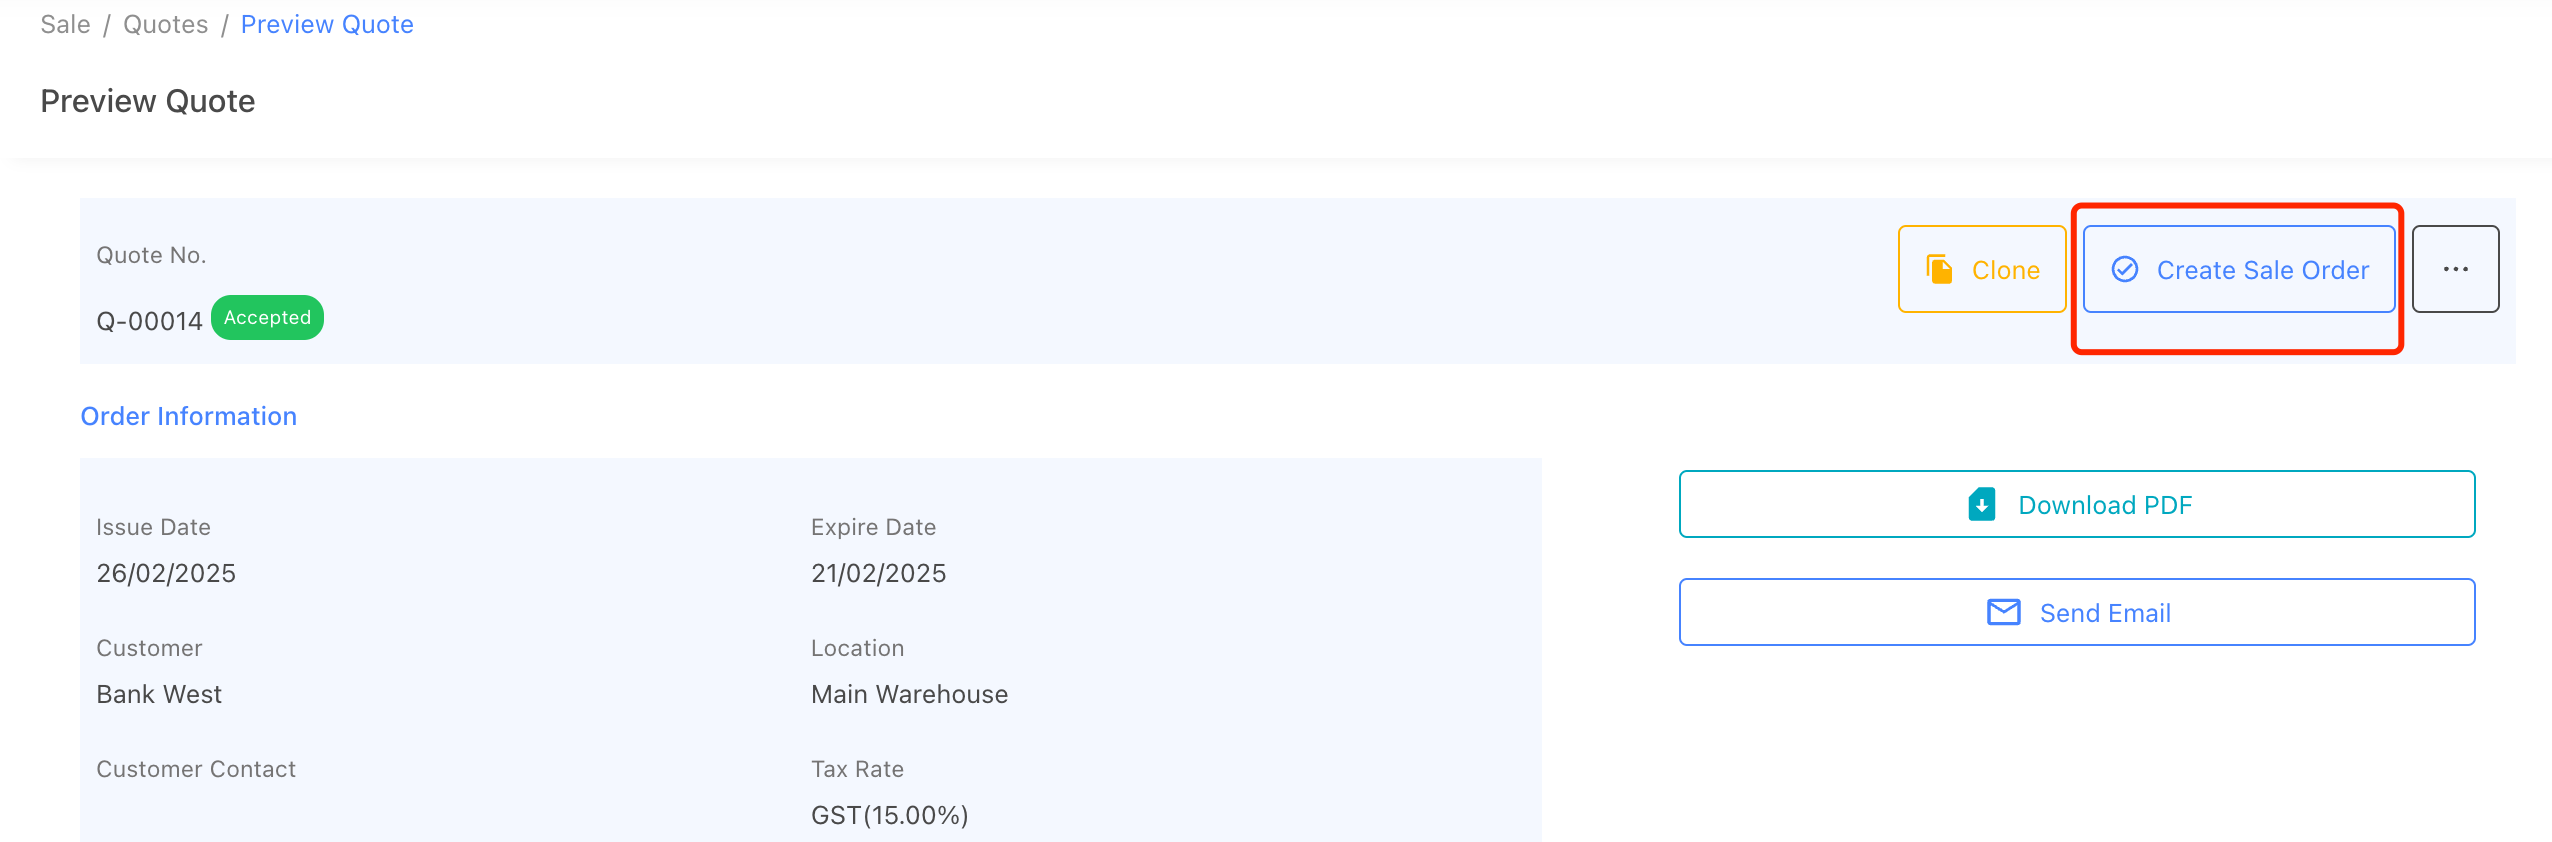
Convert a Quote to a Sales Order
Once a quote is Accepted, it can be converted into a Sales Order.
Steps to Convert a Quote to a Sales Order:
- Open the Accepted quote.
- Click the [Create Sale Order] button.
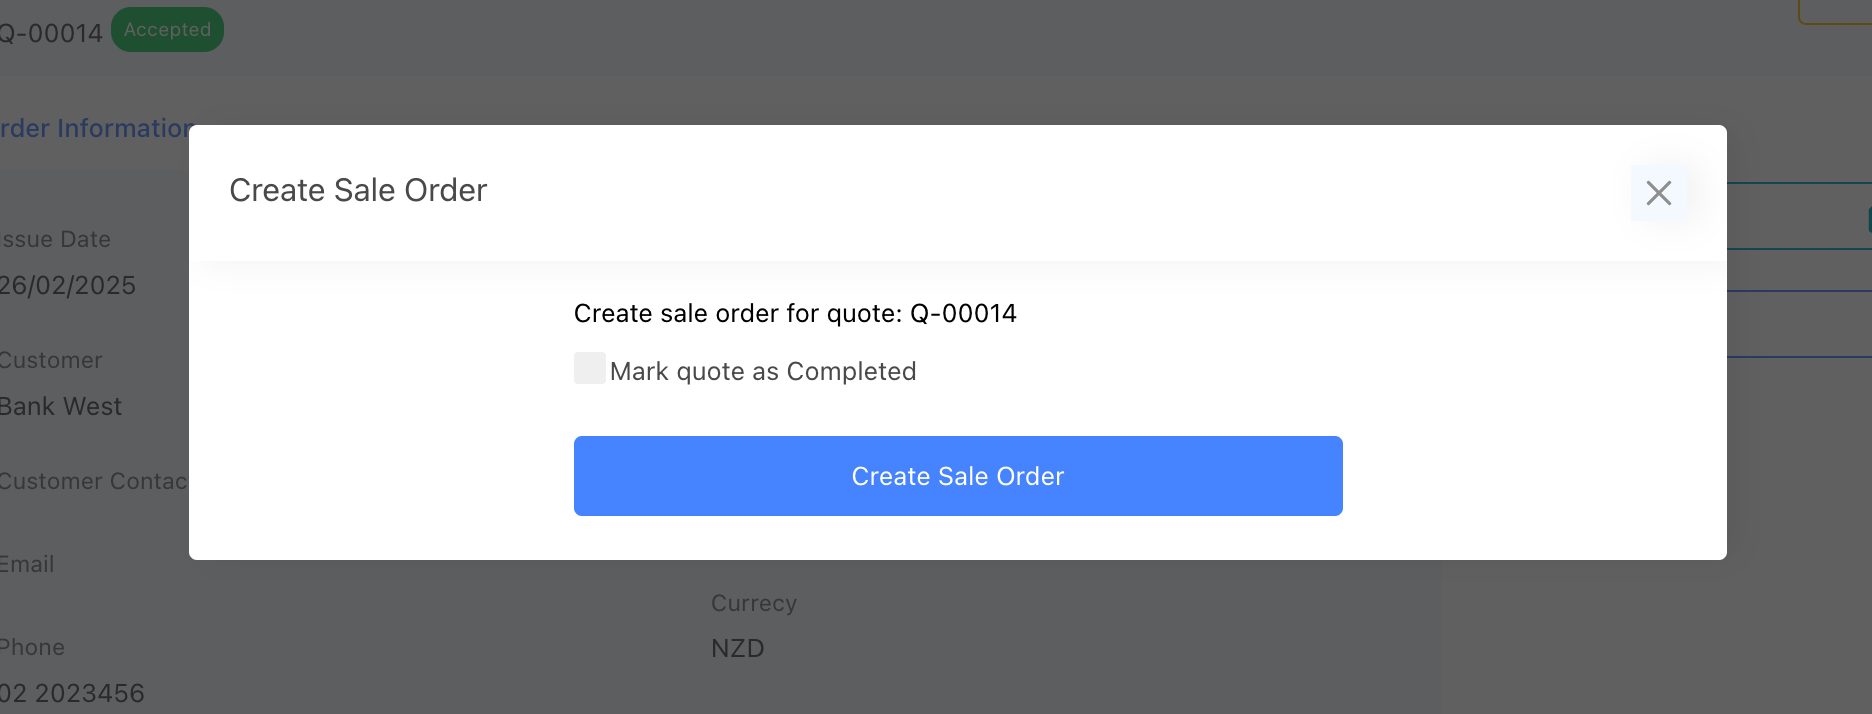
- A confirmation pop-up will appear – click [Create Sale Order].
- You will be redirected to the New Sale Order screen, where:
- The customer details and products from the quote are copied over.
- You can review or modify details before finalizing.
- Click [Save] to finalize the Sales Order.