Overview
In StockUnify, you can quickly add multiple products at once by importing them using a CSV file. This feature is especially useful when setting up your account for the first time or migrating from another system.
A CSV import can include product details such as name, Code(SKU), sales price, cost, initial stock levels, bin location, batch/serial numbers and more.
1. Download the Template
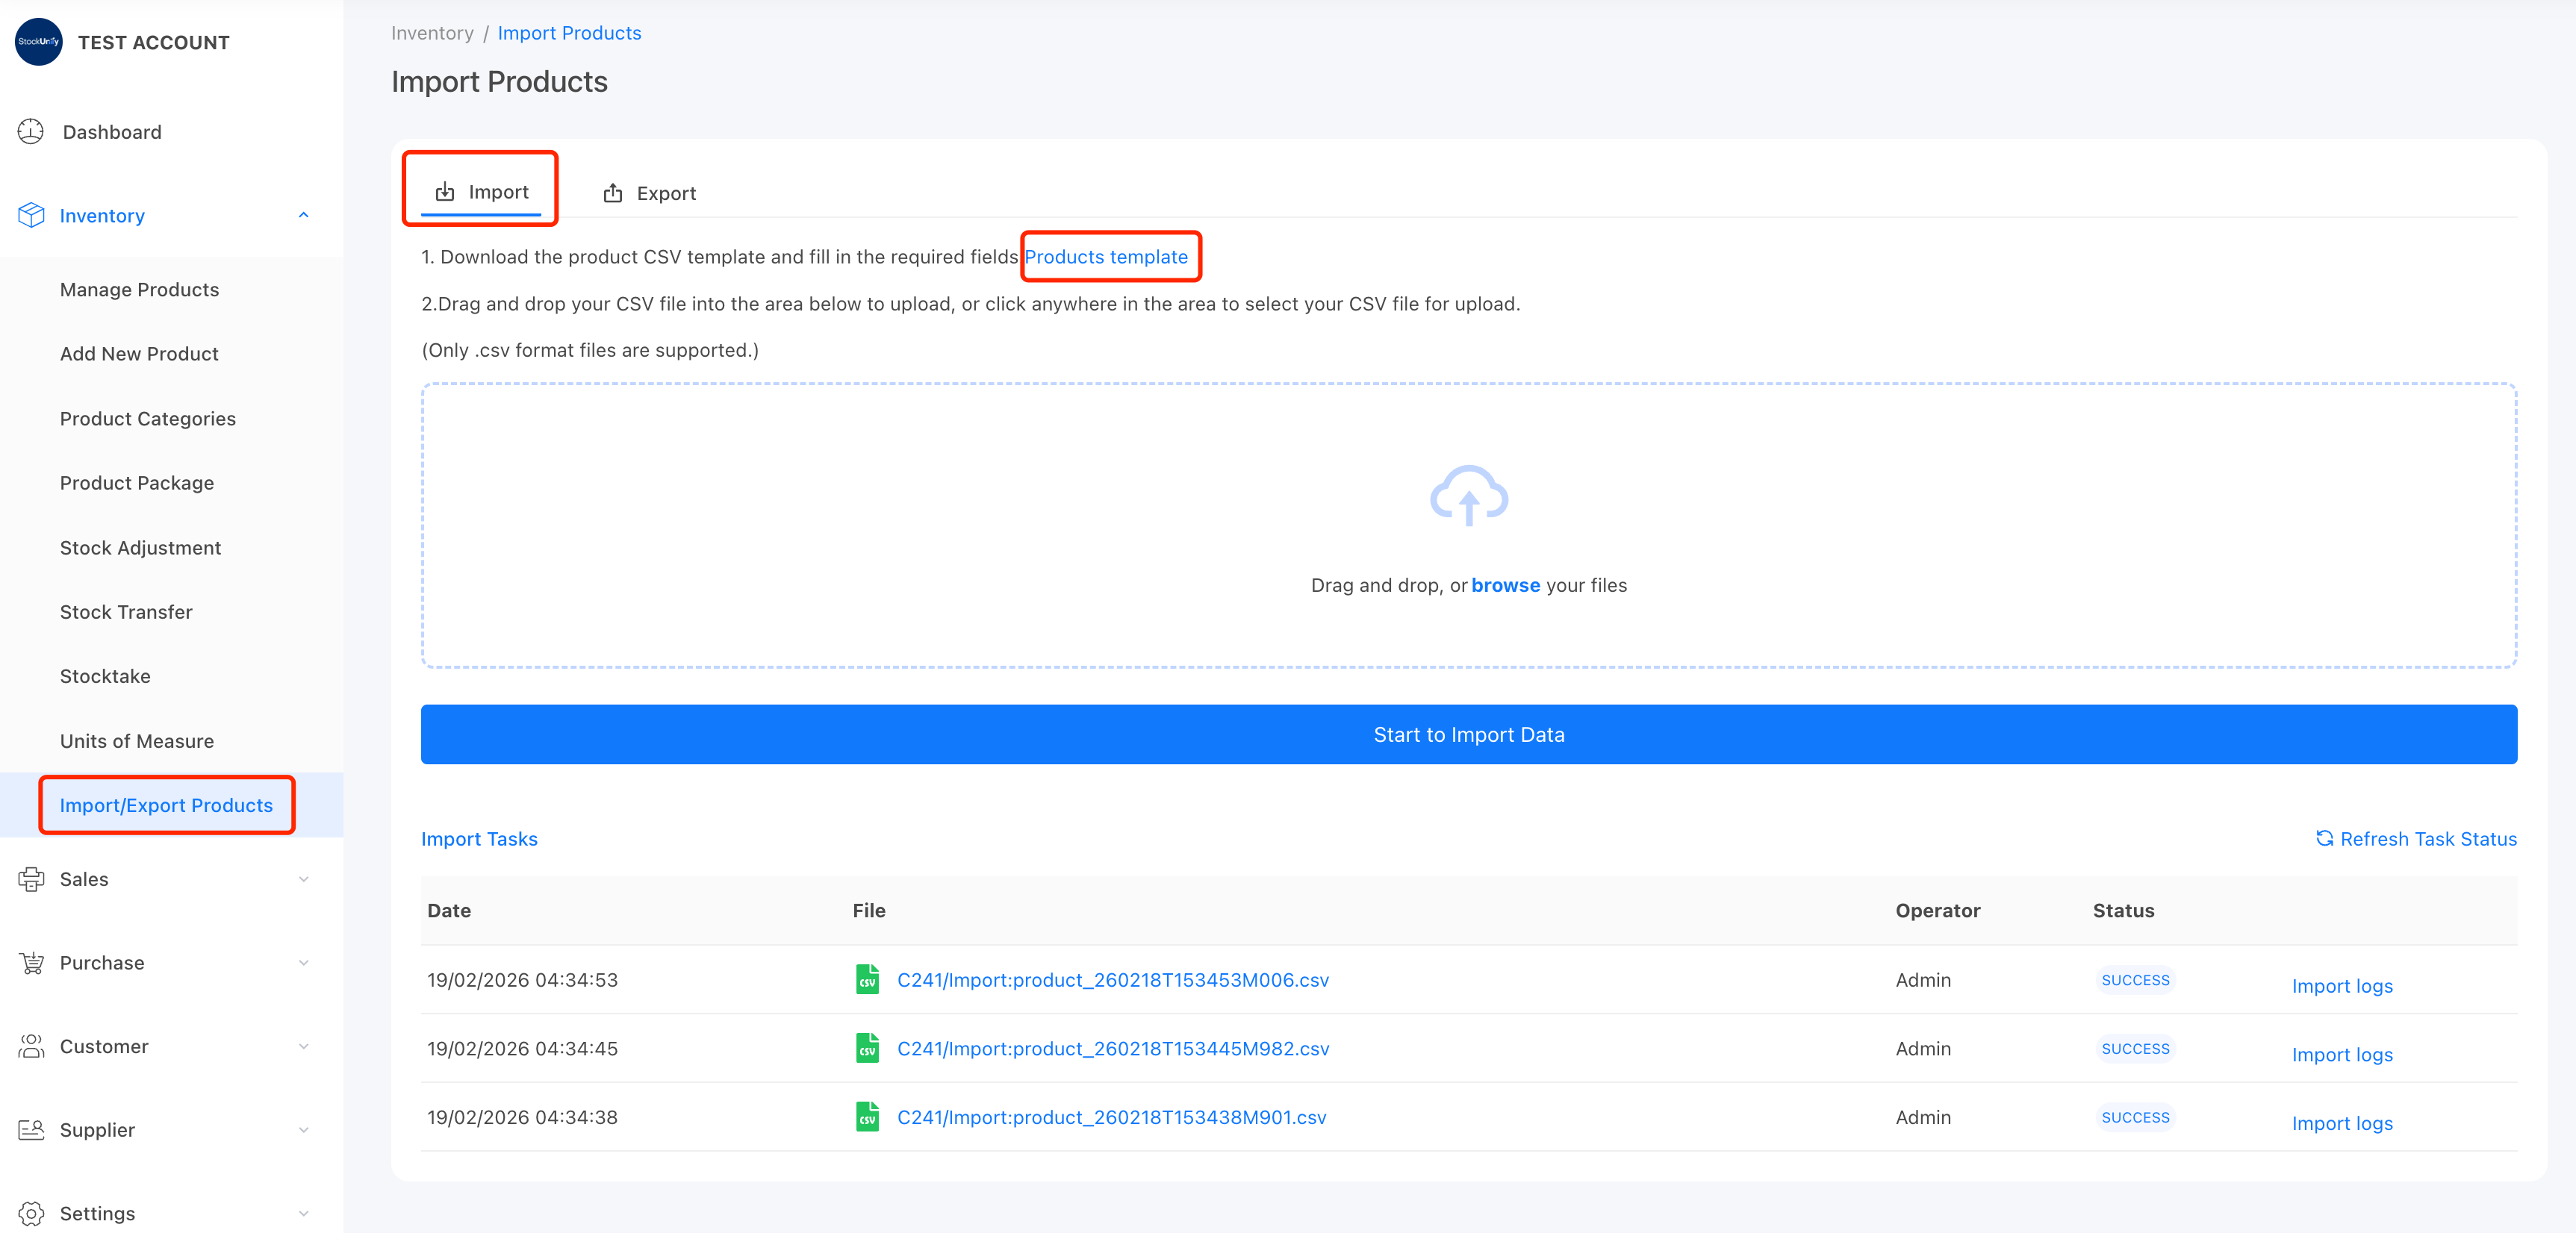
- Go to the [Inventory] → [Import/Export Products] menu.
- Click the [Import] tab → Click the [products template] button (in blue text) to download the import products template.
2. Adding products data to the template
After downloading the template, you can start to adding products to the template.

The CSV file must follow a specific structure. Each row represents one product. Below is the explanation of each column in the template:
| Column Name | Description | Maximum Length / Format | Example |
|---|---|---|---|
| Type* | Specifies whether the item is a Product (stock item) or a Service. If left blank, it will default to Product. | 8 characters | Product |
| Code | The unique Code of the product. If left blank, StockUnify will automatically generate one. | 30 characters | LED18W-WH |
| Product Name* | Required. The display name of your product. If left blank, the entire row will be ignored during import. | 256 characters | LED Ceiling Light 18W |
| Category | The category this product belongs to. If the category name does not exist, it will be created automatically. | 256 characters | Lighting |
| Unit | The unit of measure of the product. If the unit does not exist, it will be created automatically. | 45 characters | Each |
| Description | A description of the product (for internal use). | 1000 characters | LED Ceiling Light 18W with white glass cover |
| Reference | A reference field of the product. This value can appear on downloaded sales or purchase orders. | 256 characters | REF01 |
| Internal Notes | Private notes visible only to internal users. Useful for internal comments or handling instructions. | 1000 characters | Preferred vendor: BrightLED Co. |
| Supplier Name | The default supplier for this product. If the supplier name does not exist, a new supplier will be created automatically. | 256 characters | BrightLED Co. |
| Serialized (Y/N) | Defines whether the product is tracked by serial number. Enter Y for serialized items or N for non-serialized. | 1 character | Y |
| Batch-tracked (Y/N) | Defines whether the product is tracked by batch number. Enter Y for batch-tracked items or N for non-batch items. | 1 character | N |
| Xero-tracked (Y/N) | Indicates whether this product is marked as an Inventory Tracked Item in your Xero account. Enter Y or N. | 1 character | Y |
| Xero Sales Account | The Xero sales account of the product, the account code must exist in your Xero system. | ||
| Xero Inventory Account | The Xero inventory account of the product, the account code must exist in your Xero system. If Xero-tracked is set to Y, this field is required. | ||
| Xero COGS Account | The Xero COGS account of the product, the account code must exist in your Xero system. If Xero-tracked is set to Y, this field is required. | ||
| Xero Purchase Account | The Xero purchase account of the product, the account code must exist in your Xero system. | ||
| Barcode | The barcode of the product. You can later scan this barcode to add the product to orders using a barcode scanner. | Up to 64 digits | 9388239293 |
| Sale Price | The selling price per unit. Must be a numeric value with up to two decimal places. | Number (0.00 format) | 23.22 |
| Re-order Level | The re-order point of the product, when stock falls below this level, an alert will be sent. | Number (0.00 format) | 200 |
| Location | The warehouse or branch name where you want to assign the initial stock. | 45 characters | Auckland Warehouse |
| Bin Name | The specific bin or shelf within the location for the initial stock. Only used if Bin Tracking is enabled. | 128 characters | Rack A1-03 |
| Stock On Hand | The initial stock level for the product. | Number | 200 |
| Unit Cost | The purchase cost per unit. Used for calculating cost of goods sold (COGS) and the total stock on hand value. | Number (0.00 format) | 18.21 |
| Batch/Serial Number | The batch number or serial number associated with the initial stock level being imported. | 256 characters | SN-2024-001 |
| Expire Date (dd/mm/yyyy) | The expiry date for the batch tracked item. Only dd/mm/yyyy format is accepted. | Date format | 03/03/2028 |
3. Upload the CSV file
Once you complete fill the template, Go to the [Inventory] → [Import/Export Products] menu. Click the [Import] tab, then click the browse button to add the file to the upload field.
Click [Start to Import Data] to create an import task.
Once the new task is created successfully, you can check the import status from the tasks table. It usually take 1-3 minutes to complete.
If the task fails, you will see an error message indicating the cause of the error.
If you see a "SUCCESS" status, it means all the data has been imported successfully.
4. Tips for Preparing the CSV File
- If you are importing a large number of products, it is recommended to import them in smaller batches. We suggest importing a maximum of 1,000 products per batch for best performance.
- The file must be in CSV format. Other file types such as Excel (.xlsx) are not supported.
- The Product Name field is required. Any row without a product name will be skipped.
- If you want to assign initial stock to multiple locations, you can duplicate the same product row and update the Location name for each entry.
- If you include a new location name in the file that does not exist in the system, StockUnify will automatically create it. To keep your data clean, try to use existing location names whenever possible.
- Ensure that all text fields are properly formatted and that numeric fields (like price, cost, or quantity) do not include symbols such as "$" or commas.
- Save your file in UTF-8 encoding to prevent special character errors during import.