Overview
This guide shows you how to create a new product in StockUnify. You will learn which fields are required, how to set up serial or batch tracking, and how to connect the product to Xero.
Quick Start
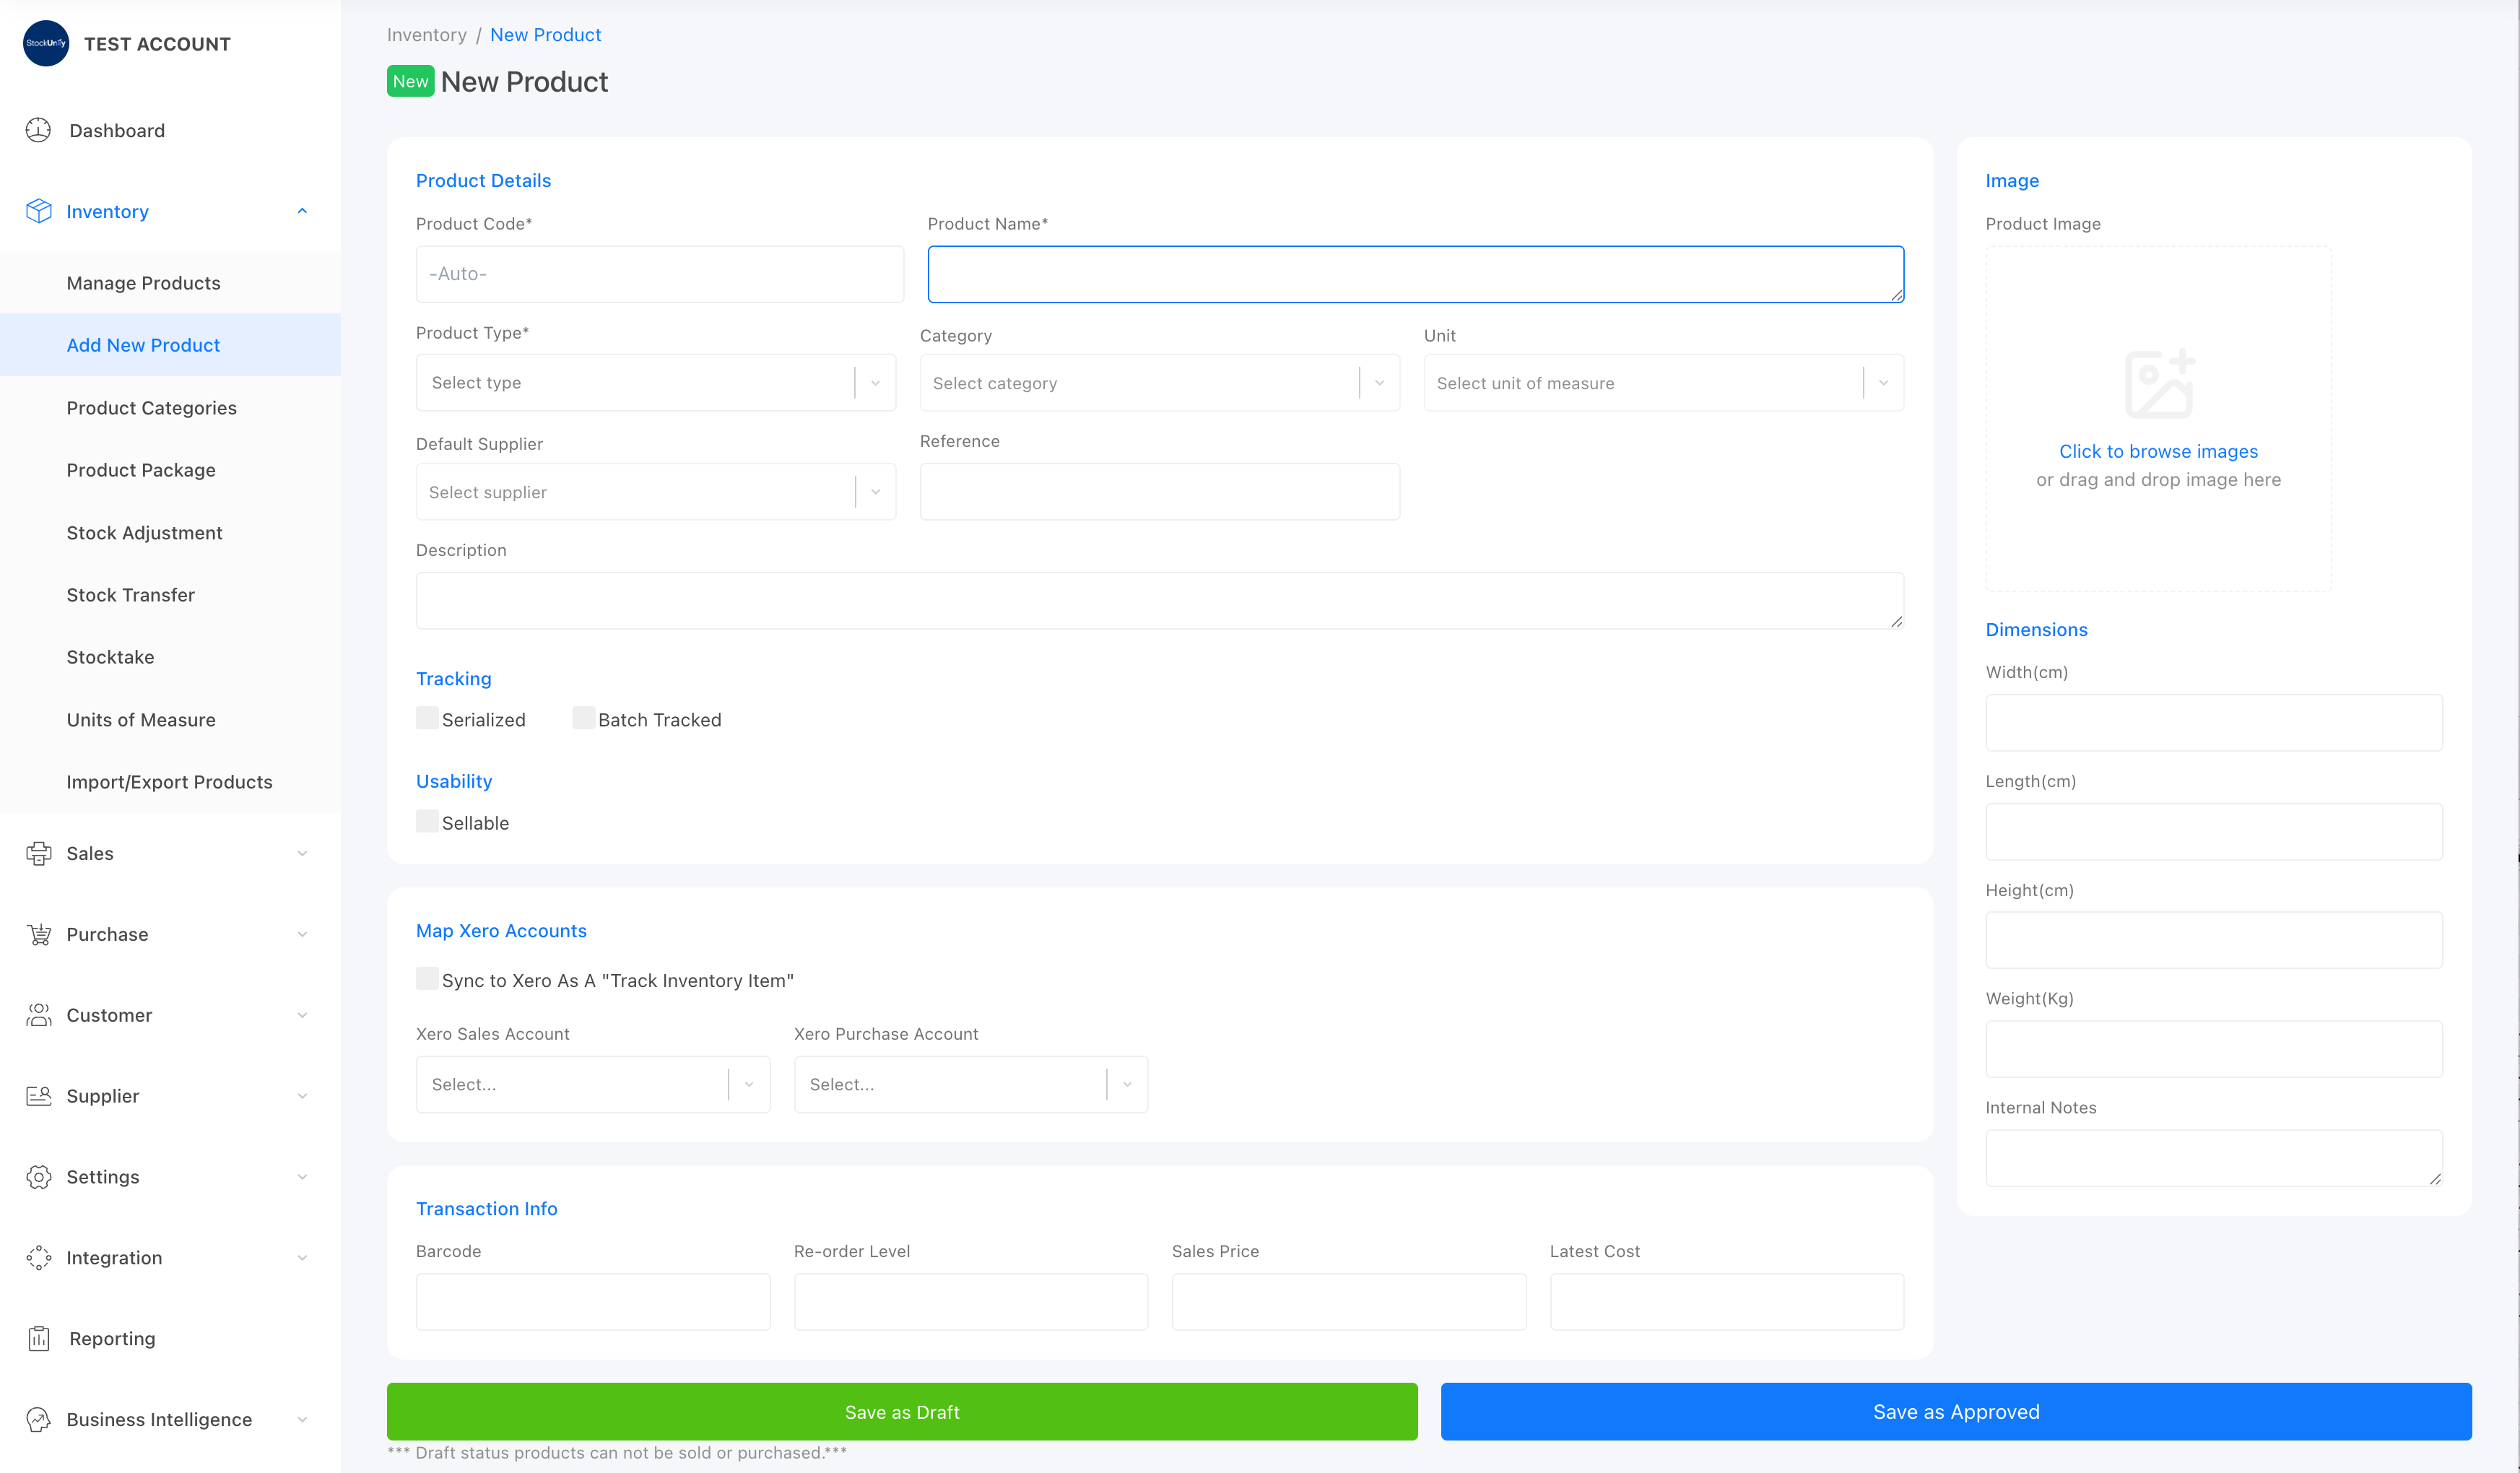
Only three fields are required to create a product. If you just want to get started quickly:
- Go to [Inventory] → [Add New Product].
- Enter a Product Name and choose a Product Type (Product or Service). You can leave Product Code blank — StockUnify will generate one for you automatically.
- Click Save as Approved.
You can come back and fill in the other details (pricing, barcode, tracking options) at any time. The sections below explain each group of settings.
Sync with Xero
When a new product is created or product details is updated in Xero, the product details will sync to Xero
Step 1: Fill in the Basic Details
Fields marked with * are required.
Product Code*: The unique identifier of the product. It must be unique in your account. If you leave it blank, StockUnify will generate a random code when you save.
Product Name*: The name of your product (up to 256 characters).
Product Type*: Choose Product for physical items you keep in stock, or Service for non-stock items such as labour or installation fees.
Category: The category this product belongs to. Categories help you filter and organise your product list.
Unit: The unit of measurement, e.g. each, box, metre.
Default Supplier: The supplier you usually purchase this product from. It is used to group products in the re-order cart.
Reference: An extra reference for this product, usually the supplier's own product code. This value can be printed on downloaded PDFs.
Description: An internal description. It is not shown to your customers.
Image: A photo of your product.
Dimensions: The physical dimensions of the product.
Step 2: Set Up Tracking and Sellability (Optional)
Serialized: Each individual unit has its own unique serial number (e.g. electronics, equipment). When you receive stock, StockUnify will ask you to enter a serial number for each unit; when you sell, it will ask you to select which serial numbers are being sold.
Batch Tracked: Items are tracked in groups that share a batch number (e.g. materials, chemicals, items with expiry dates). When you receive stock, StockUnify will ask you to enter batch numbers; when you sell, it will ask you to select which batch the items come from.
Sellable: Turn this off for items you never sell directly (e.g. internal consumables or raw materials). Non-sellable products cannot be added to sale orders and will not sync to connected apps.
Step 3: Set Up Xero Accounts
Sync to Xero as a "Tracked Inventory Item": Choose whether Xero should also track the stock level of this product. About tracked inventory in Xero
Map Xero Accounts: Select the sales and purchase accounts for this product. If you leave this blank, the default Xero accounts from your settings will be used.
Step 4: Set Up Transaction Details
Barcode: The barcode of the product. If you add a barcode, you can later add the product to sale and purchase orders simply by scanning it. For more details, see How barcodes work in StockUnify.
Reorder Level: When the stock level falls below this quantity, the product appears on the Stock Alert report, so you know it is time to re-order.
Sale Price: The default sale price of this product. You can follow your own convention and enter either a tax-inclusive or tax-exclusive price.
Latest Cost: The latest purchase cost, excluding tax. Keeping this up to date gives you a more accurate margin calculation when the product is sold.
Step 5: Save
Click Save as Approved. Your product is now ready to use — you can receive stock for it, add it to sale orders, or scan its barcode.