Performing a stocktake in StockUnify ensures that your recorded inventory matches the actual stock on hand. This guide outlines the complete process of initiating, conducting, and finalizing a stocktake, helping you identify and correct discrepancies efficiently.
Create a Stocktake
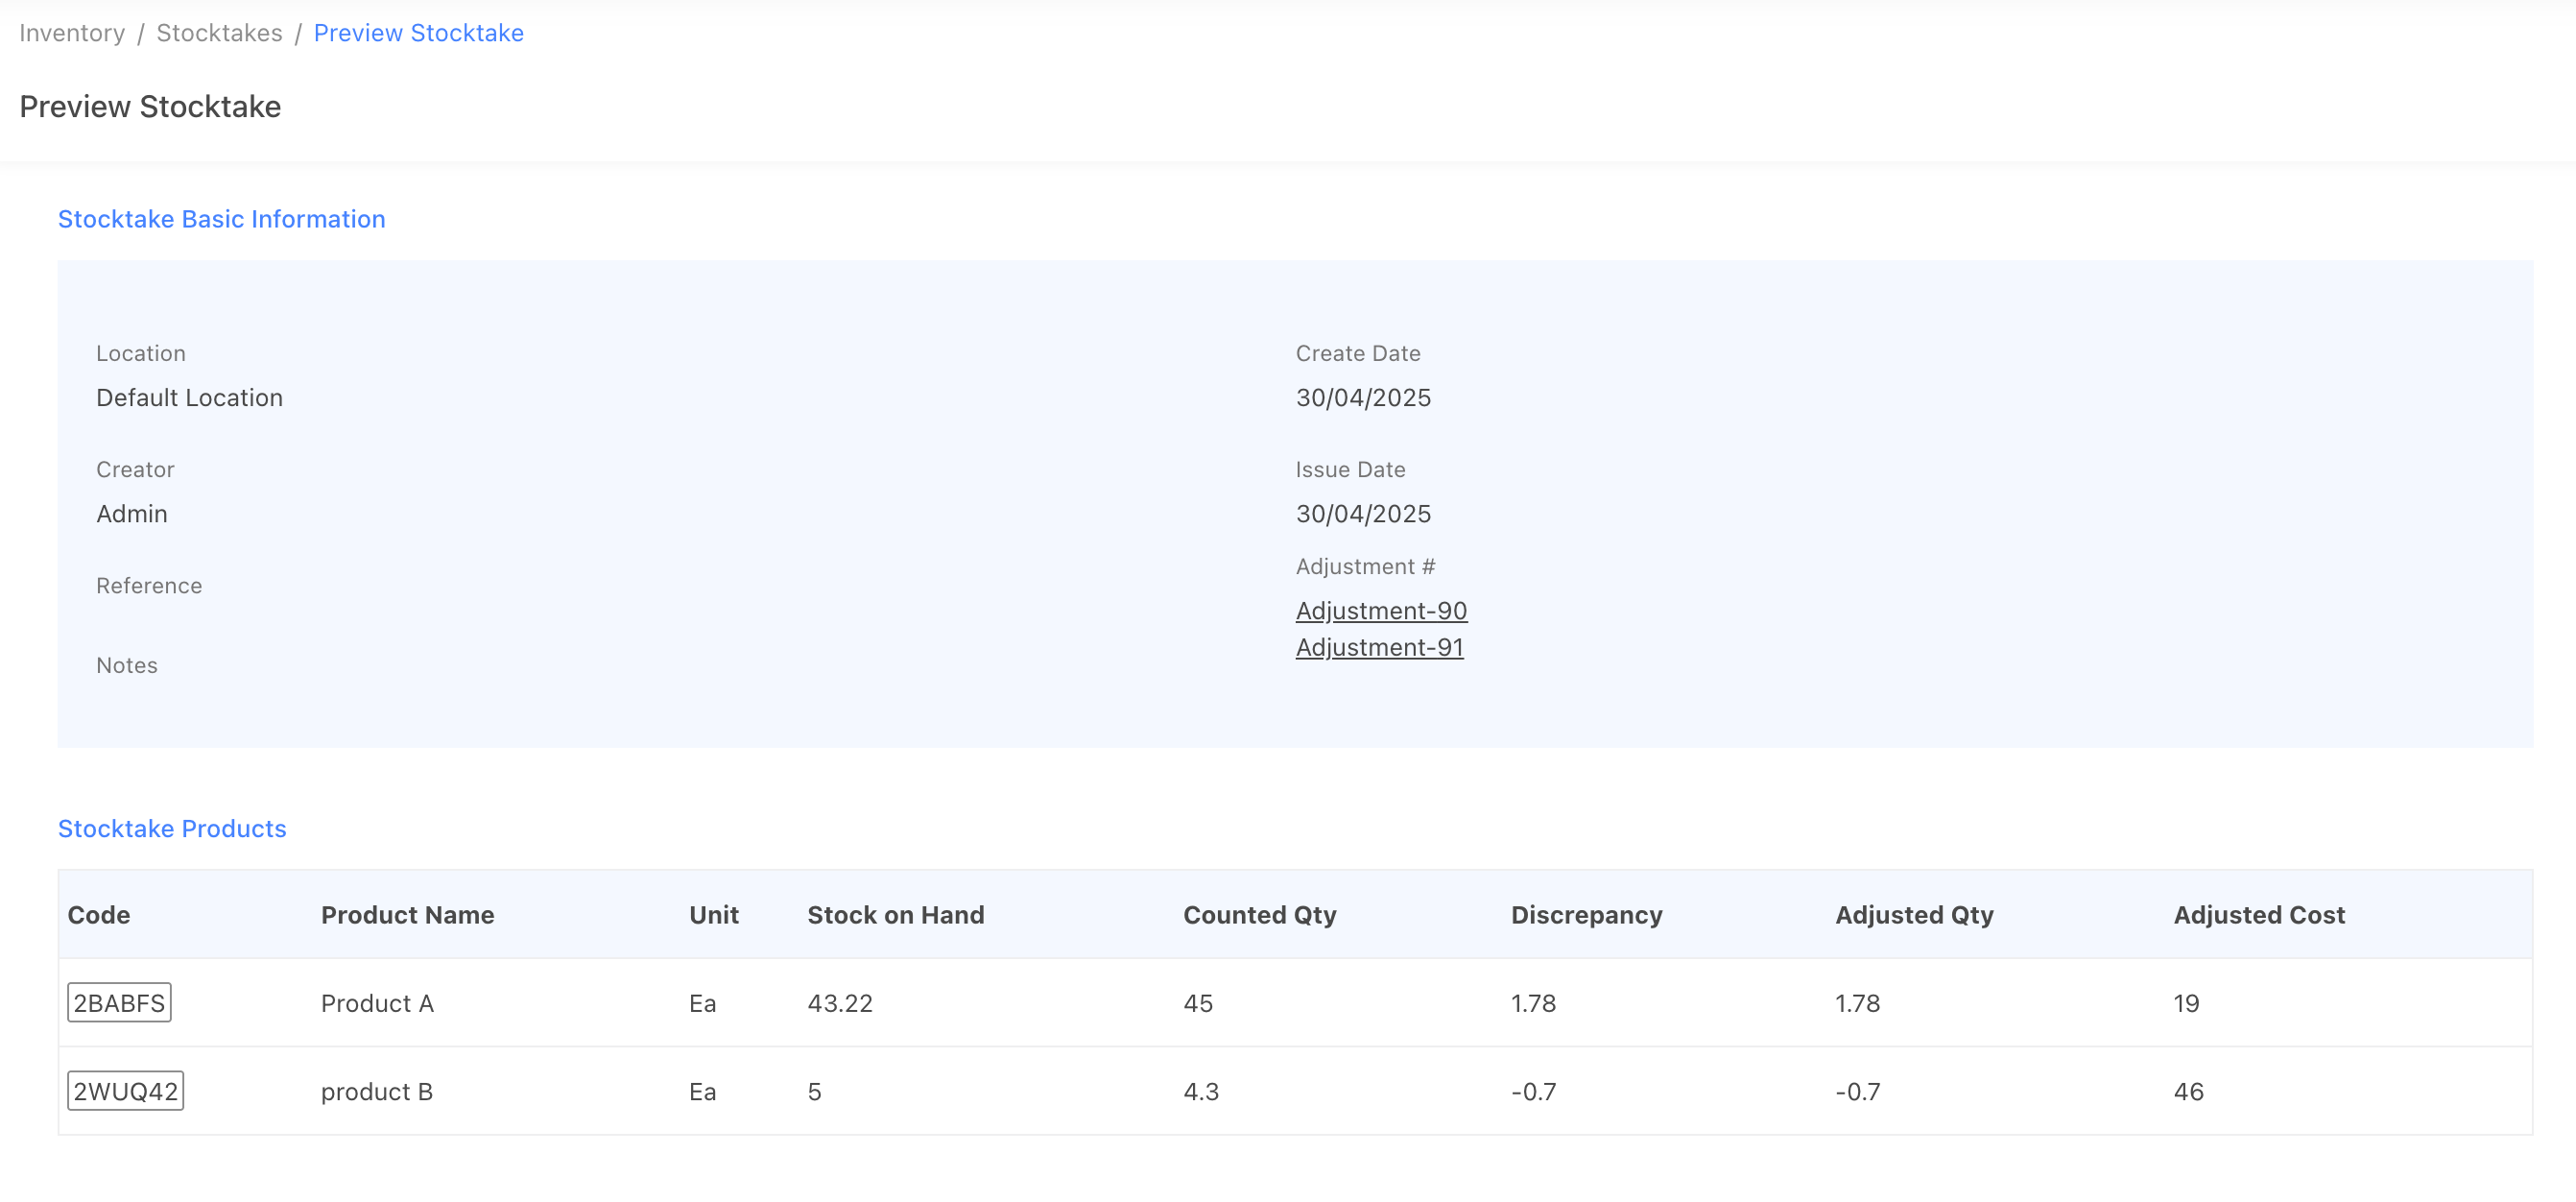
To begin, navigate to the Inventory → Stocktakes screen and click the New Stocktake button to create a new stocktake order. You can add products to this order by searching for them manually or scanning their barcodes.

If your product catalog is relatively small, it’s often easiest to search and add products directly. Once you enter the counted quantity, StockUnify will automatically calculate the discrepancy based on current stock levels.
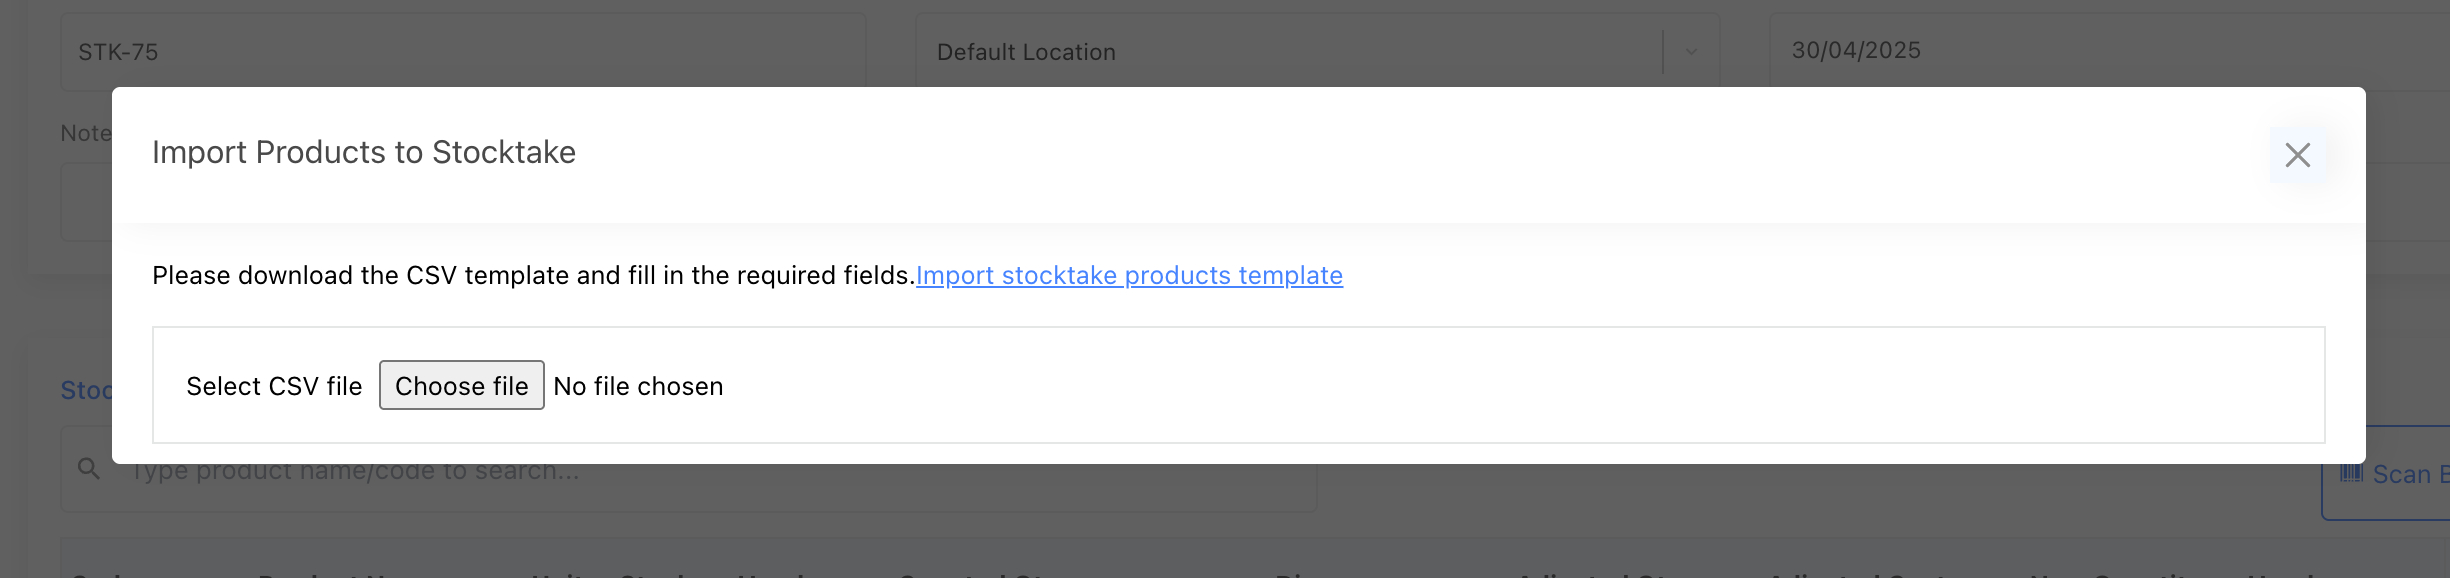
For businesses managing a large product database, we recommend using the Import Products by CSV feature to speed up the process.
Prepare the Stocktake Report
Go to the Reporting → Stocktake Report page to download a product list that includes current stock on hand. You can filter the report by location or product category to narrow your focus. As each stocktake is associated with one location, you will need to perform separate stocktakes for each location.
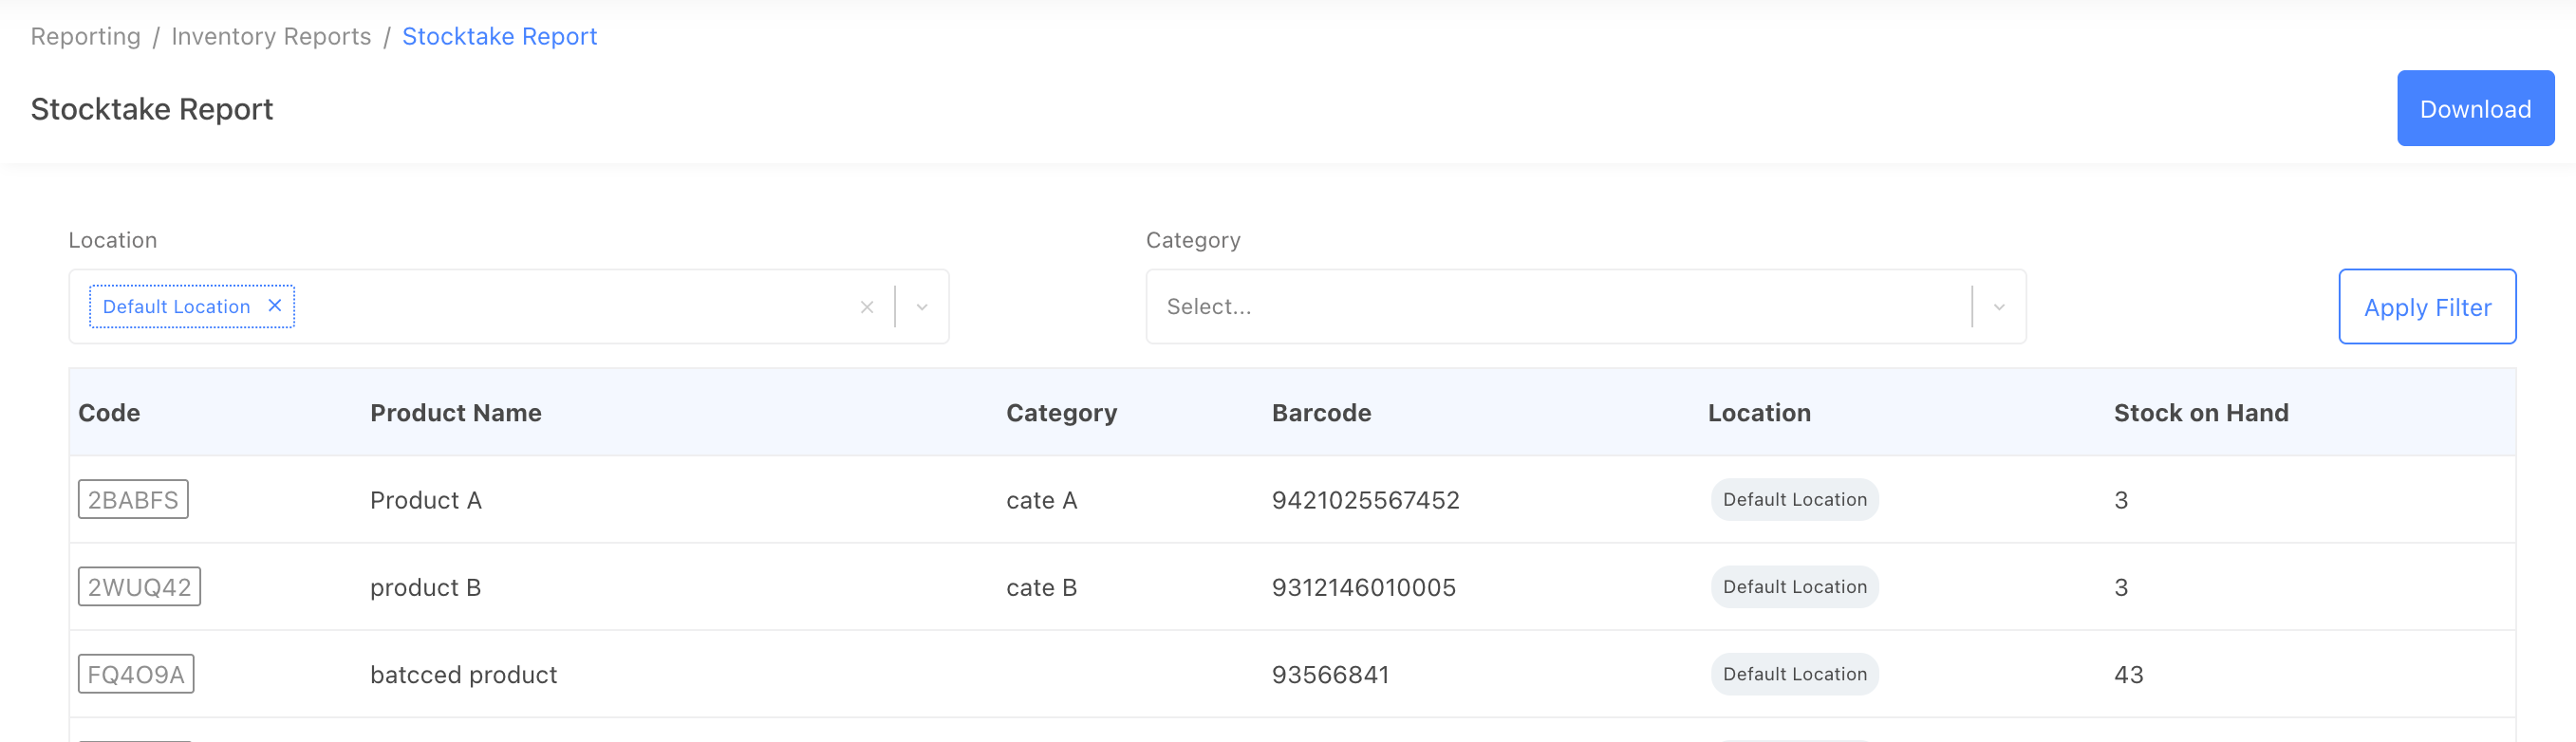
Since StockUnify does not lock stock quantities during the stocktake process, we recommend temporarily pausing relevant business operations to prevent stock changes while counting is underway.
Begin Counting Stock
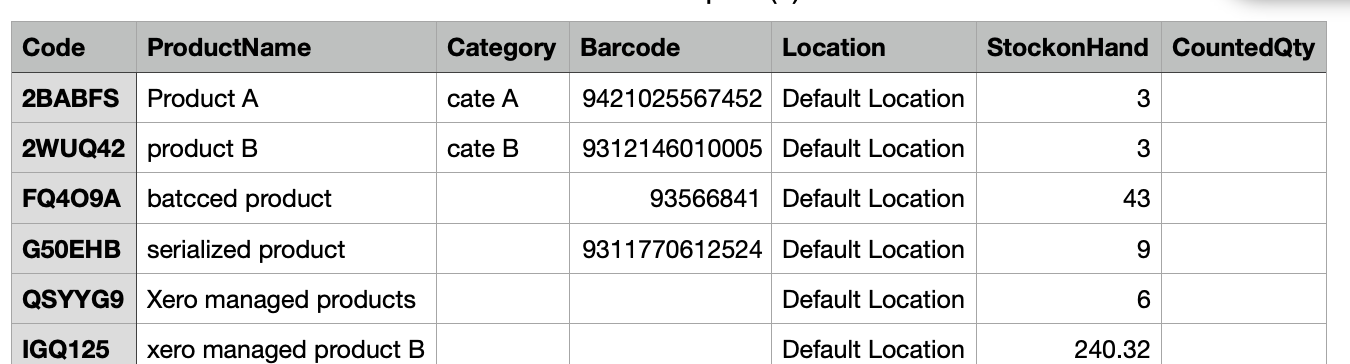
Physically count your items and record the quantities in the CountedQty column of the CSV report. After all items have been counted, upload the completed file back to the stocktake order you previously created.
Upon upload, the system will automatically calculate the discrepancy for each item. Rows with a blank or negative counted quantity will be ignored.
Complete the Stocktake
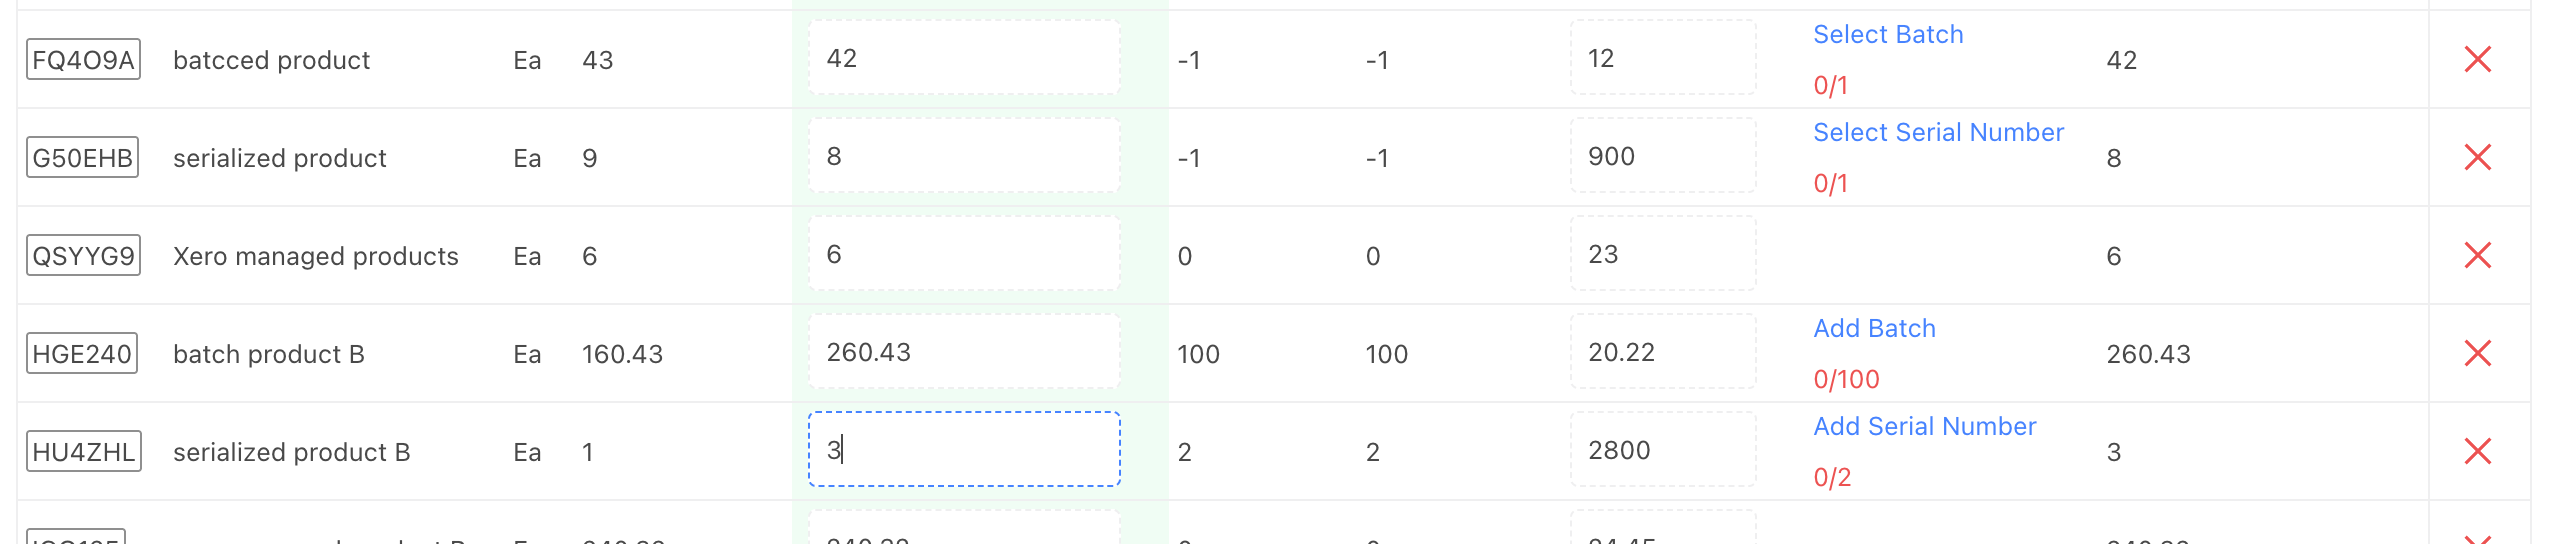
Once you have reviewed all counted quantities and confirmed their accuracy, proceed to save the stocktake as Approved.
If any products are batch-tracked or serialized, the system will prompt you to either input the batch/serial numbers for received stock, or select the batches/serials to deduct from existing stock.
When the stocktake is approved, StockUnify will automatically generate two stock adjustment orders: one for Receive Stock and another for Deduct Stock. These orders will appear in the stock adjustment list with the stocktake number used as their reference.
Links to the generated stock adjustment orders will also be available on the stocktake details page for easy access.
If the stock adjustment orders include Xero-managed products, you will have the option to synchronize those adjustments with your Xero account.
