When you complete adding a new product to the system, you can add an initial stock level to this product by making a stock adjustment order.
1.Create a new stock adjustment order
Navigate to the [Inventory] -> [Stock Adjustment] menu; then, you will see the stock adjustment screen which displays a list of all historical adjustment records.
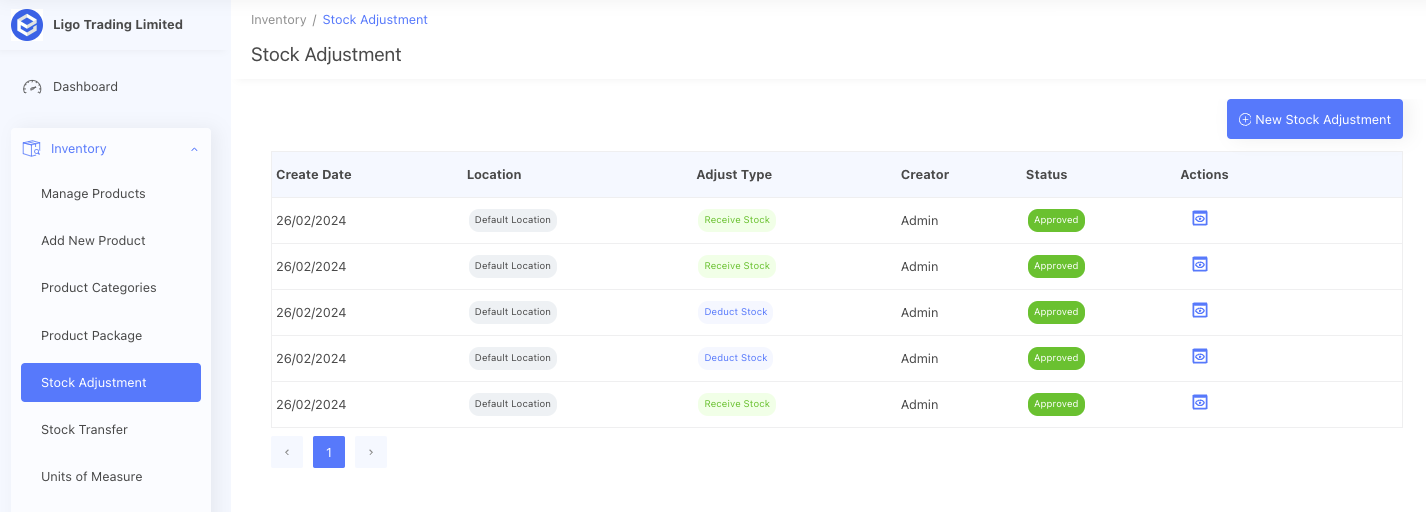
Click the [New Stock Adjustment] button to navigate to the new stock adjustment screen.
Firstly, select a Location for this adjustment.
Secondly, select the Adjust Type for this adjustment order, for the initial stock level, it should be "Receive Stock".
You also can select a project for the stock adjustment order if you need to track stock level by project.

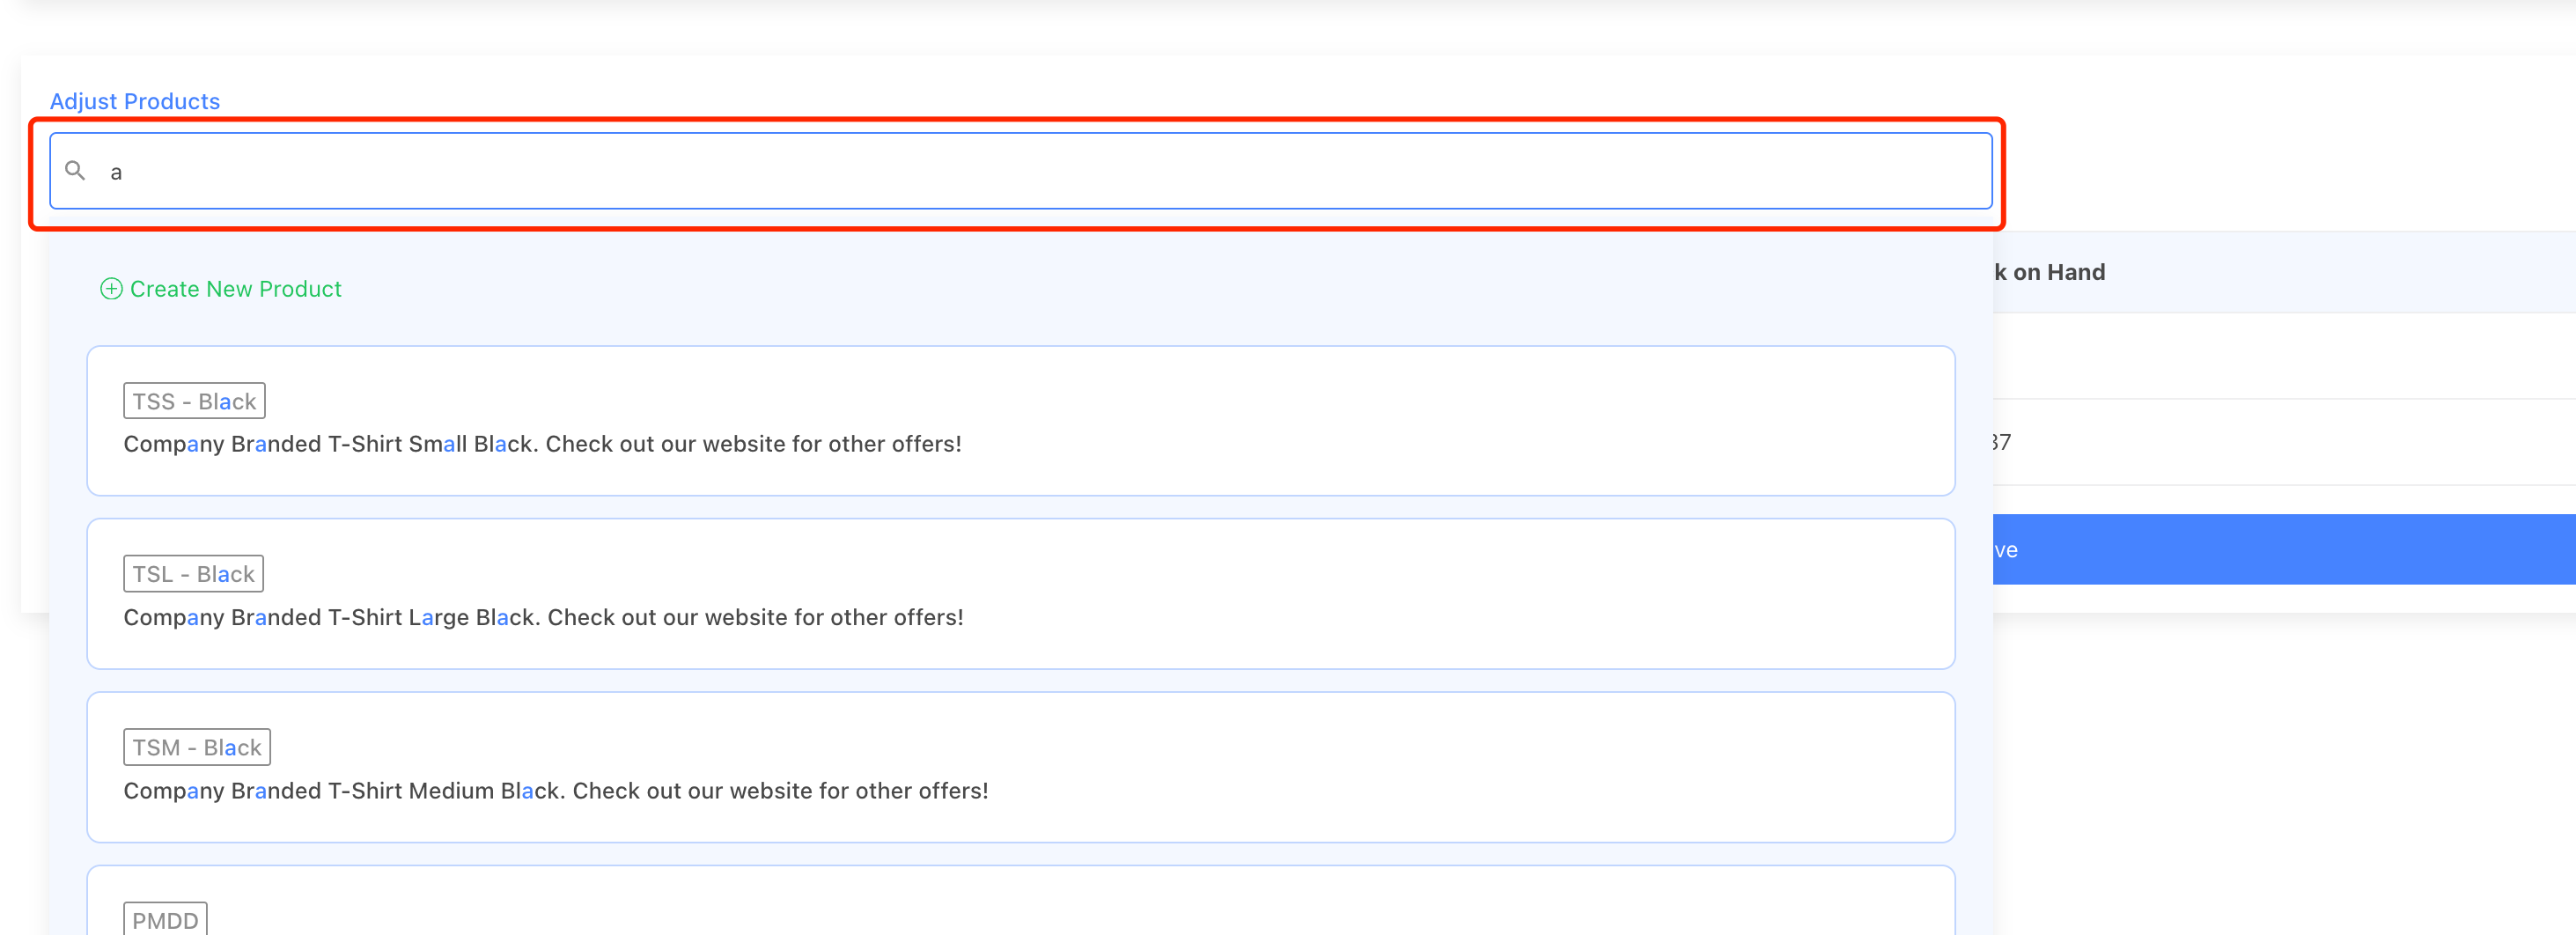
Next, use the search field to add products to this stock adjustment order.
Next, fill in the adjusted quantity and adjust the cost fields. Adjust cost is optional, it will bring up the latest cost of the product. Entering an accurate cost will give you a more accurate order margin calculation when this product is sold.

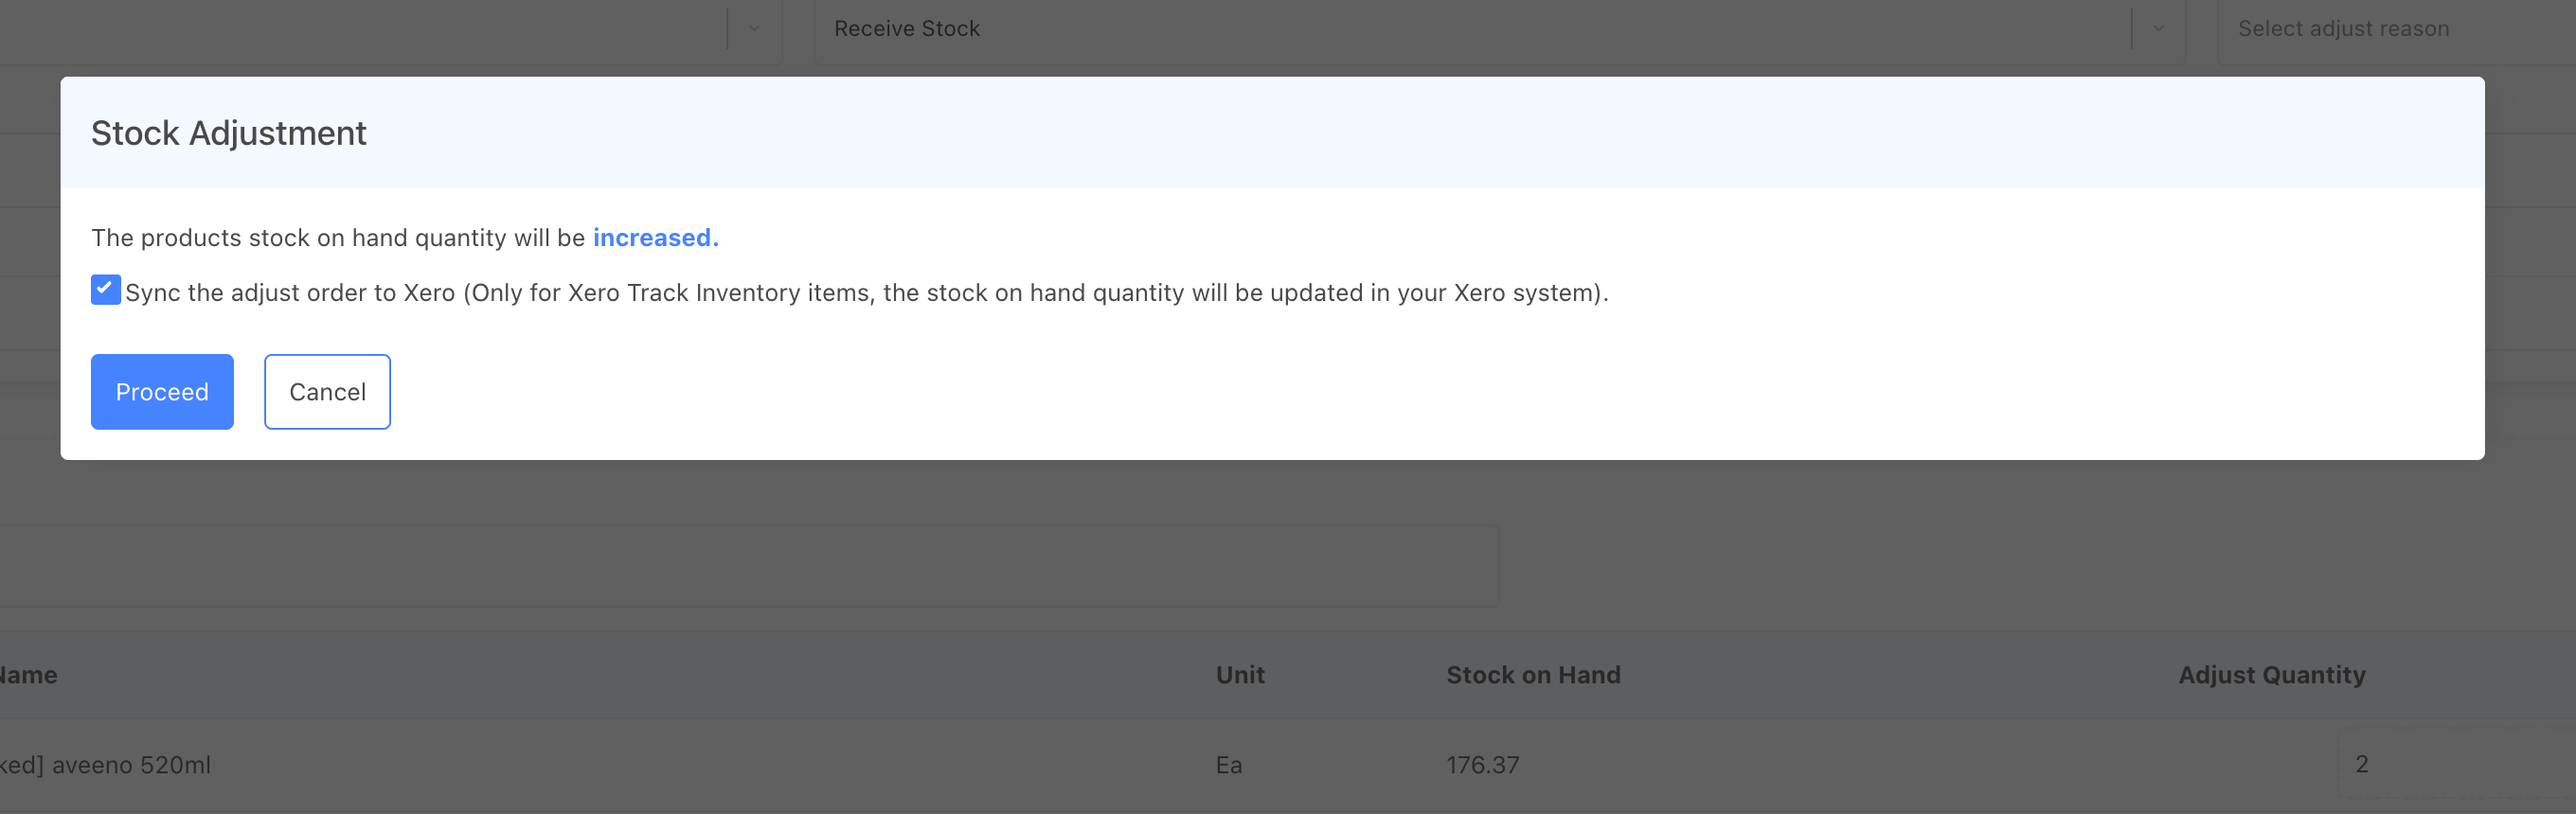
Finally, click the [Save] button, if your system is connected to Xero, you can choose to send this adjustment order to Xero. (Notes: This option will only be available when the adjusted products contain Xero Tracked Products)
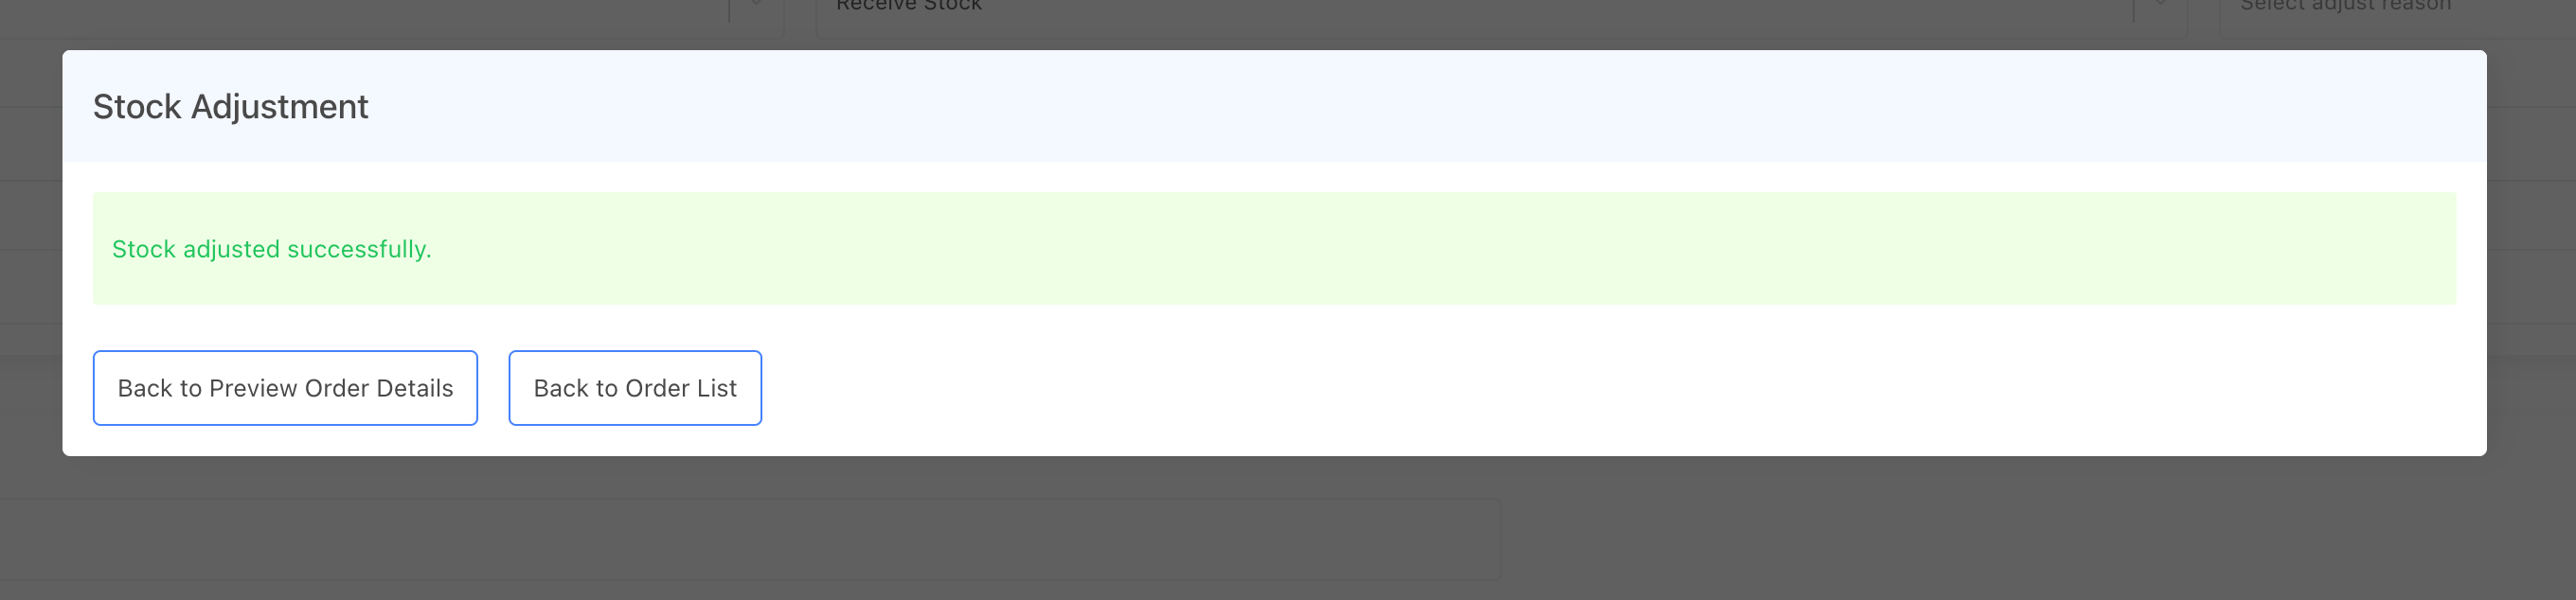
After saving, a success message will confirm that the stock levels have been updated.
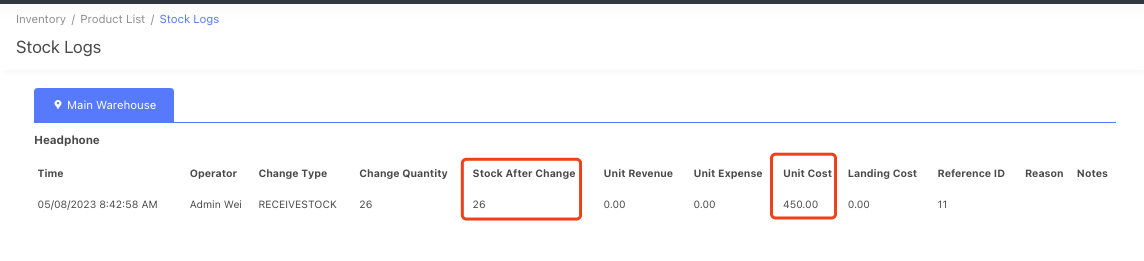
Review the stock level
Navigate to the Stock Logs page to review the stock level changes.

Now you have successfully initialized the stock on-hand quantity for your products. When creating a new sales order for these products, the system will display the updated stock on-hand quantity.
